Both Are “Compression Stockings” — But They Solve Different Problems
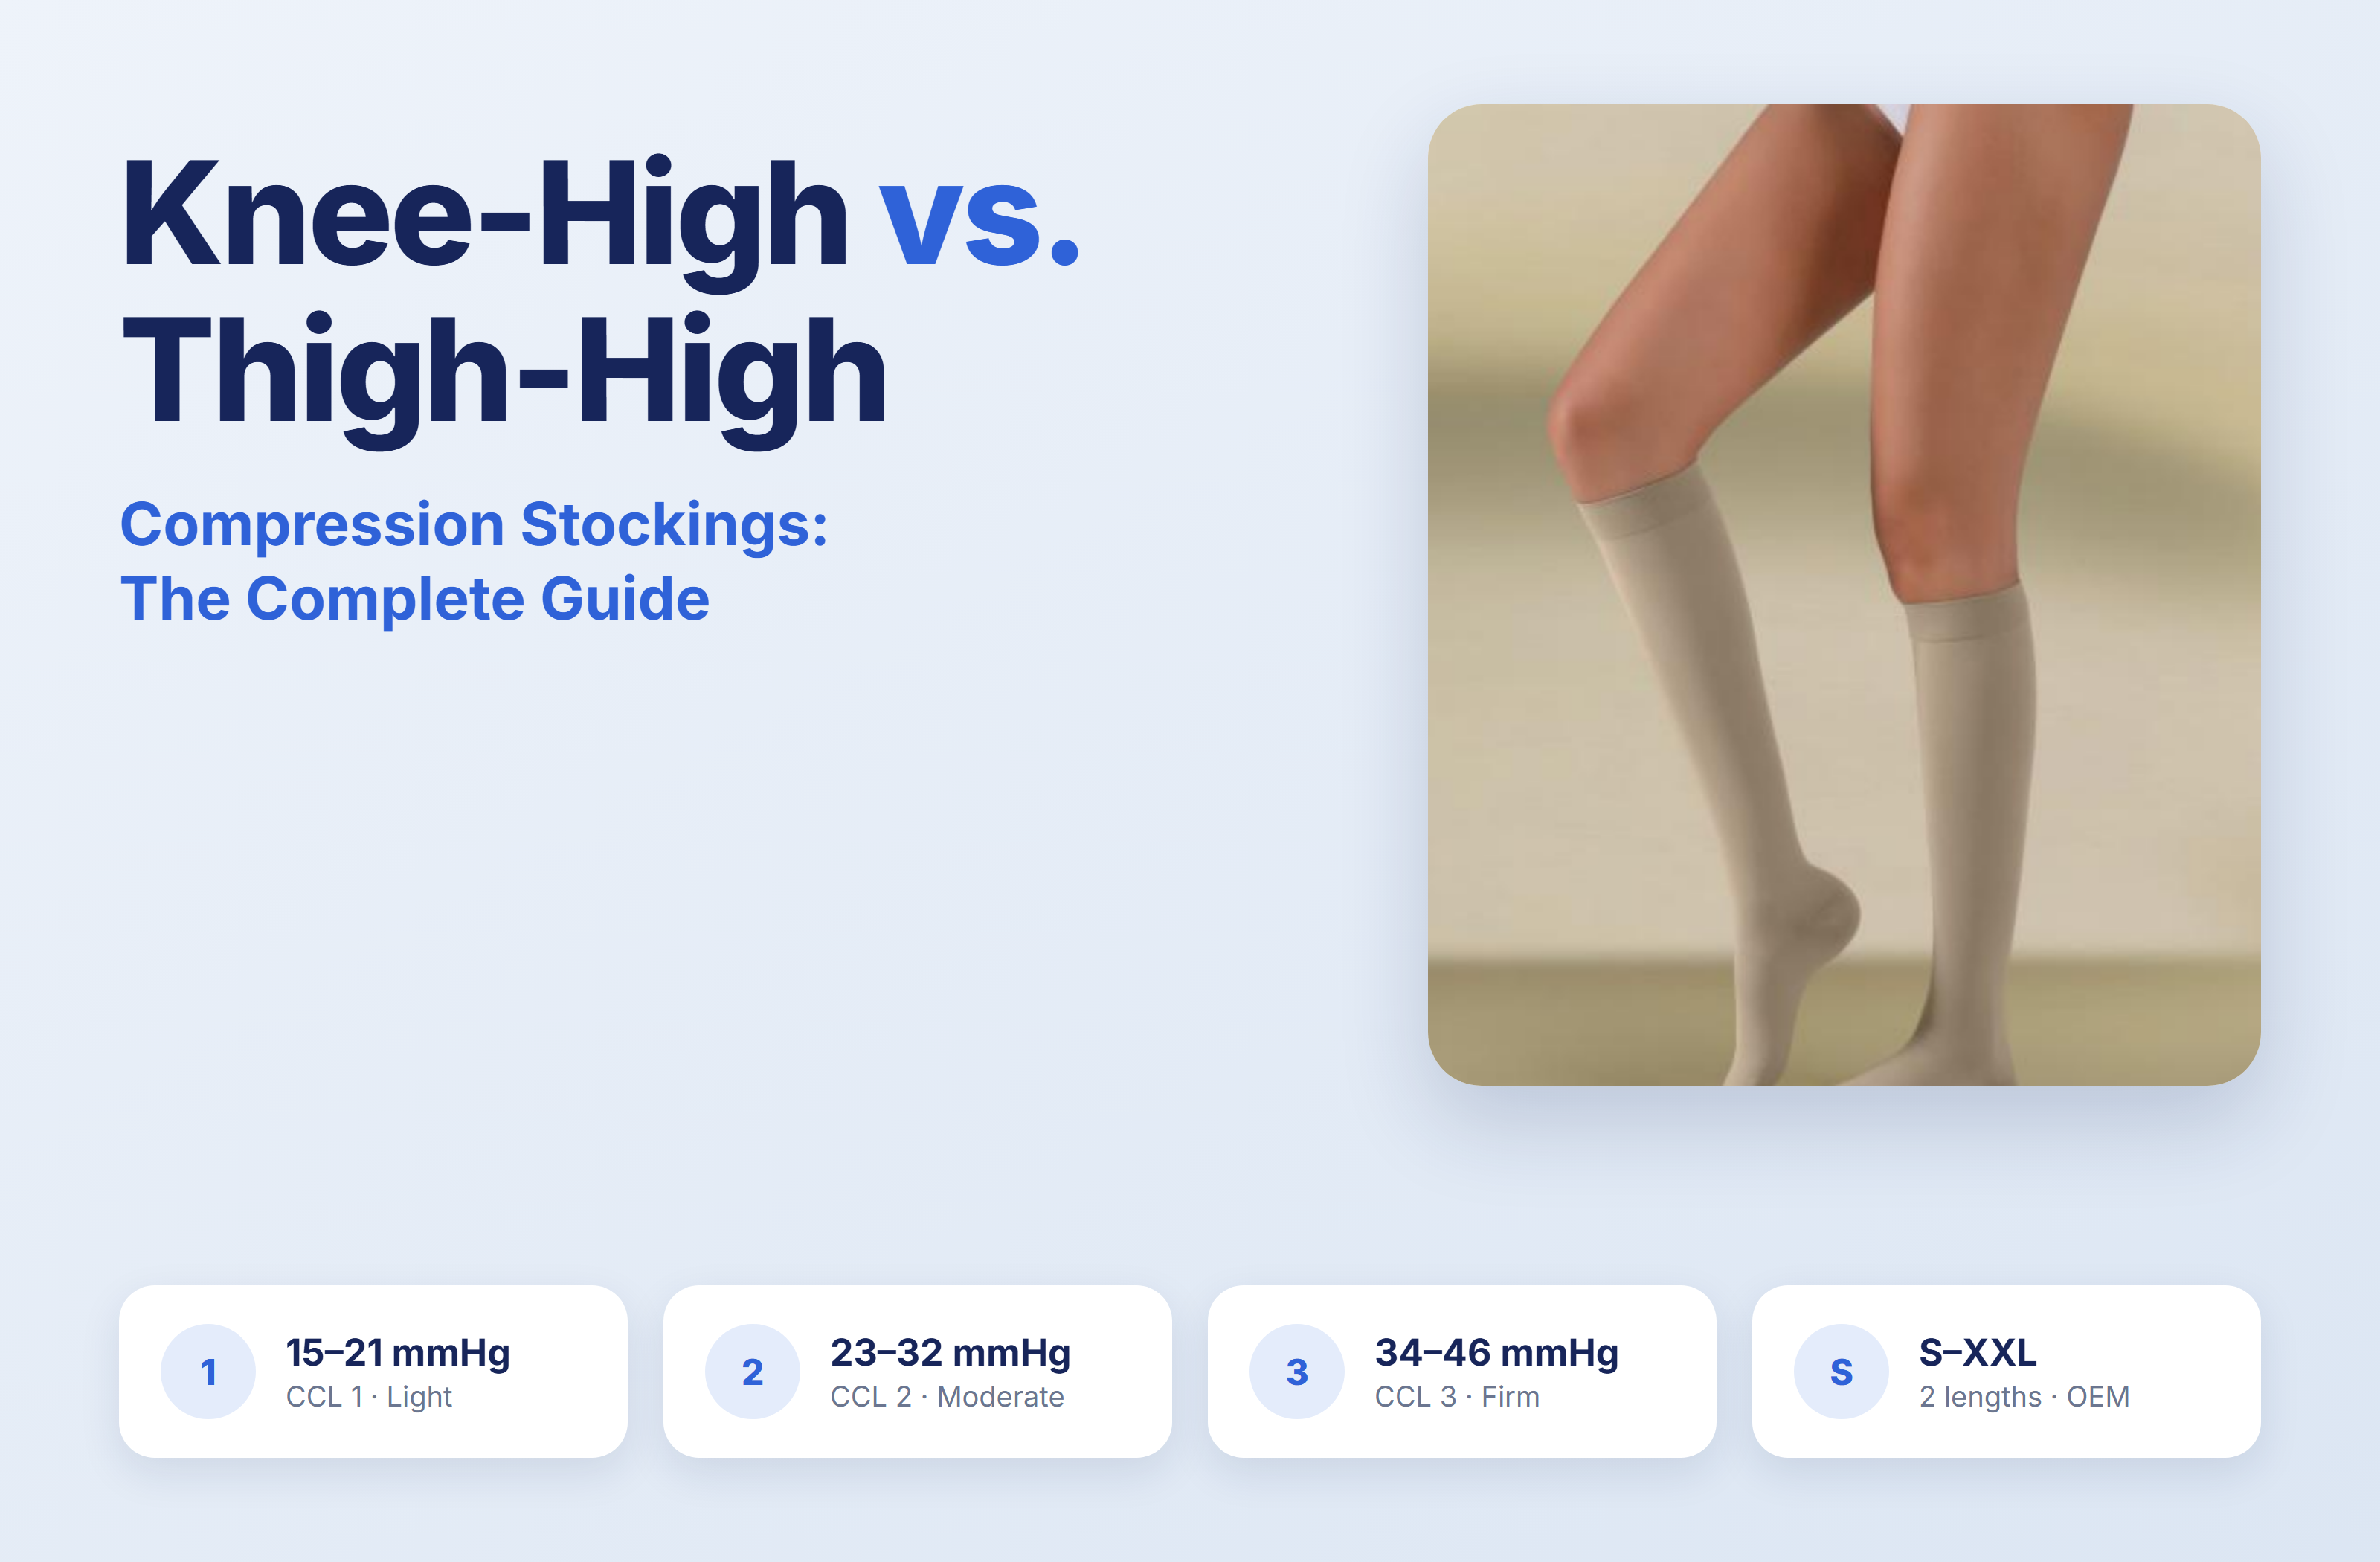
Walk into any medical supply catalog and you’ll find compression stockings in two main lengths: knee-high and thigh-high (also called mid-thigh). They look similar, they’re often made from the same fabrics, and they’re frequently priced confusingly close. So which one does a patient actually need — and as a distributor or pharmacy buyer, which mix should you stock?
This guide breaks down the differences by pressure class, medical indication, patient comfort, and logistics — so you can match the right product to the right buyer, every time.
First, Understand the Pressure: What Compression Classes (CCL) Mean
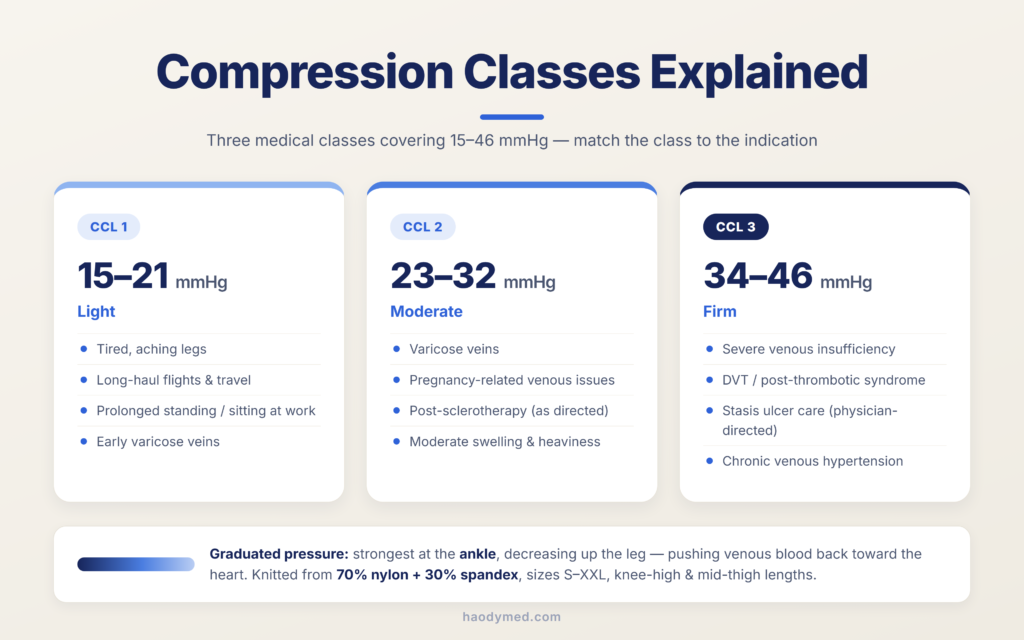
Compression strength is measured in millimeters of mercury (mmHg). The stocking is knitted with graduated pressure — strongest at the ankle, decreasing up the leg — to push venous blood back toward the heart and reduce venous hypertension.
Three compression classes covering 15–46 mmHg — from daily fatigue to severe venous disease
Our medical compression stockings are available in three classes:
Class
Pressure
Typical Use
CCL 1 (Light)
15–21 mmHg
Tired, aching legs; long flights; occupation-related fatigue; early varicose veins
Severe venous insufficiency; DVT / post-thrombotic syndrome management; stasis ulcer care (physician-directed)
Note: classification systems vary by market (EU RAL, German KKKS, US FDA-cleared labeling are not identical). Confirm the standard your market requires before tendering.
Knee-High Compression Stockings
Knee-highs (our model NO. 002101) deliver graduated compression from the ankle up to just below the knee — which is where the majority of venous stasis and swelling problems begin.
Knee-high compression stockings — graduated support foot to below the knee
Best suited for:
Everyday venous insufficiency, ankle and calf swelling
Varicose veins confined below the knee
Pregnancy-related leg fatigue
Long-haul travel and occupations requiring prolonged standing/sitting
Post-sclerotherapy of lower-leg veins (as directed by a physician)
Why buyers stock more of them:
Easier to put on — the #1 driver of patient compliance. A stocking that never gets worn has zero clinical value.
Cooler and more comfortable in warm climates — critical in Southeast Asia, the Middle East, and Southern Europe.
Lower price point drives higher retail turnover.
Fewer sizing failures: fewer measurement points mean fewer returns.
Thigh-High (Mid-Thigh) Compression Stockings
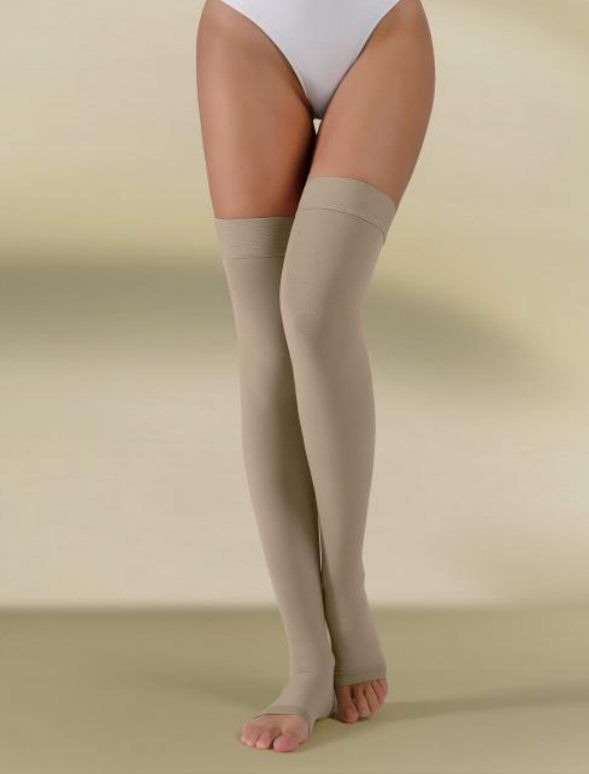
Thigh-highs (our model NO. 002201) extend graduated compression above the knee to the upper thigh, managing venous hypertension across the whole limb.
Mid-thigh compression stockings — open-toe option with stay-up band, coverage to upper thigh
Best suited for:
Varicose veins extending above the knee
Post-surgical recovery and hospitalization (including DVT prophylaxis protocols)
Thigh-level venous insufficiency where swelling or disease crosses the knee
Patients with knee-joint mobility issues where a knee-high band would irritate
Trade-offs to communicate to patients:
Harder to don and doff — the stay-up band keeps them in place but adds donning friction
Rolling or slipping at the thigh is the most common compliance complaint
Higher unit price; larger size matrix in your inventory
Head-to-Head Comparison
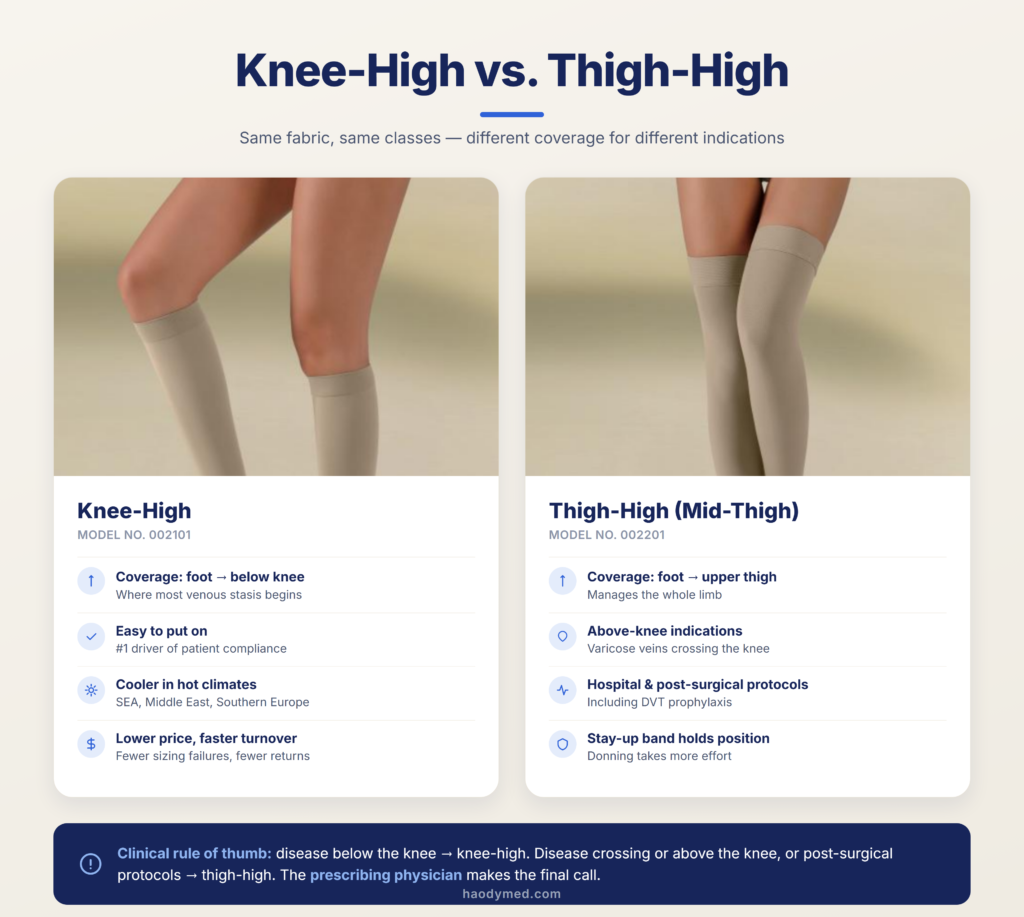
Disease below the knee → knee-high. Disease crossing or above the knee → thigh-high.
Factor
Knee-High
Thigh-High
Compression zone
Foot → below knee
Foot → upper thigh
Donning ease
Easy
Challenging
Patient comfort (hot climates)
Better
Warmer
Above-knee indications
No
Yes
Price point
Lower
Higher
Return/exchange rate
Lower
Higher (sizing complexity)
Retail turnover
Fast
Moderate
Clinical rule of thumb: disease below the knee → knee-high. Disease that crosses or originates above the knee, or hospital/post-surgical protocols → thigh-high. The prescribing physician makes the final call — never let a retail recommendation replace it.
Material & Sizing (Where Most Returns Come From)
Both models are knitted from 70% (±2%) nylon + 30% (±2%) spandex — the spandex delivers the sustained graduated pressure, while the nylon keeps the knit smooth, durable and skin-friendly. Available in beige, black and multi-color, sizes S–XXL.
Compression stockings fail in the field for one dominant reason: wrong size. Measure first thing in the morning, before swelling builds:
Ankle circumference at the narrowest point
Calf circumference at the widest point
Knee-high length: floor to knee bend
For thigh-high, add: thigh circumference and floor to upper thigh
The full S–XXL measurement chart is available on request — ask us before placing a first order.
Common Buying Mistakes (and How to Avoid Them)
Stocking only one length. Pharmacies and home-care dealers need both; the mix depends on your market’s hospital protocols.
Treating “mmHg” as interchangeable between standards. CCL classes are not identical across EU RAL and US-labeled product — confirm the standard before tendering.
Buying non-certified product. For medical-grade stockings, always ask the manufacturer for certification and test documentation applicable to your market — we provide it on request.
Frequently Asked Questions
Are thigh-high stockings always “better” because they’re longer?
No. Longer is not stronger. If the venous problem is confined below the knee, a properly fitted knee-high delivers the required graduated compression with better comfort and compliance. Thigh-highs are indicated when disease or protocol requires above-knee coverage.
Can compression stockings be worn at night?
Generally no — unless specifically prescribed (e.g., certain post-surgical cases). Horizontal lying position already assists venous return. Follow the physician’s instruction.
What’s the difference between diabetic socks and compression stockings?
Diabetic socks protect fragile skin with seamless, non-binding construction and only 3–5 mmHg micro-pressure; compression stockings actively support circulation with graduated 15–46 mmHg pressure. They serve different patients — see our guide: What Are Diabetic Socks?
Do you supply both lengths for wholesale/OEM?
Yes. We manufacture both knee-high (NO. 002101) and mid-thigh (NO. 002201) compression stockings in CCL 1–3, sizes S–XXL, with OEM/ODM support for branding, packaging and colorways. Contact us with your market and certification requirements.
The Bottom Line
Knee-highs win on comfort, price, and compliance; thigh-highs win when the indication extends above the knee. Stock both, size carefully, and let the prescription — not the price tag — make the medical decision.
Disclaimer: This article is for informational purposes only and is not medical advice. Compression therapy should be initiated on the advice of a qualified physician.
Diabetic foot problems rarely start with a dramatic injury. They start small: local vascular lesions reduce blood flow to the feet, the tissue loses resilience, and — because diabetic neuropathy dulls sensation — the patient no longer feels the friction, pressure points, or blisters that a healthy foot would flag immediately. Left unnoticed, those small injuries progress into ulcers, infections, and in severe cases even amputation.
This is why foot care is not an optional extra for people with diabetes — it is daily prevention. And the first line of that defense is the sock that sits against the skin all day.
What Exactly Are Diabetic Socks?
Diabetic socks are therapeutic socks engineered specifically for diabetes-related foot risks. Unlike fashion or athletic socks, every design decision serves one goal: eliminate the points of pressure, friction, moisture, and bacterial growth that a diabetic foot cannot defend itself against.
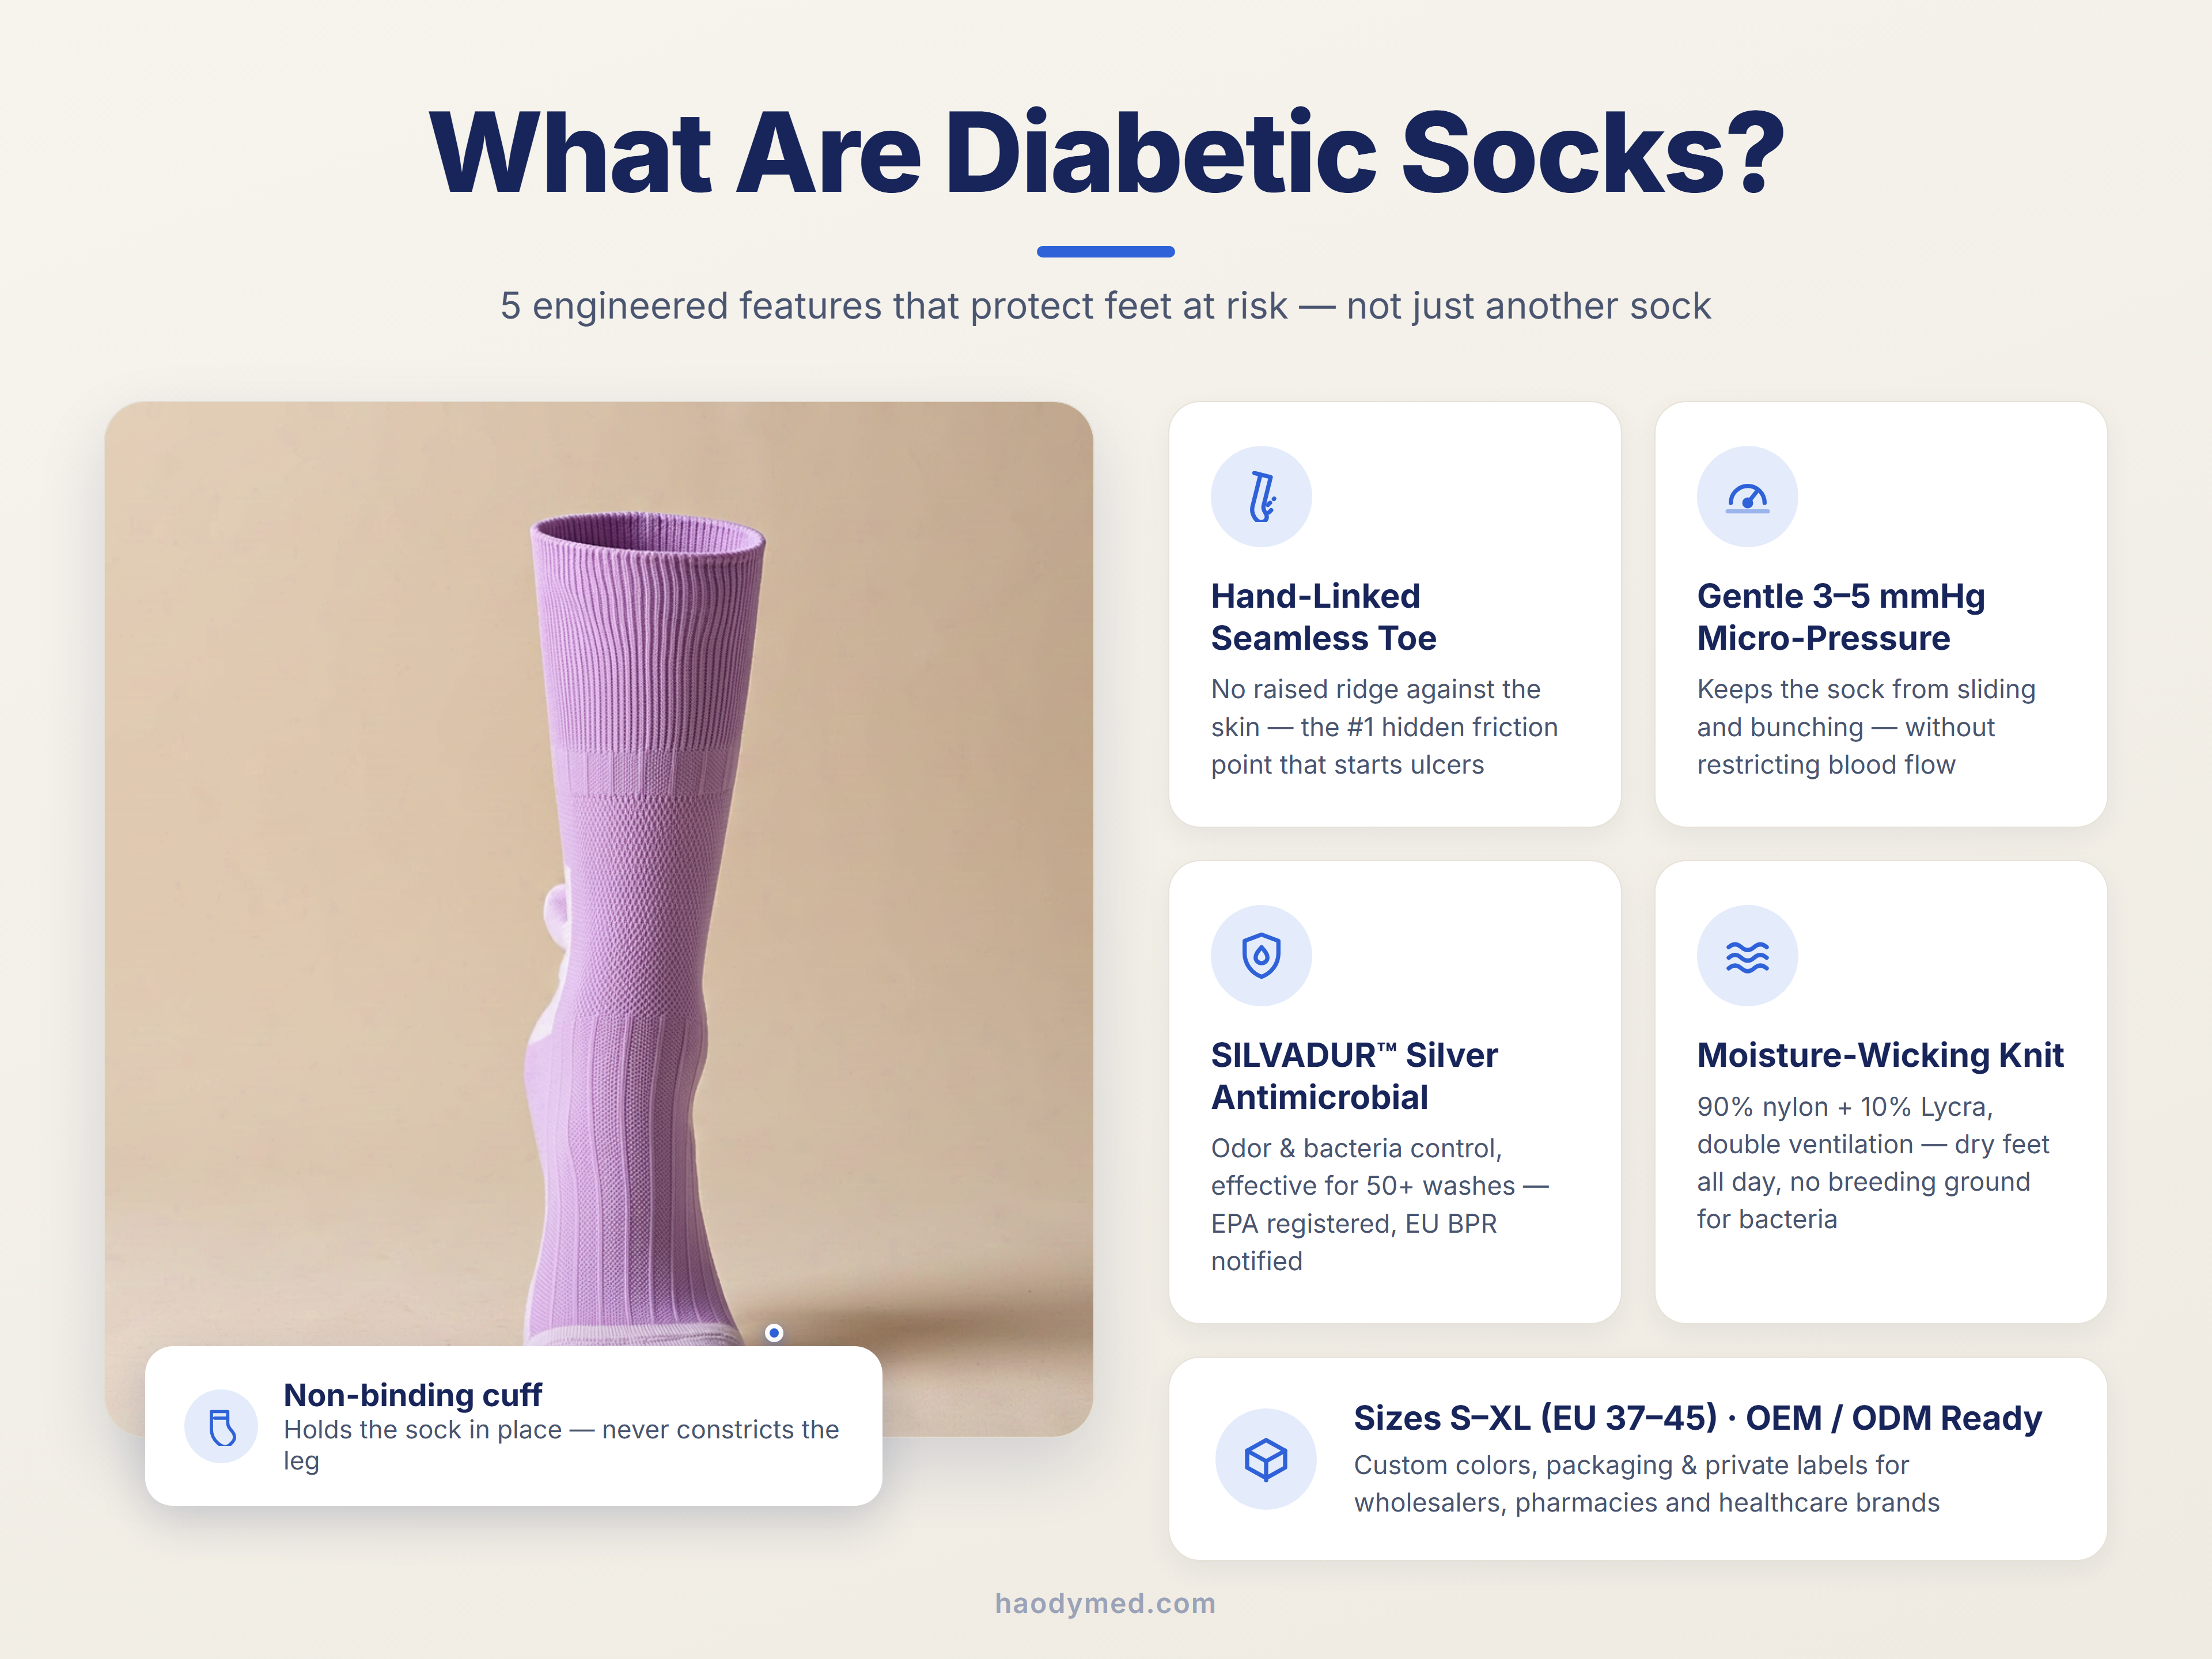
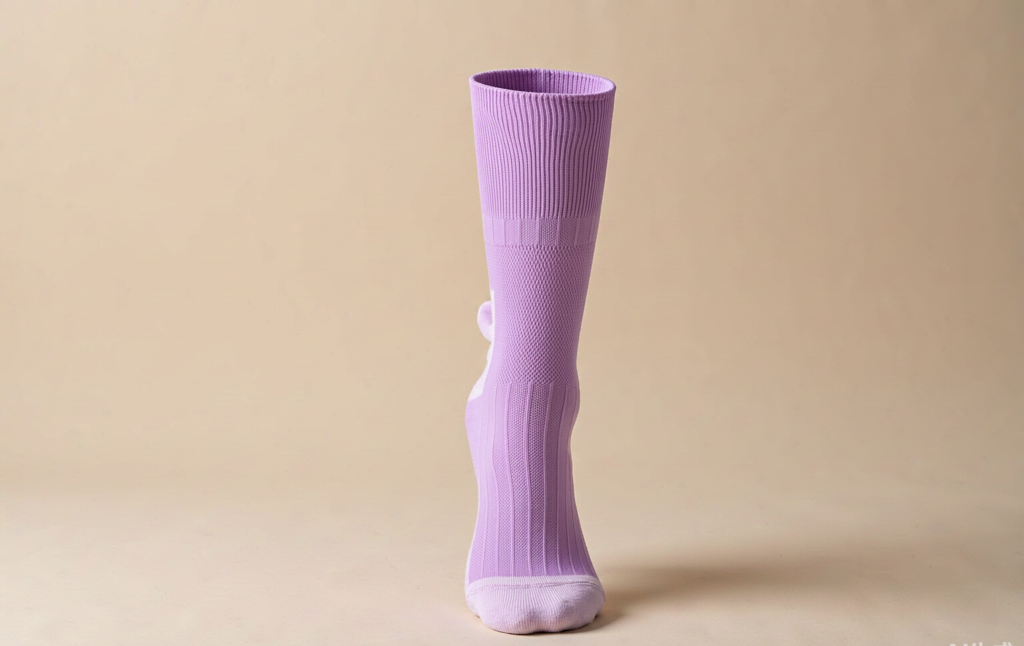
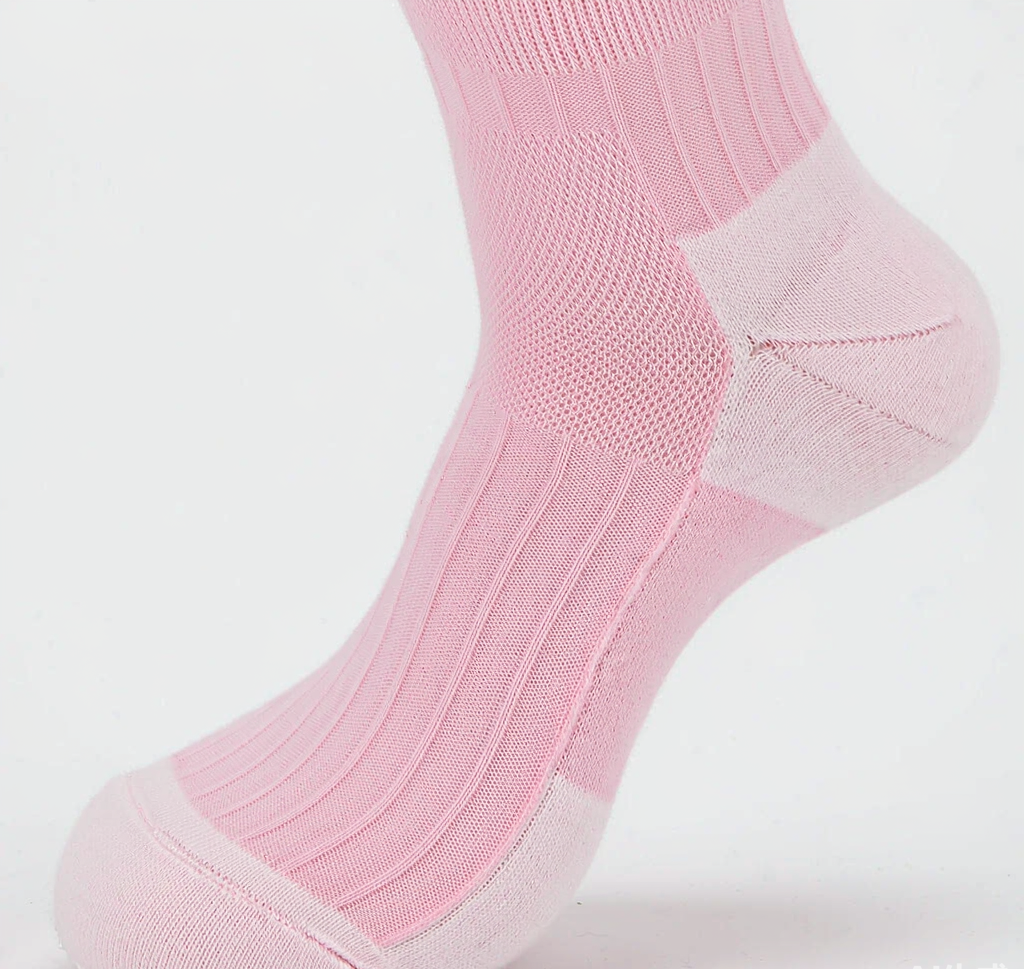
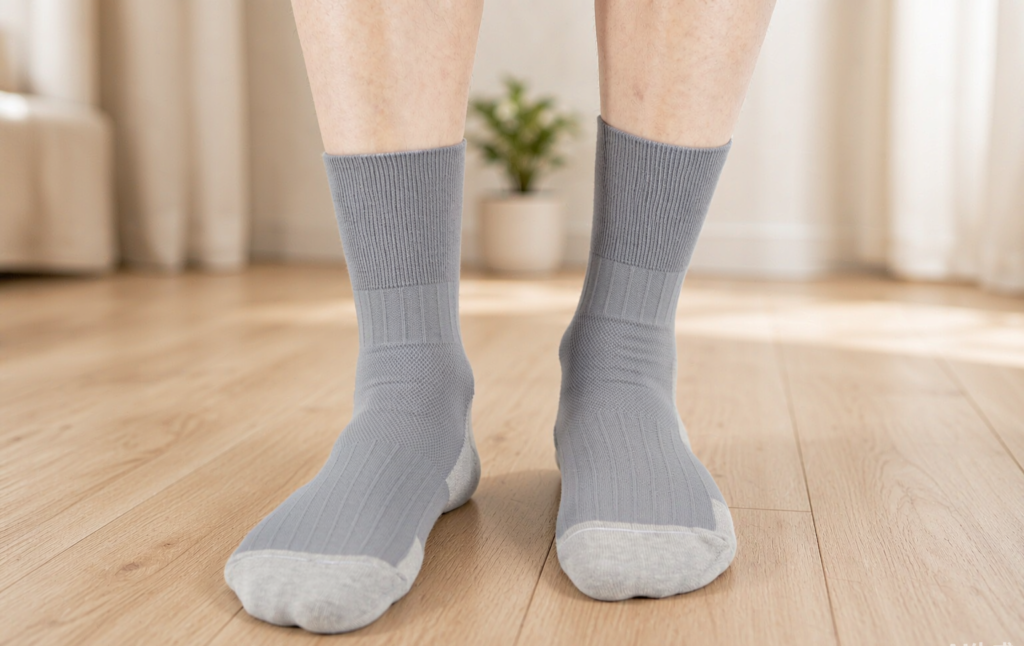
A true diabetic sock is skin-friendly, applies only micro-pressure (never constriction), manages perspiration, and inhibits bacterial and odor growth. It looks deceptively similar to a normal crew sock — the difference is in the details you can’t see.
5 Features That Separate Real Diabetic Socks from Ordinary Socks
1. Non-Binding Cuff
A conventional sock cuff relies on tight elastic ribs to stay up. On a diabetic leg, that same rib can leave a visible constriction ring and restrict already-impaired circulation. A proper diabetic sock uses a loose, non-binding cuff that holds the sock in place without ever constricting the leg.
2. Seamless, Hand-Linked Toe
The toe seam of an ordinary sock is a raised ridge of stitching. For a foot with reduced sensation, that ridge is a constant, unnoticed friction point — one of the most common starting sites for ulcers. Quality diabetic socks use a hand-linked seamless toe, leaving the toe area perfectly smooth against the skin.
3. Gentle Ankle Pressure (3–5 mmHg)
Diabetic socks are not compression stockings. The heel and arch carry a considerate, comfortable micro-pressure of just 3–5 mmHg — enough to keep the sock from sliding and bunching (bunching = friction), but low enough that it never restricts blood flow. This is a critical distinction we cover in the comparison below.
4. Moisture Management
Damp skin macerates, softens, and breaks down faster — and warm, wet fabric is a breeding ground for bacteria and fungus. A breathable cotton-blend feel combined with moisture-wicking performance keeps feet drier through the day. Ours uses a helicitic texture with double ventilation for exactly this reason.
5. Antibacterial & Odor-Proof Treatment
This is where technology matters. Our diabetic socks are treated with SILVADUR™ antimicrobial technology, a patented polymer-delivery system that carries silver ions efficiently into the textile. It controls odor-causing bacteria and keeps the sock fresh for 50+ washes.
Recognized and listed as an Active Chemical Product by the International Antimicrobial Council and OEKO-TEX® Association as harmless to human health when used as indicated
Registered with the U.S. EPA and notified under EU BPR
Non-sensitizing and non-irritating; recyclable and reusable during processing
Test reports issued by the International Antimicrobial Council; authentication tags authorized by SILVADUR (certificate available on request)
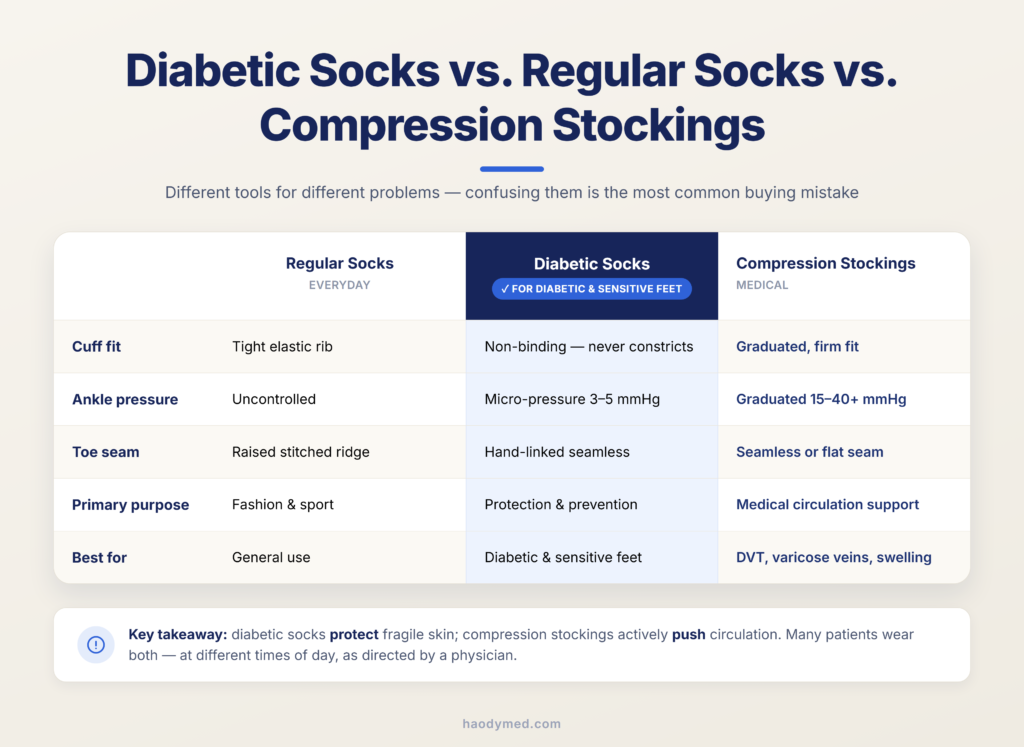
Diabetic Socks vs. Regular Socks vs. Compression Stockings
Key takeaway: diabetic socks protect fragile skin; compression stockings actively push circulation. They are different tools for different problems — and many patients wear both, at different times of day, as directed by a physician. Confusing the two is one of the most common retail mistakes we see distributors make.
How to Choose the Right Pair
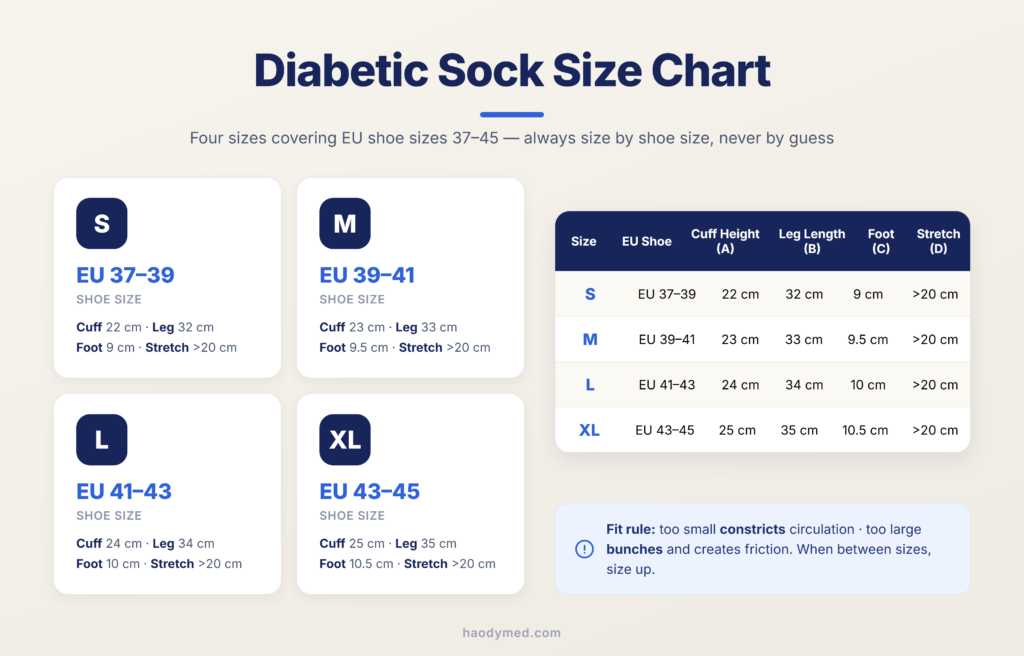
Step 1: Match the Size to EU Shoe Size
Sizing is the most common error. A sock that is too small constricts; too large, it bunches and creates friction. Our diabetic socks come in four sizes covering EU 37–45:
Step 2: Check the Composition
Our socks are knitted from 90% super-grade nylon + 10% Lycra — a blend chosen because Lycra delivers four-way stretch and shape retention (so the non-binding cuff stays non-binding wash after wash), while the fine-gauge nylon knits smooth, breathable, skin-friendly fabric with an antiskid, helicitic texture.
Step 3: Verify the Antimicrobial Claim
“Antibacterial” on a label means nothing without a test report. Ask your supplier for: the antimicrobial technology name, its EPA registration / EU BPR status, and third-party test reports. If a supplier cannot produce these, walk away.
Step 4: Look for OEM Capability (for Distributors)
If you are a wholesaler, pharmacy chain, or healthcare brand, confirm the factory can support OEM/ODM: custom colors, packaging, logo, and certification documentation for your market.
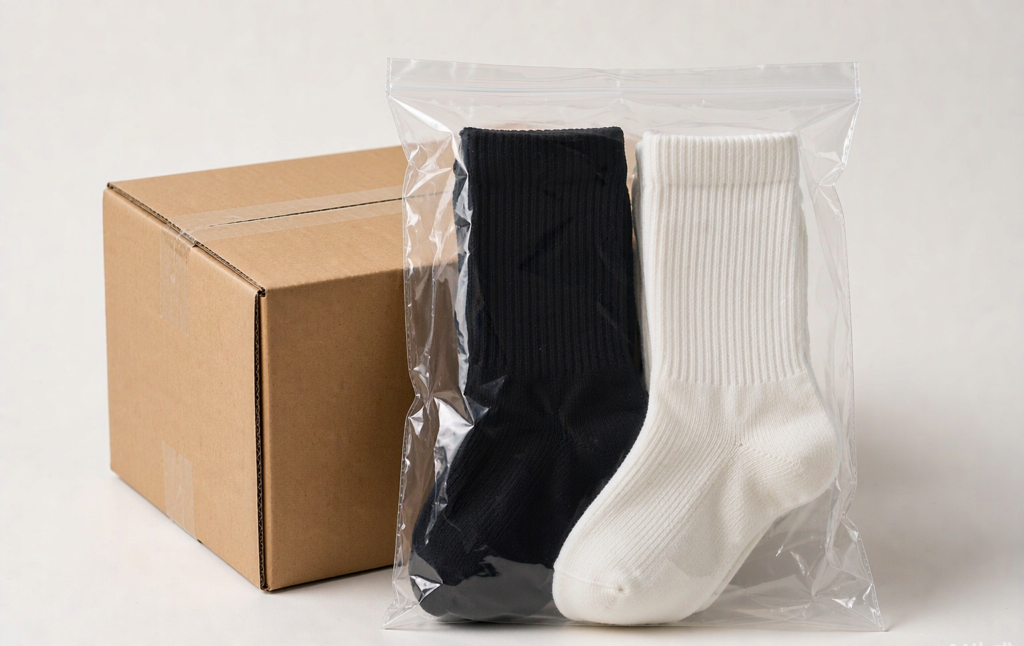
Packaging & Logistics (For Wholesale Buyers)
Frequently Asked Questions
Do diabetic socks really make a difference?
For anyone with reduced foot sensation or circulation, yes — the elimination of tight cuffs, ridged seams, and damp bacterial environments removes the three most common triggers of diabetic foot complications. They are a low-cost, high-impact form of daily prevention.
Can I wear diabetic socks if I don’t have diabetes?
Absolutely. Anyone with sensitive skin, swollen feet, or who simply wants a non-binding, seamless, odor-resistant sock benefits from the same design.
Are diabetic socks the same as compression socks?
No. Diabetic socks use gentle 3–5 mmHg micro-pressure to stay in place without constriction. Compression stockings use graduated 15–40+ mmHg pressure to actively support circulation. See the comparison table above.
How long does the antibacterial effect last?
The SILVADUR™ treatment remains effective for 50+ home washes under normal care.
Can I get these with my own brand (OEM)?
Yes. We are a medical supplies manufacturer with production bases in China and Vietnam, supporting OEM/ODM for colors, sizing, packaging, and private labels. Contact us for a quote.
The Bottom Line
A diabetic sock is the cheapest insurance policy in diabetic foot care: seamless where skin is fragile, loose where circulation is weak, dry where bacteria breed. Choose by size, verify the antimicrobial claim, and buy from a manufacturer who can show you the certificates.
Disclaimer: This article is for informational purposes only and is not medical advice. Patients should consult their physician for diagnosis and treatment recommendations.
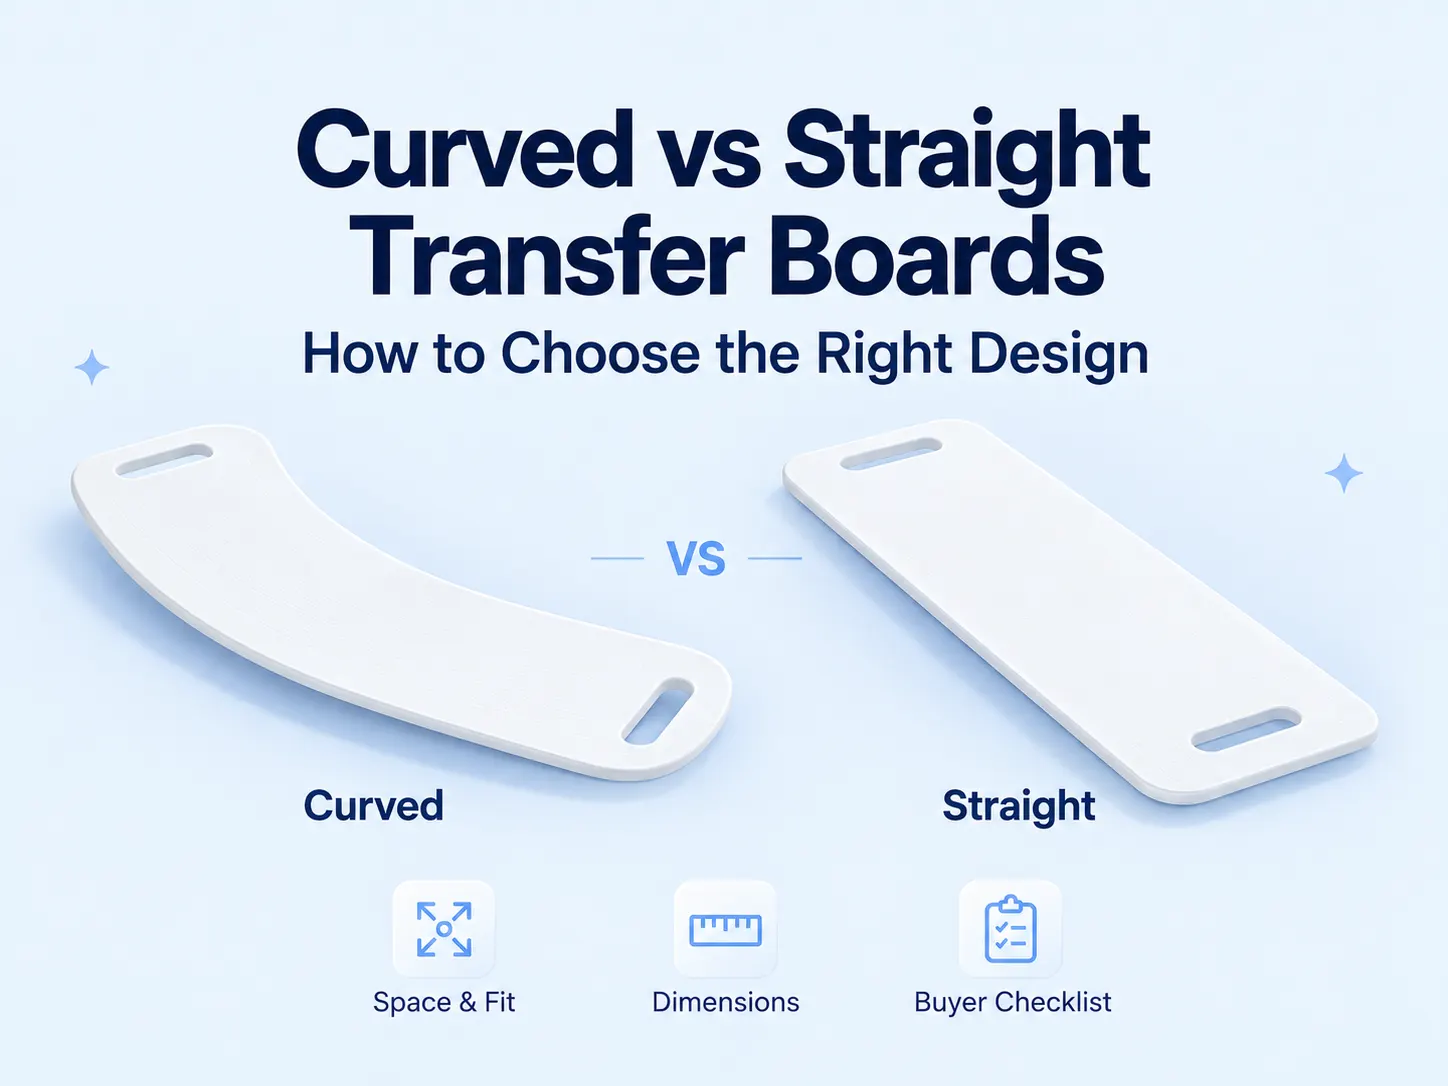
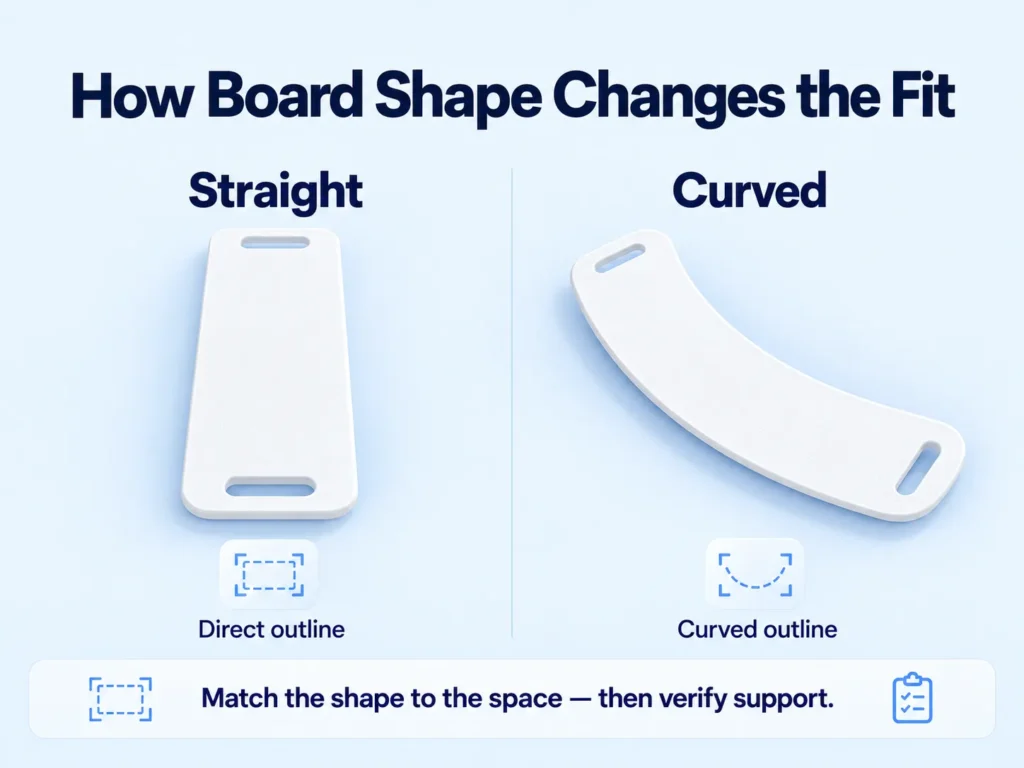
A straight transfer board offers a simple, direct bridge between two surfaces. A curved board is shaped to sit around a wheelchair wheel or fit a particular layout. Neither shape is universally safer. The right choice depends on the equipment, the space, the specific model, the manufacturer’s instructions, and a professional assessment of the person using it.
This article compares the two shapes for seated transfers. It is not a step-by-step tutorial. For definitions and general board types, see our guide to transfer board types and intended uses. The second half is written for distributors, rehabilitation providers, and care-facility buyers. It covers what to measure, how to compare quotes, and how to evaluate samples.
Curved vs Straight Transfer Boards: Key Differences at a Glance
Shape mainly affects how a board fits the space and equipment around a transfer. It does not tell you the load rating, the support requirements, or whether a board suits a given person. Those depend on the exact model and on individual assessment.
Comparison point
Straight transfer boards
Curved transfer boards
Outline
A more direct board profile
An arc-shaped profile. The curve varies by model
Space fit
Check the direct path and positioning room
Check curve direction, obstacles, and end placement
Support requirements
Confirm against the model’s instructions
Confirm as well. A curve does not reduce them
Dimensions
Length, width, thickness, contact area
The same, plus the curve and end outline
Rated load
A property of the specific model
A property of the specific model. It cannot be inferred from the curve
Material and cleaning
Follow the material and manufacturer’s instructions
Follow the material and manufacturer’s instructions
Buying basis
Match to real use conditions
Match to real use conditions
We deliberately left out price and performance comparisons. Those vary too much between materials, thicknesses, and manufacturers to state as a general rule.
What Does the Board’s Shape Actually Change?
Shape changes how a board sits between two surfaces and how it works around nearby parts of the equipment. It does not change what the board is rated for.
Straight Boards and Direct Transfer Paths
A straight board gives a plain bridge when the path between two surfaces is clear. The NSW Agency for Clinical Innovation describes straight boards as typically long wooden or plastic boards. It lists use on and off a commode and in and out of a car, and possibly from a bed to a power wheelchair.
Straight boards are not limited to bed-to-chair moves. They can suit many layouts, provided the support points and positioning space work in the real setting.
Curved Boards and Obstacle Clearance
NSW ACI describes a curved board as one that curves around the wheel. It positions it as an alternative to the over-wheel slider, in a range of lengths and widths. In practice, a curve may help with positioning around a wheelchair wheel.
Check three things before relying on that curve:
Which way the curve runs.
Where each end will land.
Whether both ends have adequate support.
An arc does not mean the board can clear a fixed armrest or any other obstacle. That depends on the model and the equipment.
Curved, Notched, Sliding, and Rotating Are Different Features
Product names alone are not enough to identify a board’s structure or intended use. Before comparing models, request an outline drawing, current product images, and instructions for use. Confirm whether the board is straight or curved, whether it has a notch, and whether it includes any moving or rotating components. Use these details—not the product name—to determine what you are comparing.
Which Shape Fits Your Transfer Environment?
Use the setting to narrow your options, then let measurements and assessment decide the model. Both shapes may work in the same setting.
Wheelchair-to-Bed or Chair Transfers
Check how closely the chair can approach, the condition of both seat surfaces, and where the wheels and armrests sit. UMass Memorial Health notes that transfers are easier between surfaces of similar height, or to a slightly lower one. Its guidance has the wheelchair as close to the bed as possible, and it may have the nearest armrest removed.
Look at the shape of the commode seat, the area where the board can be supported, and compatibility with the equipment. NSW ACI lists straight boards for commode transfers, and notes that a satin or silk cover can be fitted to a straight board for added skin protection. A curved shape is not a “commode-only” feature. In wet areas, confirm the material and cleaning suitability for each model.
Wheelchair-to-Car Transfers
Check the door opening, the height difference between seats, the gap, and the positioning conditions. A longer board does not fix every gap or height problem. Confirm limits with the manufacturer’s instructions and a qualified professional. UMass Memorial Health also says car transfers should follow the steps given by the person’s therapist or physician.
What Should Buyers Measure Before Requesting a Quote?
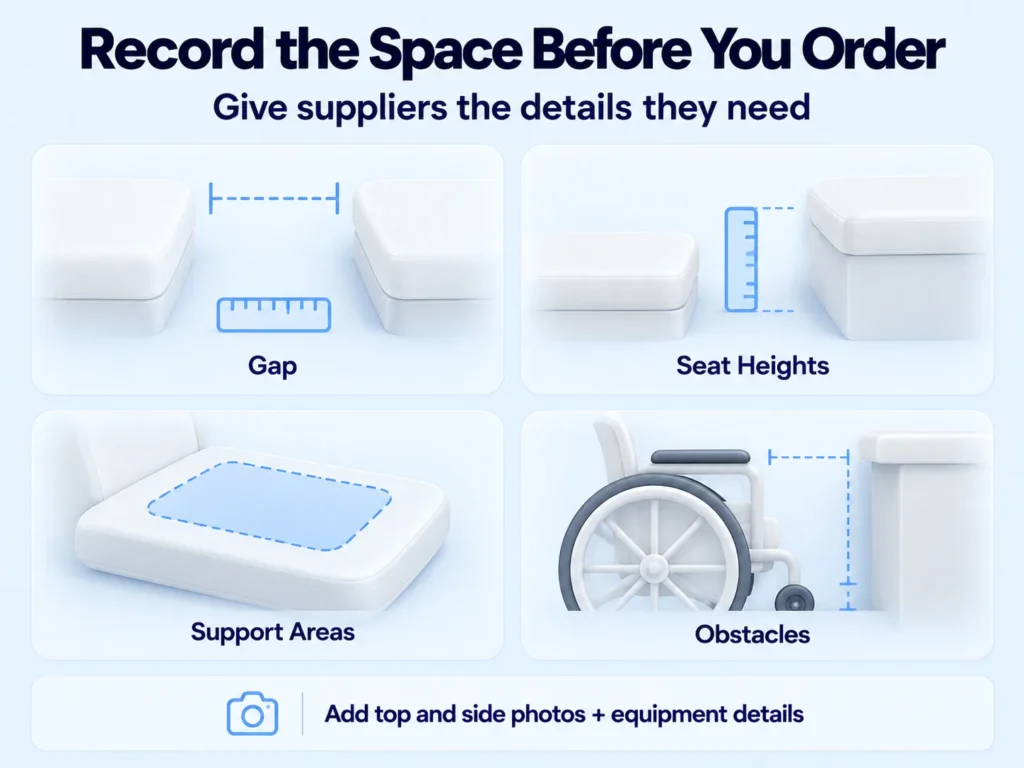
Record the real transfer setup before asking suppliers for a recommendation. Suppliers can then check product limits against actual conditions, rather than quoting from a product name. The table below can be copied into a quote request.
Information to record
What the buyer should provide
What needs confirmation
Starting and target equipment
Equipment models, seat types, use setting
Whether this matches the product’s intended use
Actual gap
Gap in the planned position, with photos
Whether it falls within the model’s stated limits
Seat heights
Height of each side and the difference
Whether it fits the instructions for use
Support area
Size and shape of the contact area on both sides
Whether each board end can be properly supported
Obstacles
Positions of wheels, armrests, other parts
Whether the board can be positioned around them
Surrounding space
Room to place and remove the board, and for care
Whether the working space is adequate
Send annotated top-view and side-view photos with equipment models and clear measurement units. Remove any personal identifying information. Responsibilities are separate: the buyer supplies the environment details, the supplier checks product limits, and a qualified professional confirms fit for the individual.
Why Board Length and Weight Capacity Are Not Enough
Length and a headline load number are easy to compare, but they leave out what determines whether a board suits your setup. Two quotes with the same figures can describe boards with different outlines, support requirements, and documentation.
Overall Length Is Not the Same as Permitted Gap
Overall length, the supported end areas, and the gap a board may span are three different things. For curved boards, also review the outline drawing, because the longest dimension alone says little about the shape. We do not give a universal “rule of thumb” for overlap or span here. Use the manufacturer’s stated limits for the specific model.
Match the Load Claim to the Exact Model and Conditions
A rated load belongs to a specific model, tested or documented under stated conditions. NSW ACI also advises confirming that the person’s weight is compatible with the board’s safe working limit. Ask for labels and documents that name the exact model. Ask which support conditions and limitations apply. Don’t rank boards on numbers whose conditions are unknown, and don’t invent your own safety-margin formula.
Use this template to compare suppliers side by side:
Specification to verify
Supplier A
Supplier B
Exact model and specification revision
To be confirmed
To be confirmed
Dimensions and outline drawing
To be confirmed
To be confirmed
Rated load and stated limitations
To be confirmed
To be confirmed
Support and gap requirements
To be confirmed
To be confirmed
Material, top surface, and underside design
To be confirmed
To be confirmed
Cleaning instructions and included accessories
To be confirmed
To be confirmed
How to Evaluate Samples Before Bulk Ordering
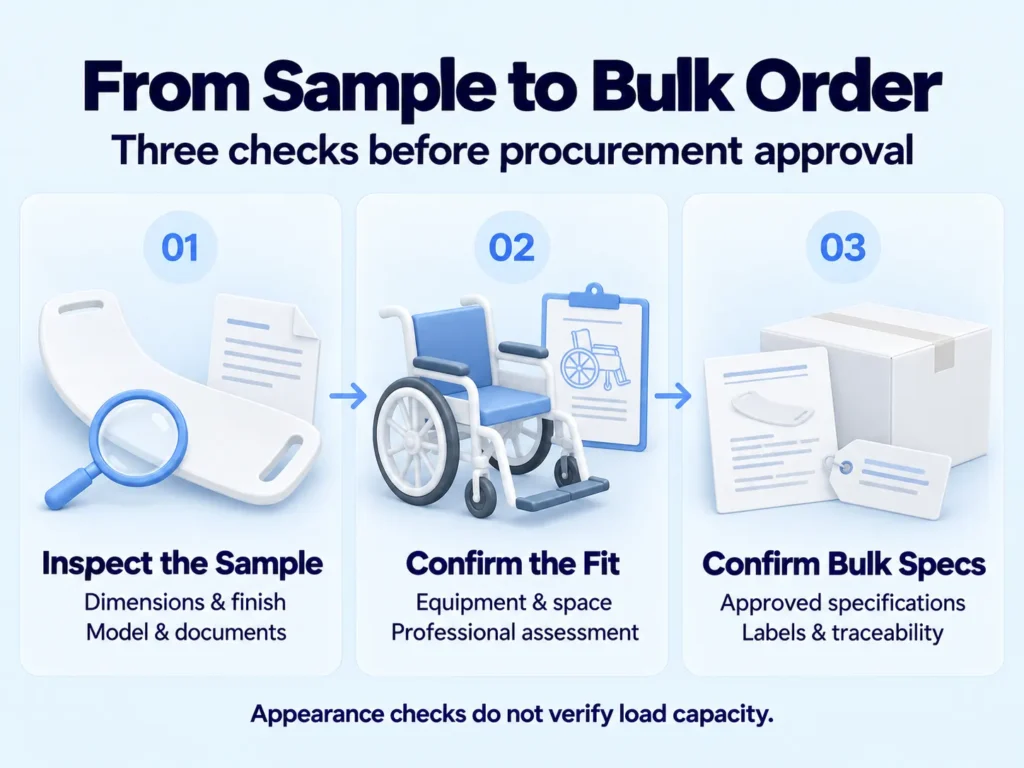
Separate three things: what you can check by looking at the sample, what needs documents, and what needs professional assessment. Mixing them up is how a sample approval turns into a false sense of assurance.
Stage 1 — Inspect the Sample and Verify Documents
Confirm the model, outline, and dimensions match the ordered specification.
Check the edges, the top surface, the underside contact areas, and any accessories.
Check that the label, instructions, and technical documents all refer to the same model.
A visual check cannot verify load capacity or confirm fit for a person. Don’t run destructive load tests on a sample yourself.
Stage 2 — Confirm Fit in the Intended Environment
Have someone with the right competence assess fit, following the instructions for use and your organization’s procedures. Record which equipment it was assessed with, the conditions of use, and any limits found. A trial with a real person is not a routine goods-in check. It belongs inside a professional assessment.
Stage 3 — Document What the Bulk Order Must Match
Write down what production has to match:
Sample number and specification version.
Material, dimensional tolerances, surface, labeling, and accessories.
Packaging, batch traceability, change-notification terms, and how exceptions are handled.
Keep appearance and dimension acceptance apart from performance requirements that need supporting documents.
Frequently Asked Questions
Is a Curved Transfer Board Safer Than a Straight Board?
No. Neither shape is universally safer. Safety depends on how well the model fits the equipment and setup, on an individual assessment, and on correct use under the manufacturer’s instructions and professional guidance.
Is a Banana Transfer Board the Same as a Curved Transfer Board?
“Banana board” is a common nickname for a curved board. Names vary by seller and region, so verify the actual outline, dimensions, and intended use of the model rather than relying on the name.
Can a Curved Board Be Used with Fixed Wheelchair Armrests?
A curved shape does not guarantee it. It depends on the equipment, the board model, how it is positioned, and a professional assessment. Check the instructions and ask the manufacturer before assuming it will work.
How Do I Choose the Right Transfer Board Length?
There is no universal length. Base it on your actual positioning, the support area at each end, and the manufacturer’s limits for the model. Use the measurement table above and share it with the supplier.
What Should Distributors Request Before Ordering Samples?
Request:
The intended use and the exact model and dimensions.
Load documentation tied to that model.
The instructions for use and cleaning requirements.
Packaging and labeling information.
Request Transfer Board Specifications for Your Application
Work in this order: use and environment, then shape and size, then model documents, then sample confirmation. If you are sourcing for a distributor, clinic, or care facility, tell us the use case, the equipment involved, your target market, expected quantities, and any packaging or labeling needs. Include the models you want checked. Then request transfer board specifications from our team.
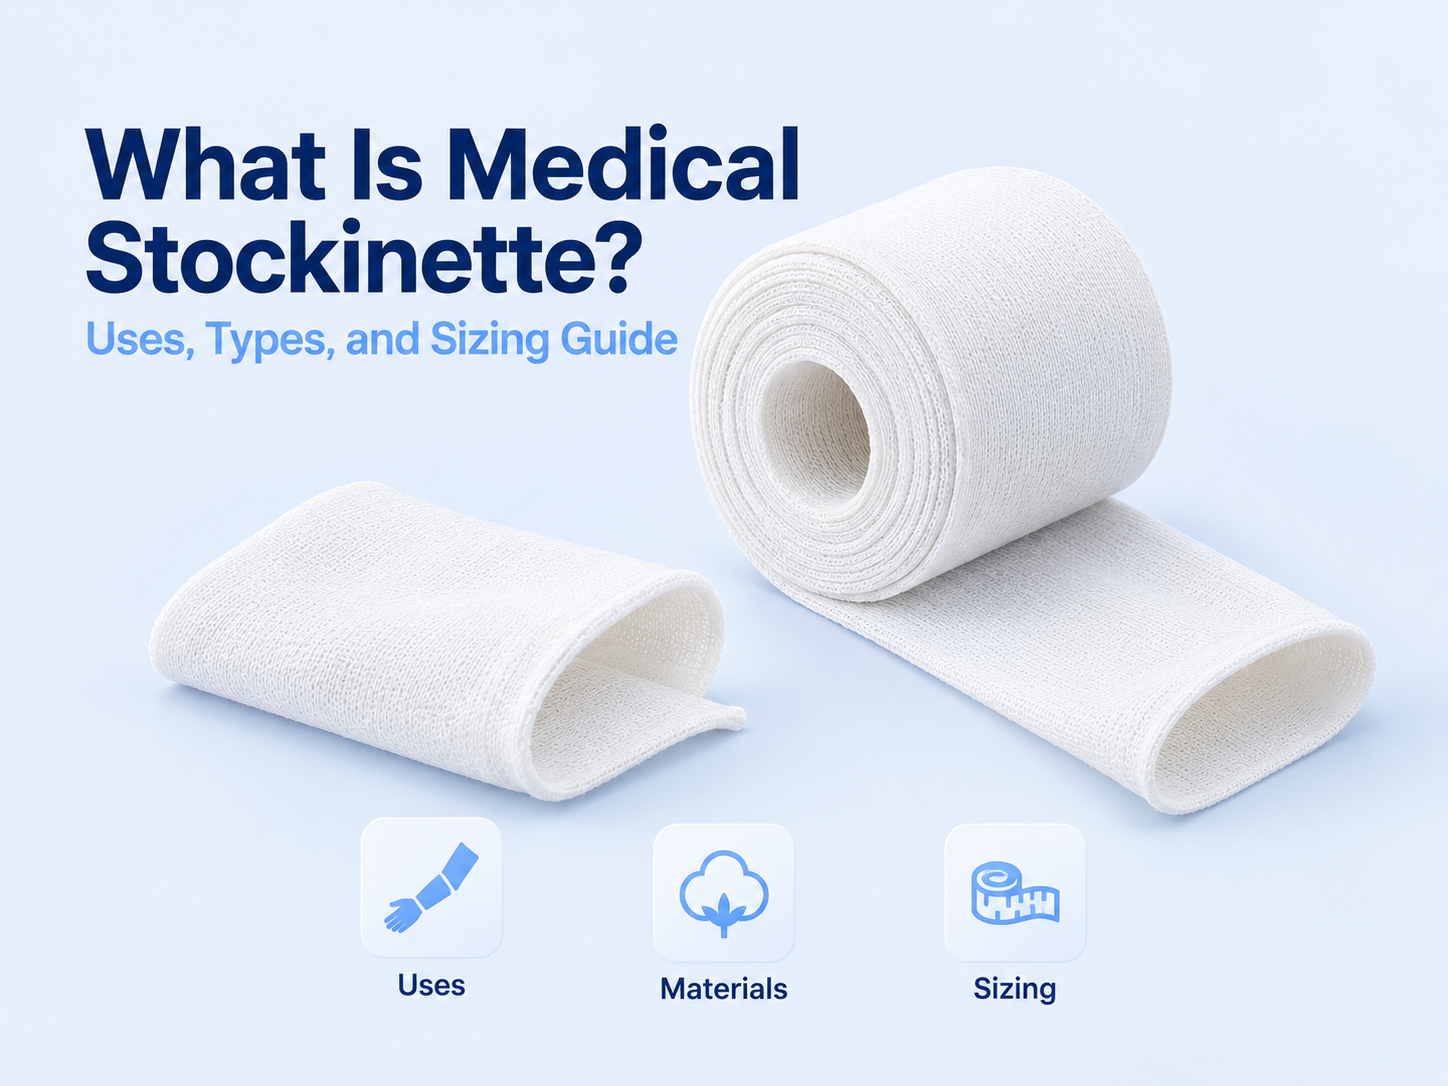
Medical stockinette is a seamless tubular knit fabric used as a lining or limb covering in orthopedic and surgical settings. It sits between the skin and a cast, splint, orthosis or bandaging system, or it covers a limb during certain procedures.
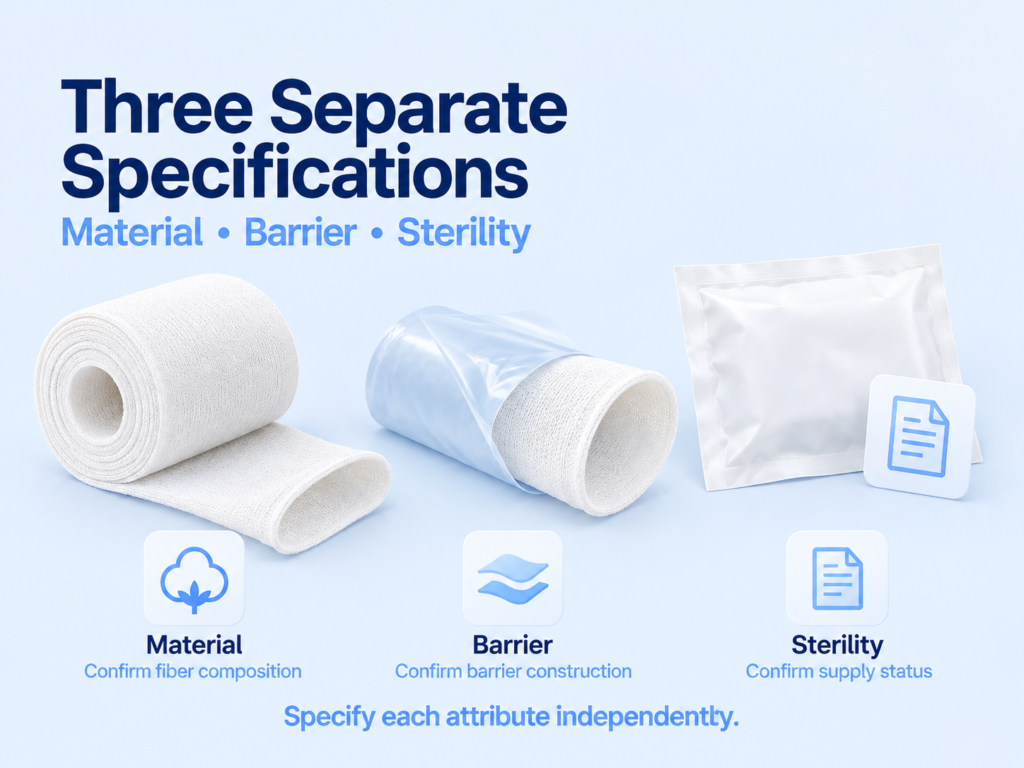
Here’s the catch: not every stockinette is built for the same job. Material, barrier construction and sterility are three separate choices, and treating them as one is the most common way a purchase order goes wrong.
This guide covers what stockinette is, what it’s used for, how the main types differ, how to read sizes, and what to specify before you place a bulk order.
What Is Medical Stockinette?
Medical stockinette is a tube of knitted fabric, usually supplied as a roll that is cut to length or as pre-cut pieces. The knit structure gives it stretch, so the tube can be drawn over a limb and then sit smoothly against the skin.
You’ll see it called tubular stockinette, and in orthopedic catalogs often undercast stockinette, because it goes under a cast. You’ll also see the shorter spelling “stockinet.” It’s the same product family.
Two cautions before we go further. Not all stockinette is 100% cotton. Not all of it is sterile. And it doesn’t automatically apply therapeutic pressure or touch an open wound. What a specific product is designed for depends on its construction and its labeling.
What Is Medical Stockinette Used For?
Most products fall into three use cases.
Under Casts and Splints
The most familiar use is as a skin-side liner beneath a cast or splint. The fabric creates a smooth interface between the skin and the outer materials. Exactly how it should be used depends on the fixation system’s instructions, so this article won’t walk through applying a cast. That belongs to trained clinicians.
Under Orthoses and Certain Bandaging Systems
Stockinette is also used as an interface layer under braces, orthoses and some bandaging systems. Be careful with wording here. A stockinette used inside a compression bandaging system is not the same as a stockinette that provides therapeutic compression. Unless the product label says otherwise, assume a plain liner doesn’t deliver treatment pressure.
Surgical Limb Coverage
Some stockinette products are designed to cover a limb during surgery. These are typically a different construction from a plain roll liner, often with a fluid-barrier layer. Whether the product must also be sterile is a separate question, which we cover in the next section. A standard roll liner shouldn’t be treated as a surgical covering by default.
Medical Stockinette Types: Materials, Barrier Construction, and Sterility
Most product pages mix three different ideas together. Pull them apart and specifications get much easier to write.
Cotton and Synthetic Stockinette
Cotton and synthetic fibers such as polyester are the two material families you’ll see most. Cotton is a familiar choice for skin-contact liners. Synthetic knits are offered by some suppliers for different handling and performance needs.
Avoid tidy rules like “cotton is for plaster, synthetic is for fiberglass.” Real product choice depends on the intended use, the fixation system and the manufacturer’s guidance. The fiber name alone won’t tell you how the finished product behaves.
What Makes a Stockinette Impervious?
An impervious stockinette includes a dedicated fluid-barrier layer, typically part of a composite construction with a knit lining. The exact lining and film depend on the manufacturer, so always ask for the product specification.
“Impervious” describes a barrier design for a specific purpose. It doesn’t mean the product is a bath cover or suitable for immersion.
Material, Barrier Construction, and Sterility: Three Separate Decisions
Think of these as three independent dropdown menus on your RFQ:
Dimension
What to confirm
What not to assume
Material
Fiber composition and knit construction
A fiber name defines every performance property
Barrier construction
Whether a validated fluid-barrier layer is included
Synthetic means waterproof
Sterility
Sterile or non-sterile supply status, plus supporting documentation
Impervious means sterile
The three can be combined. One product might have a synthetic lining and a barrier layer and be supplied non-sterile. Another might be a plain cotton roll. They aren’t three mutually exclusive product categories.
Here’s why this matters: a buyer who writes only “medical stockinette” on an inquiry leaves the supplier to guess all three. You’ll get quotes for different products, and they won’t be comparable.
Stockinette vs. Cast Padding vs. Tubular Bandage
These products get mixed up because catalogs use the words loosely. Here’s a simple way to tell them apart:
Product
Structure / form
Typical role
Confirm before buying
Stockinette
Seamless knitted tube
Skin-side liner or limb covering
Material, barrier, sterility, size
Cast padding
Wrapped padding material, often in rolls
Cushioning layer under a cast
Fiber type, width, intended fixation system
Tubular bandage
Tubular knit or elastic bandage
Retention, support or dressing hold
Elasticity, application, size range
Tubular net bandage
Open-mesh tubular structure
Holding dressings in place
Mesh stretch, size, application area
Names overlap between suppliers, so check the intended use and the construction, not just the product title. And don’t treat plain stockinette as a universal replacement for cast padding. They do different jobs.
How to Read Stockinette Sizes and Choose the Right Fit
Size is where many first-time buyers get tripped up.
Flat Width Is Not Diameter
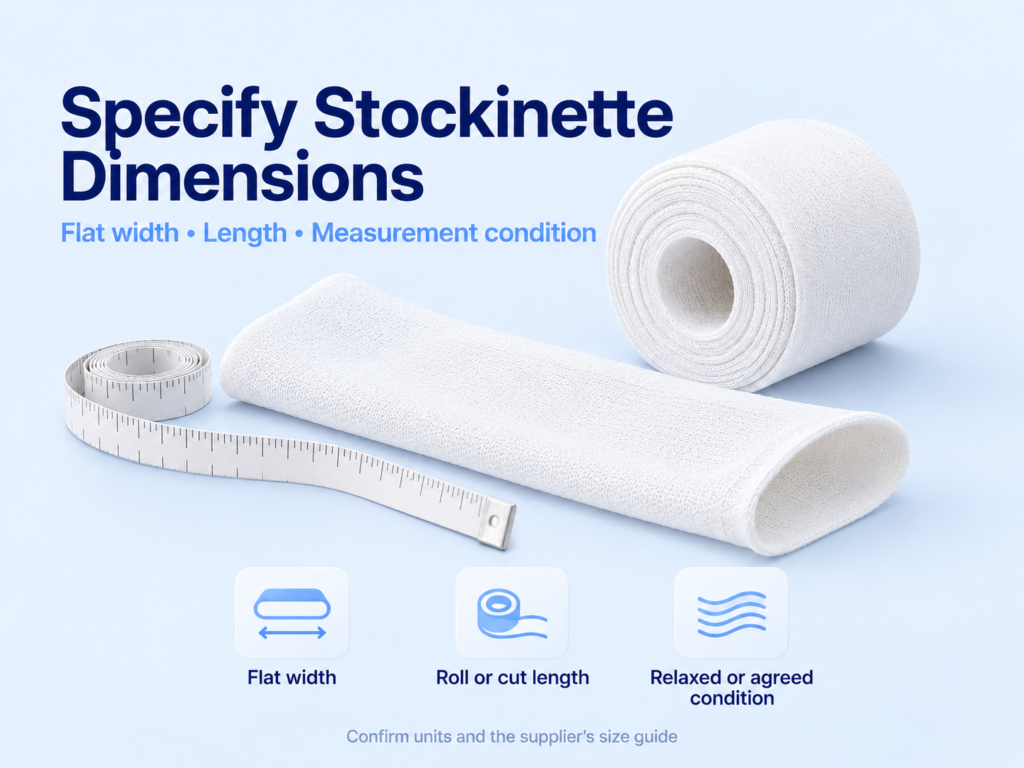
Suppliers usually list stockinette by flat width, meaning the width of the tube when it’s laid flat. For a simple tubular fabric in a relaxed, unstretched state, the circumference is roughly twice the flat width.、
That’s a geometry rule of thumb, not a clinical fitting formula. It doesn’t tell you what limb circumference a product suits, because stretch, knit structure and design all change how the fabric performs on a real limb.
State the Measurement Condition
Always ask how a size was measured. A width listed unstretched and a width listed under tension are two different numbers. Agree on the measurement condition with your supplier, and don’t treat maximum stretch as the comfortable working range.
Use the Actual Supplier Size Guide
Pick sizes from the specific product’s size chart, its intended use and an approved sample. Be wary of generic charts that say a certain inch size fits “all adults.” Those tables rarely account for the product’s actual knit and stretch.
If you’re building your own spec sheet, use fields like these:
Flat width and unit
Roll length or pre-cut length and unit
Measurement condition (relaxed or an agreed method)
Tolerance agreed with the supplier
Intended body area or application
How to Compare Stockinette Quotes on the Same Basis
Two quotes for “the same” stockinette often aren’t. Before you look at a price, confirm that both offers match on material, width, construction, sterility, packaging and trade terms. Only then normalize for length.
One trap comes up all the time. 25 yards is 22.86 metres, not 25 metres. A roll listed in yards and a roll listed in metres are not the same amount of fabric.
The formula is simple:
Price per metre = Price per roll ÷ Roll length in metres
Here’s a made-up example. These are hypothetical numbers for illustration, not Haody prices or market rates.
Illustrative quotation
Roll length
Hypothetical price
Approx. price per metre
A
25 yd / 22.86 m
USD 10.00
USD 0.437/m
B
25 m
USD 10.50
USD 0.420/m
Quote A looks cheaper per roll. Quote B is cheaper per metre. That’s the whole point: a lower roll price doesn’t always mean a lower cost per unit of fabric, provided the two products are truly equivalent.
Two limits on this method. Price per metre says nothing about quality, so it can’t be your only criterion. And for sterile or pre-cut products, compare price per compliant finished piece or pack instead of applying the roll formula.
What Buyers Should Specify and Check Before Bulk Ordering
Build a Clear Stockinette RFQ
A complete inquiry saves rounds of back-and-forth. Copy this table into your next request:
RFQ field
Buyer input / supplier confirmation
Intended use
[Specify application]
Material and construction
[Specify or request options]
Barrier requirement
[Required / not required; applicable evidence]
Dimensions and units
[Flat width; roll or cut length; measurement condition]
Sterility
[Sterile / non-sterile, as required]
Supply format
[Roll / pre-cut / pre-rolled, if available]
Packaging and labeling
[Unit pack, quantity, language, lot identification]
Quantity and destination
[Order quantity; destination market]
From Approved Sample to Bulk Delivery: What Should Stay Consistent?
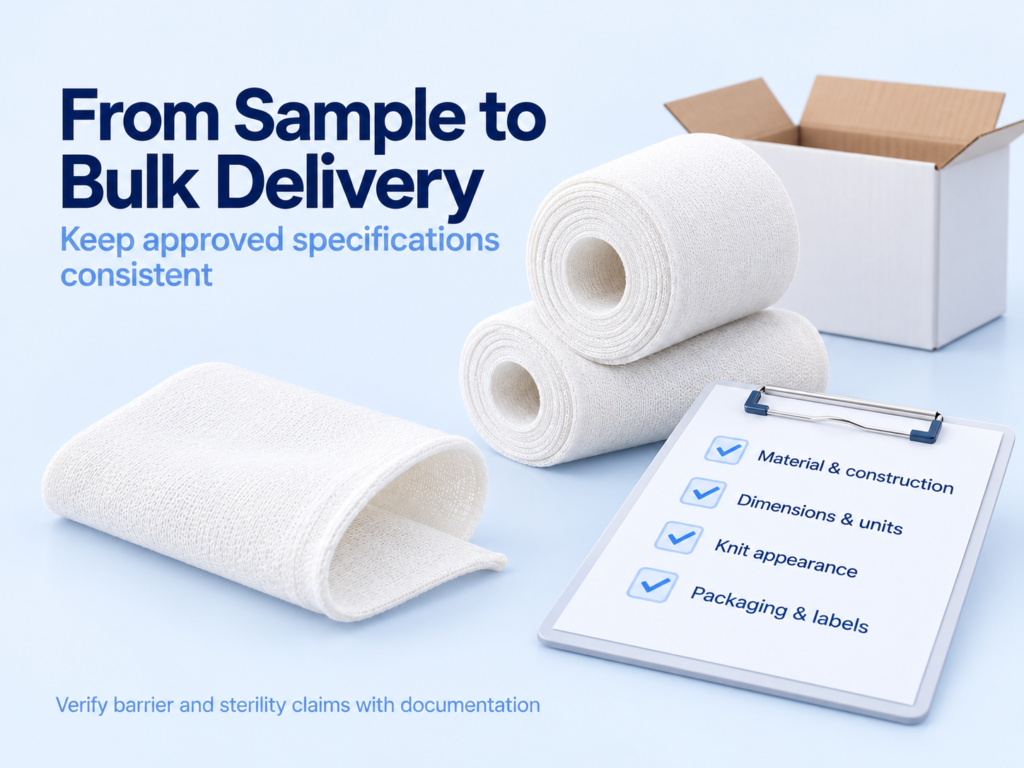
“Request a sample” is standard advice. The harder part is knowing what to compare when the bulk shipment arrives. Use a checklist like this one:
Checkpoint
What to record
Supporting information
When to verify
Material / construction
Agreed composition and structure
Supplier specification
Sample approval and change review
Dimensions
Width, length, units, measurement condition
Agreed method and tolerances
Sample and agreed incoming checks
Surface / knit
Visible defects and agreed appearance
Approved reference sample
Sample and incoming visual checks
Stretch / recovery, where relevant
Agreed evaluation conditions
Applicable method or test record
Sample approval; risk-based batch checks
Barrier / sterility claims
Required property and supply status
Relevant validated documentation
Before approval and when changes occur
Packaging / labels
Pack count, product identity, lot markings
Approved artwork / packing specification
Pre-shipment or incoming checks
A few practical points:
Photos, hand feel and a quick visual check can’t prove sterility or barrier performance. Those need the right documentation.
Tolerances, test methods and acceptance criteria should be agreed by both sides in writing.
Keep the approved sample and the specification version on file, along with a record of any change.
Frequently Asked Questions
Is medical stockinette the same as a compression bandage?
Not by default. Terms overlap across catalogs, but a plain liner shouldn’t be assumed to provide therapeutic compression. Check the specific design and label.
Is cotton stockinette waterproof?
You can’t tell from the fiber name alone. Waterproofing depends on construction, such as a dedicated barrier layer, and on the product’s intended use.
Is all medical stockinette sterile?
No. Products are supplied both sterile and non-sterile. Look at the label and the accompanying documentation for the exact product.
Can stockinette replace cast padding?
They serve different roles. Follow the instructions of the specific fixation system, and don’t treat one as a universal substitute for the other.
What information should I send when requesting a quotation?
Send the intended use, material and construction, dimensions with units, sterility requirement, packaging, quantity and destination market. The RFQ table above covers the details.
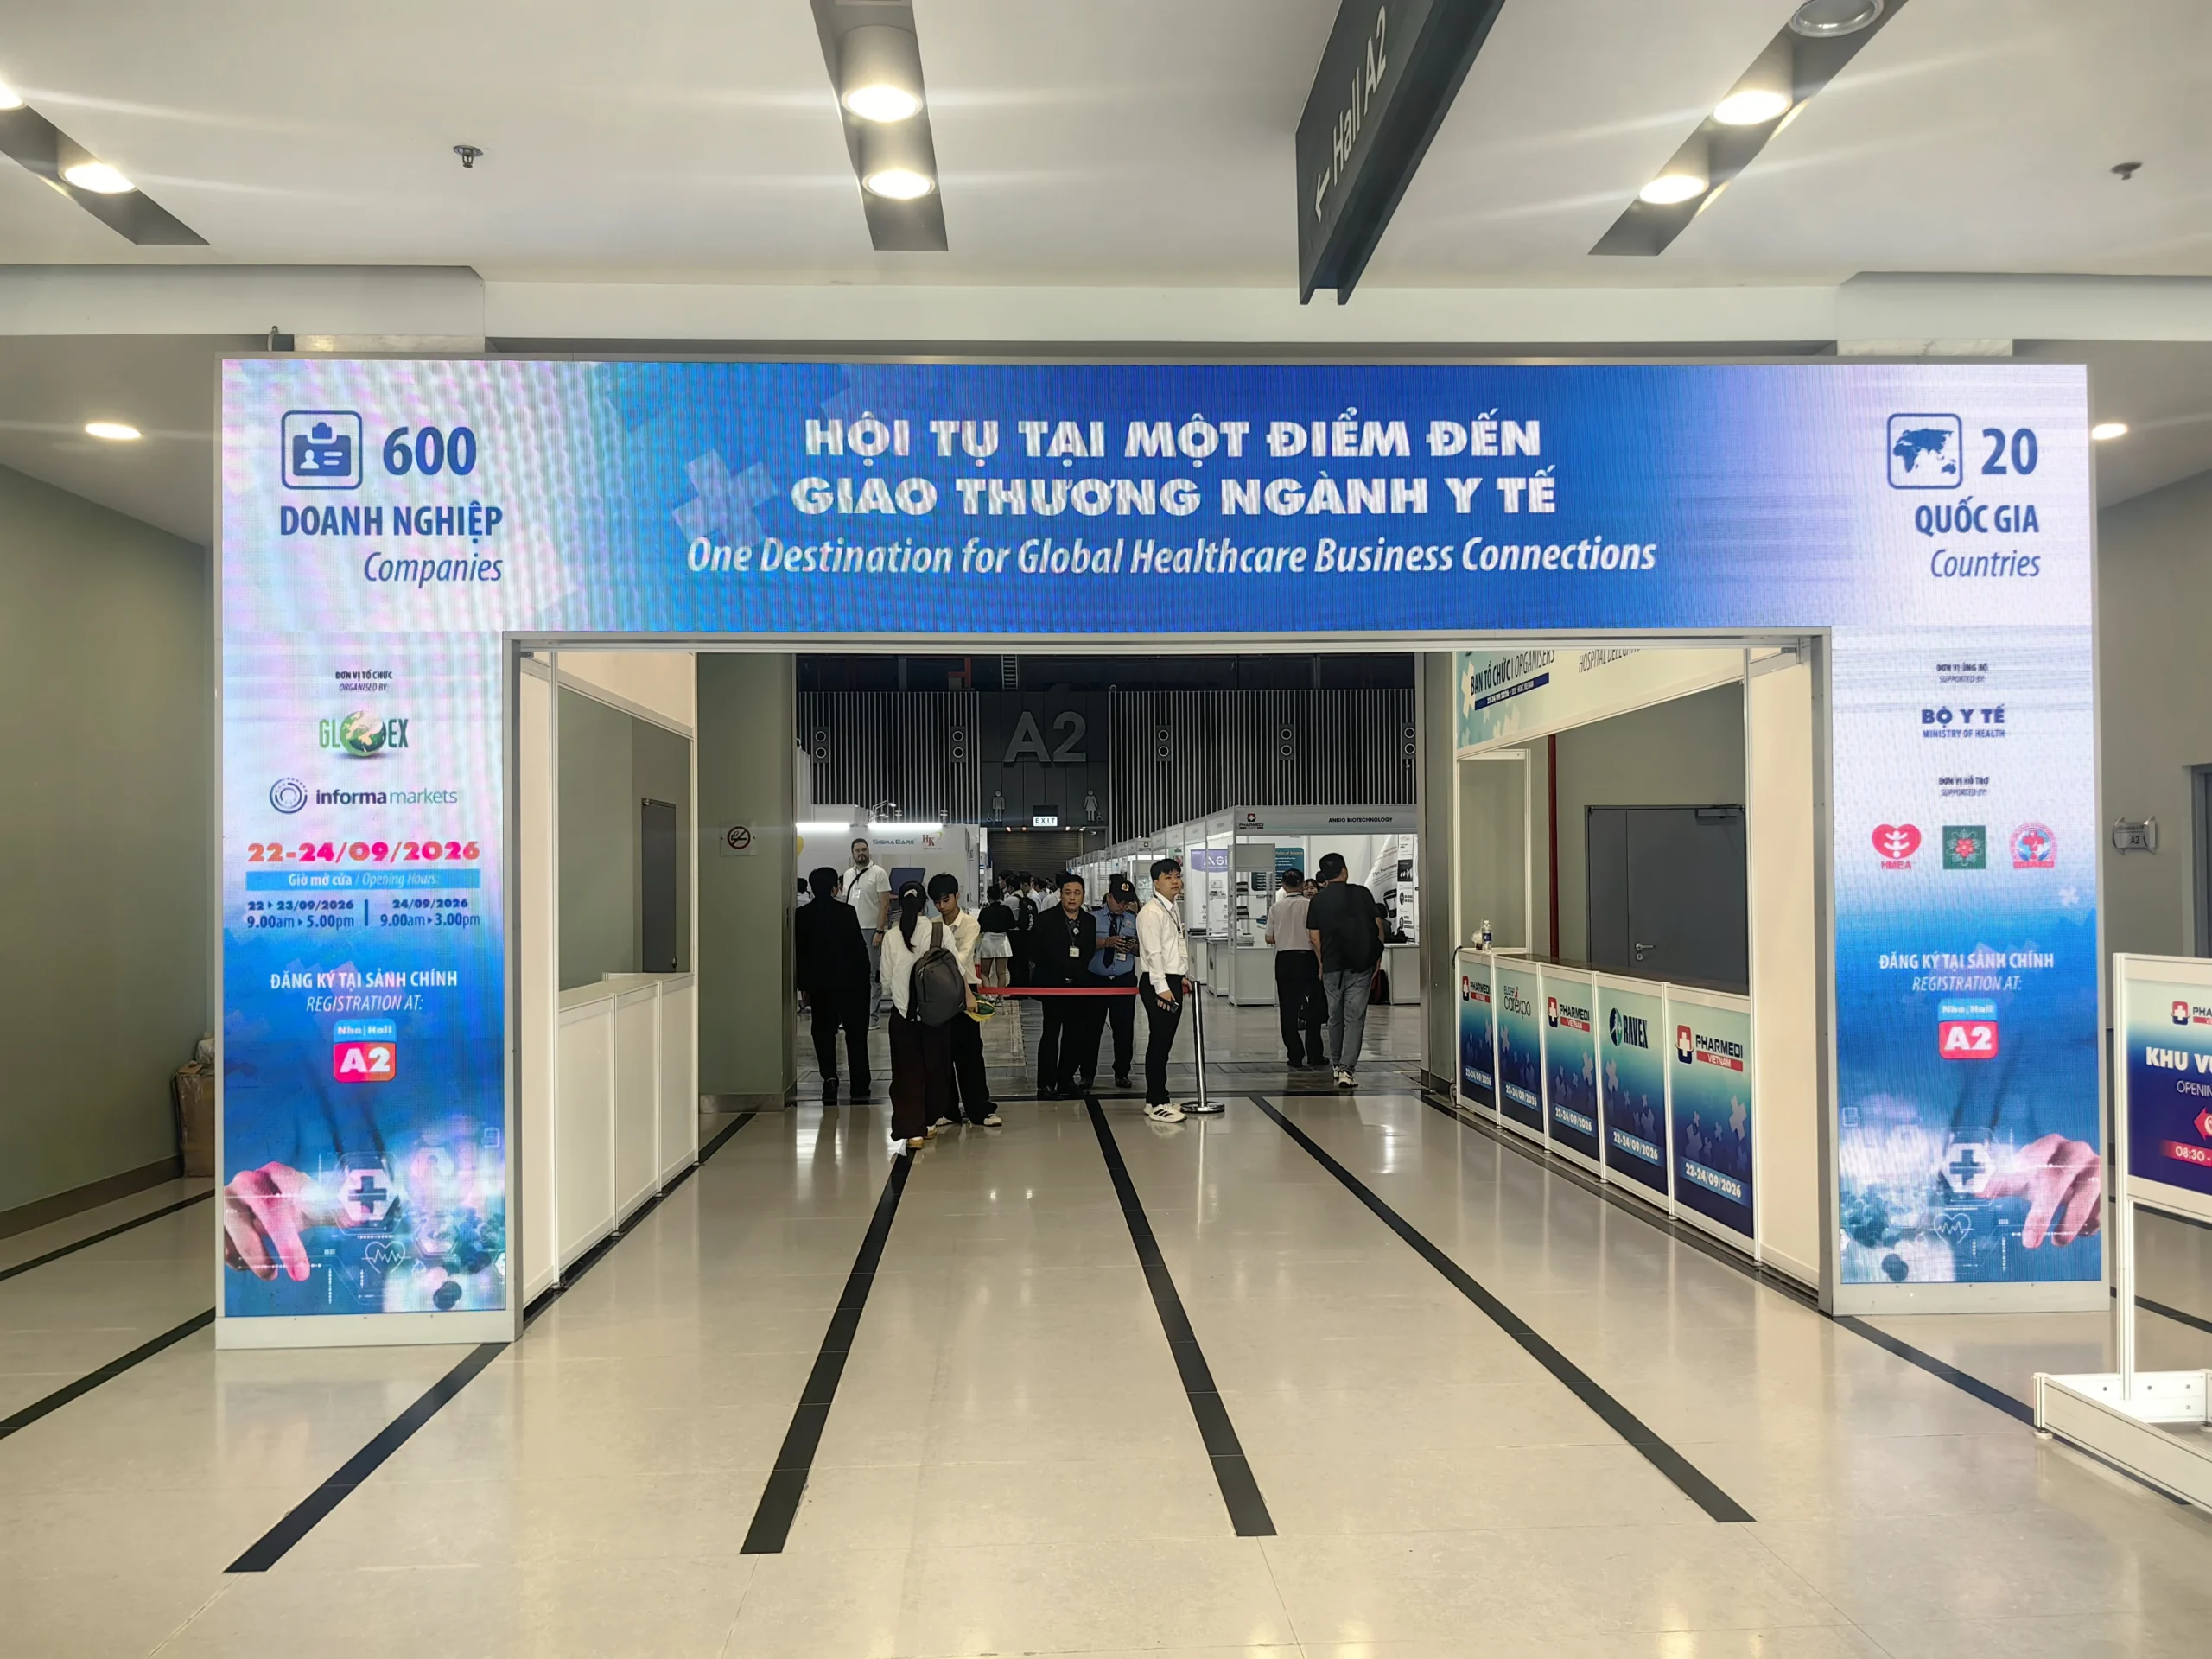
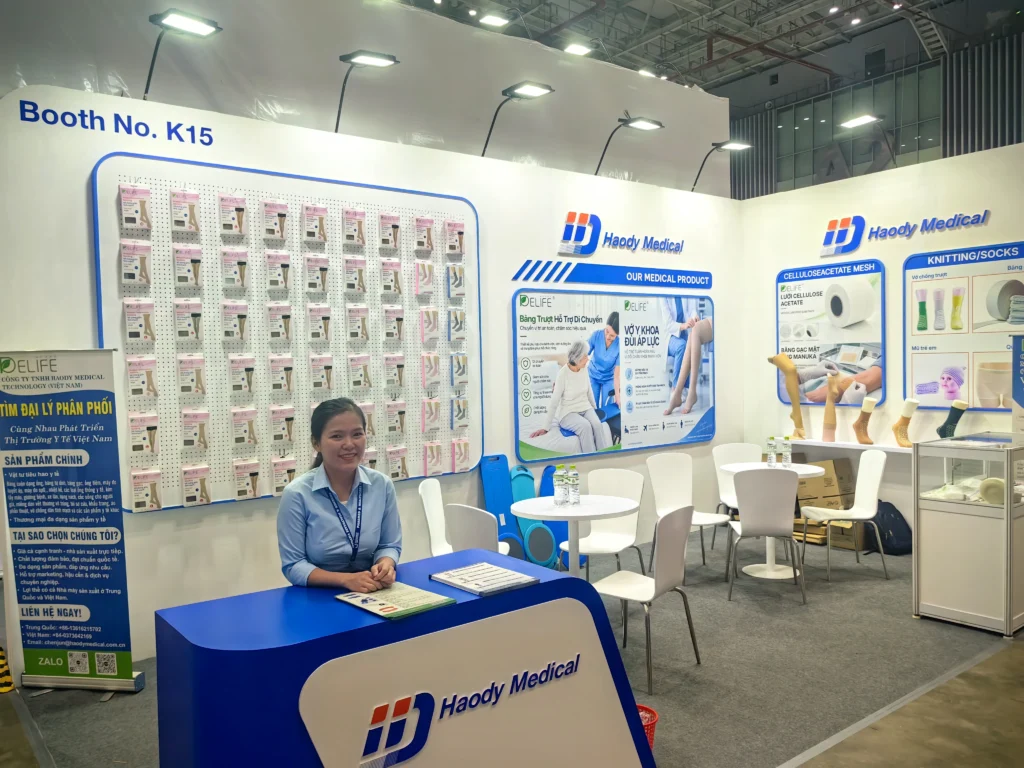
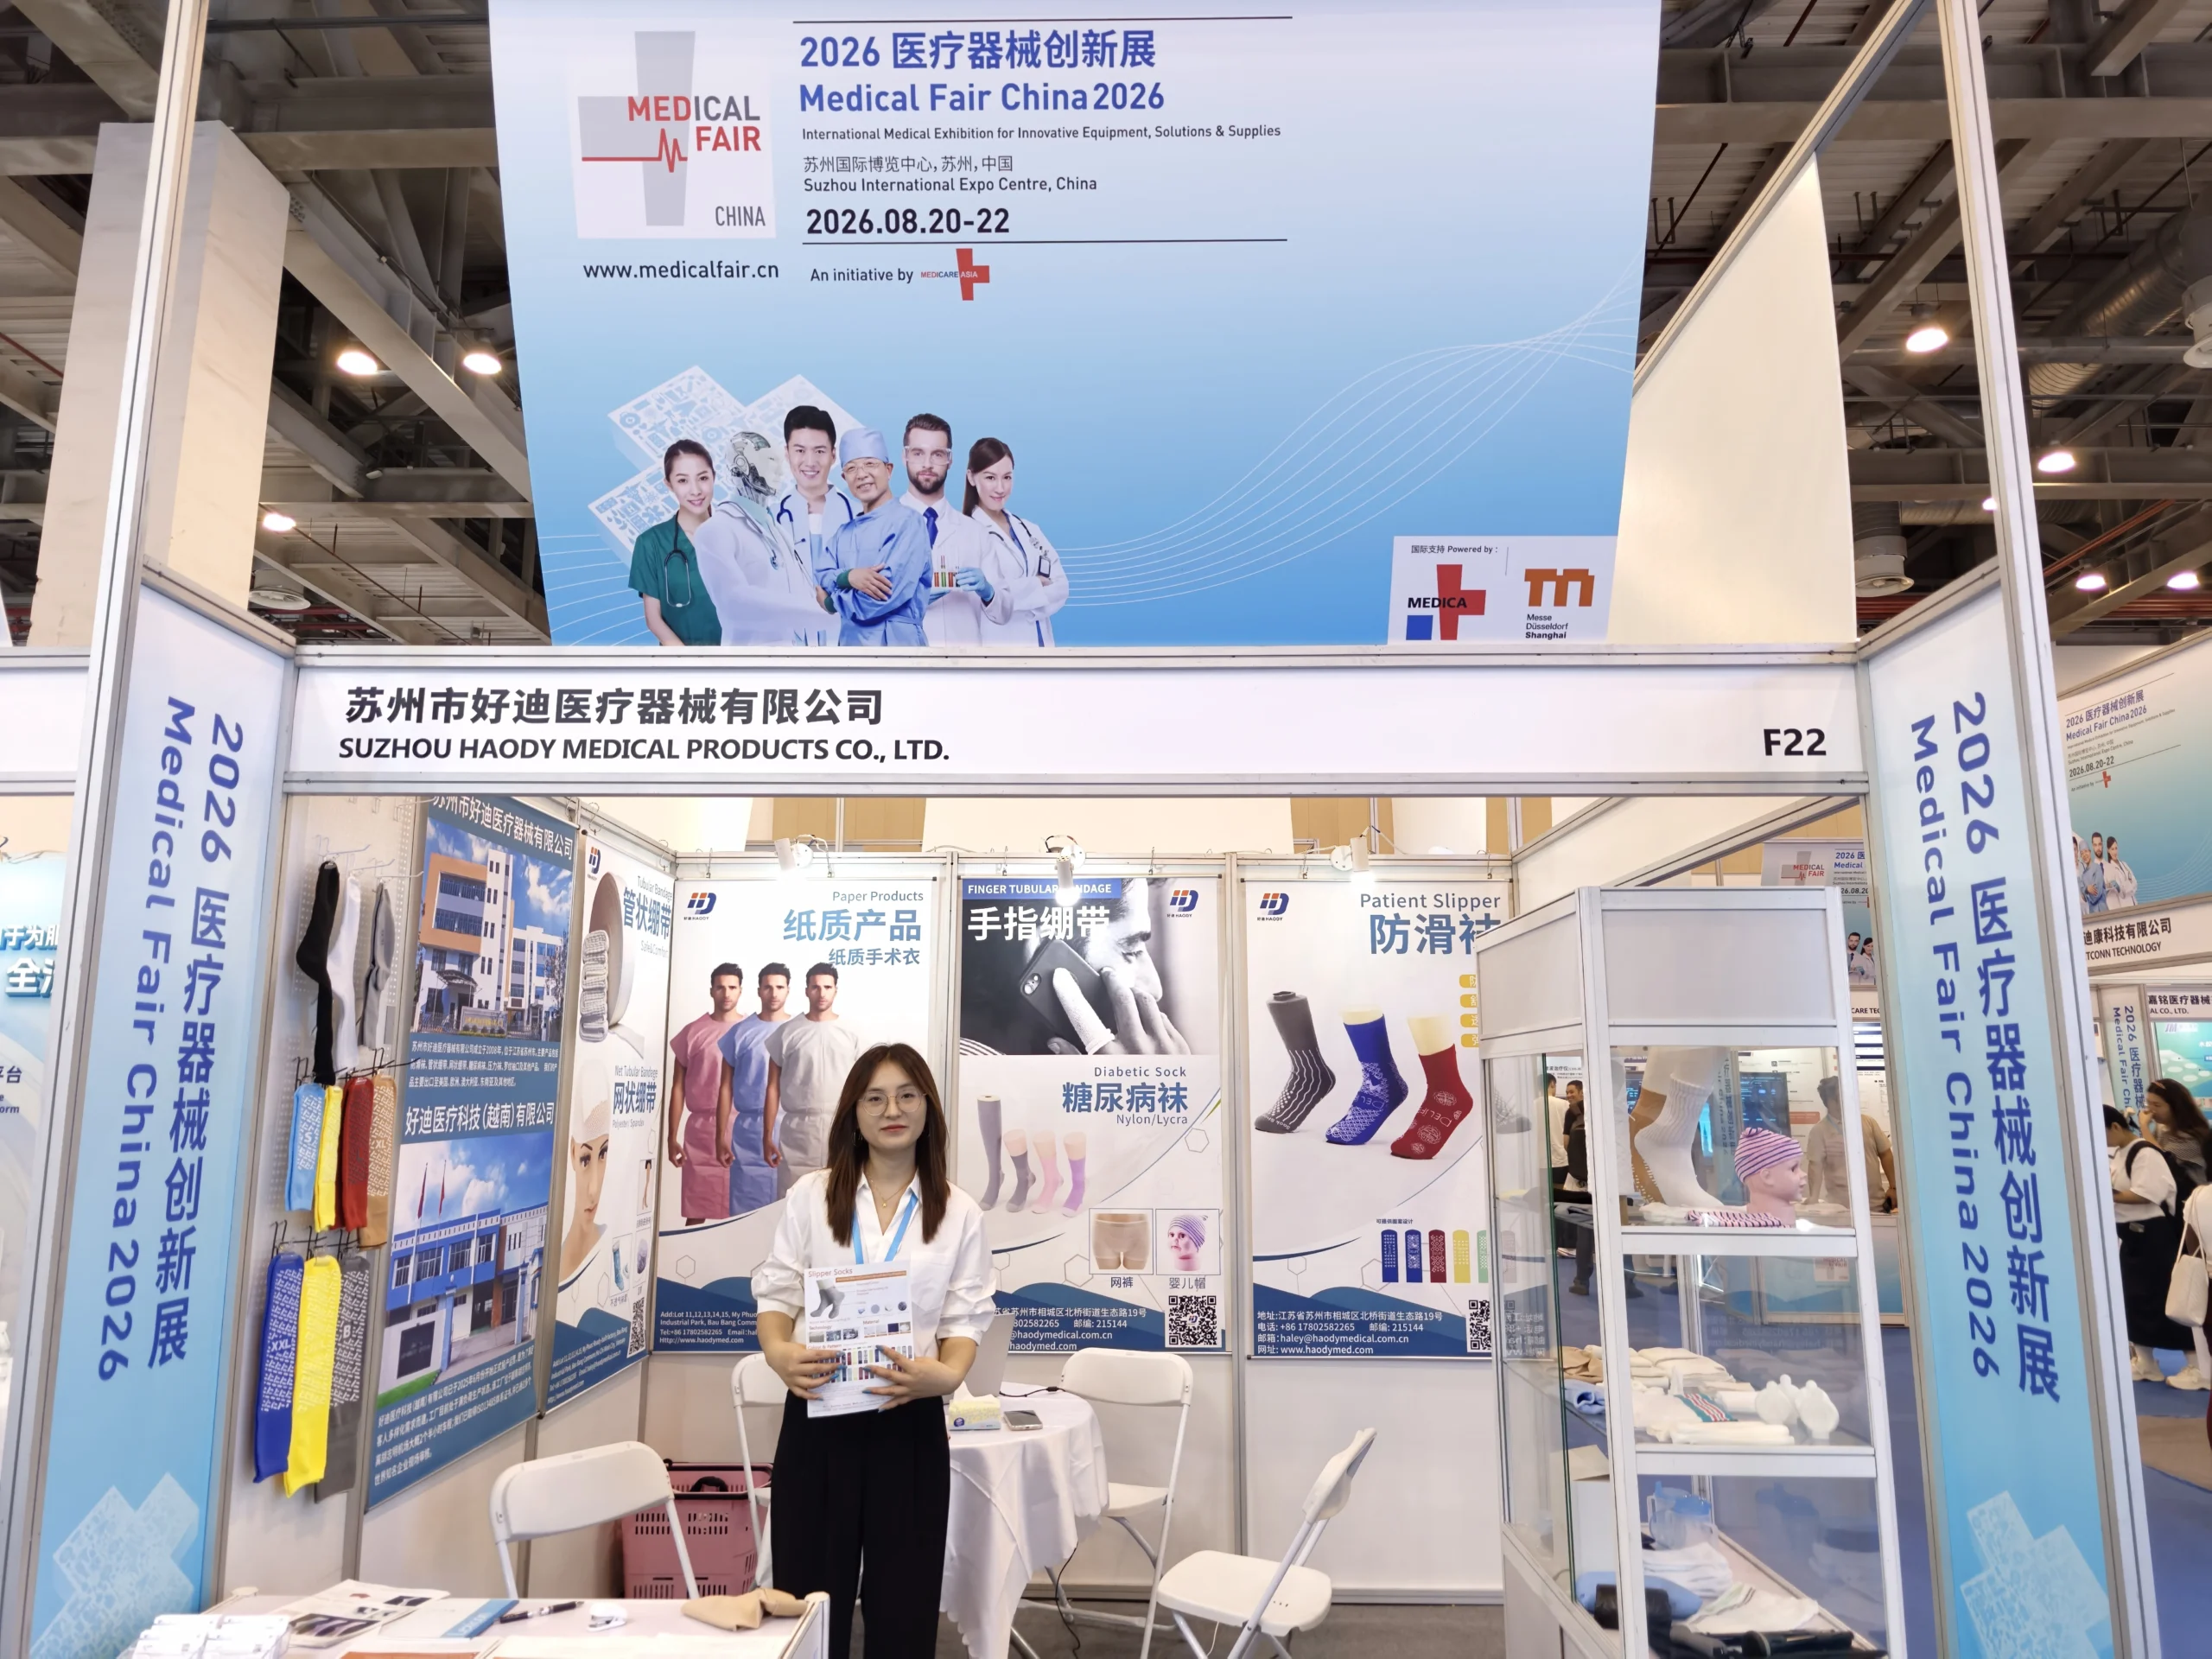
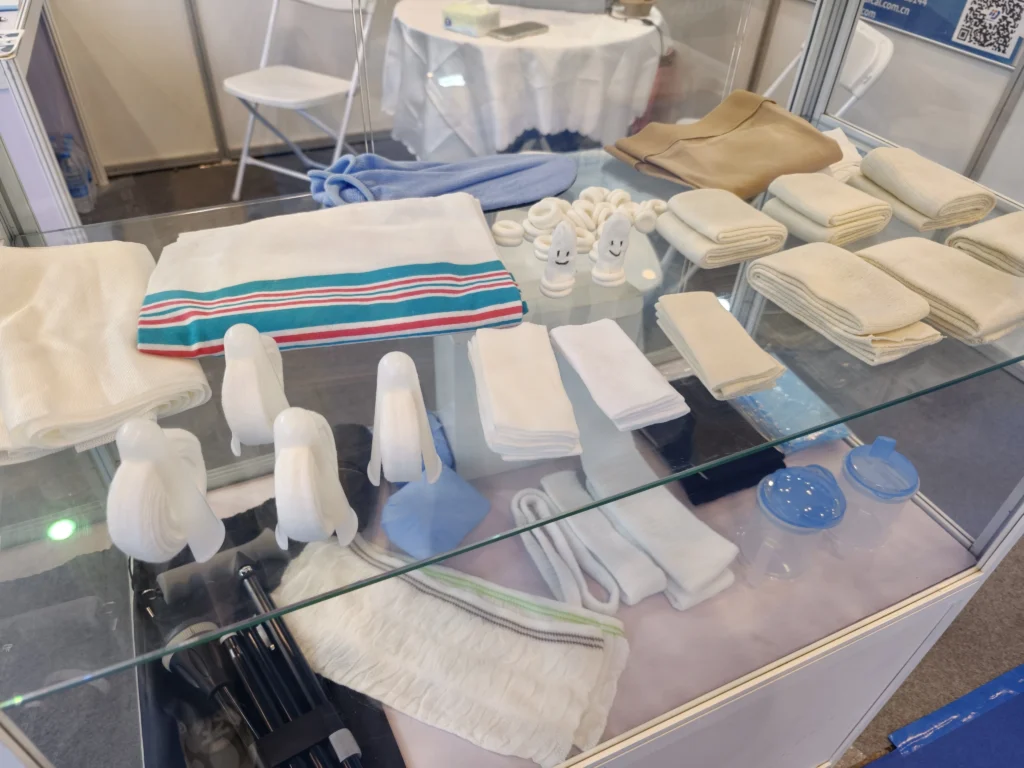
Haody Medical exhibited at PHARMEDI & Healthcare Vietnam 2026, held from 22–24 September 2026 at the Saigon Exhibition and Convention Center (SECC), Ho Chi Minh City, Vietnam. At Booth K15, we presented medical textiles and patient care products, with displays featuring compression stockings, hospital socks, tubular bandages, cellulose acetate mesh and patient transfer boards.
Our booth brought product samples, Vietnamese-language information and face-to-face conversations together, giving visitors a closer look at the range and a direct way to connect with our team.
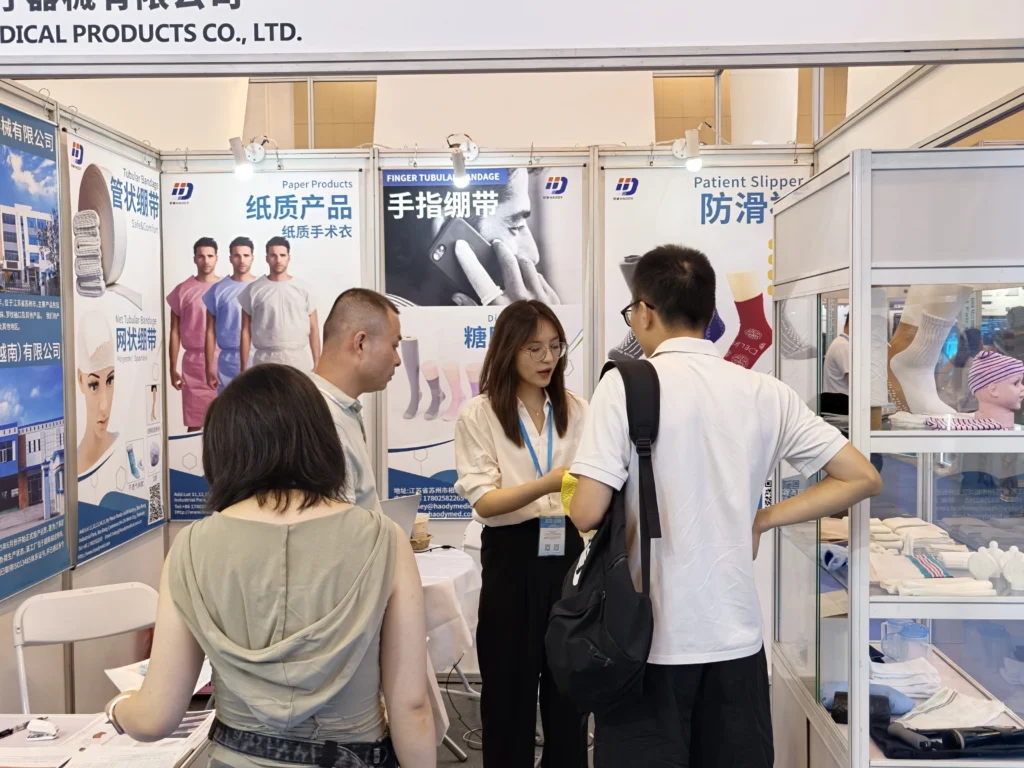
Haody Medical Booth K15 with a team member, packaged hosiery and medical product displays at PHARMEDI Vietnam 2026
A Closer Look at the Products at Booth K15
The booth combined packaged products, display samples and application posters. Visitors could view the product range and speak with our team about items relevant to their sourcing needs.
Compression Stockings and Hospital Socks
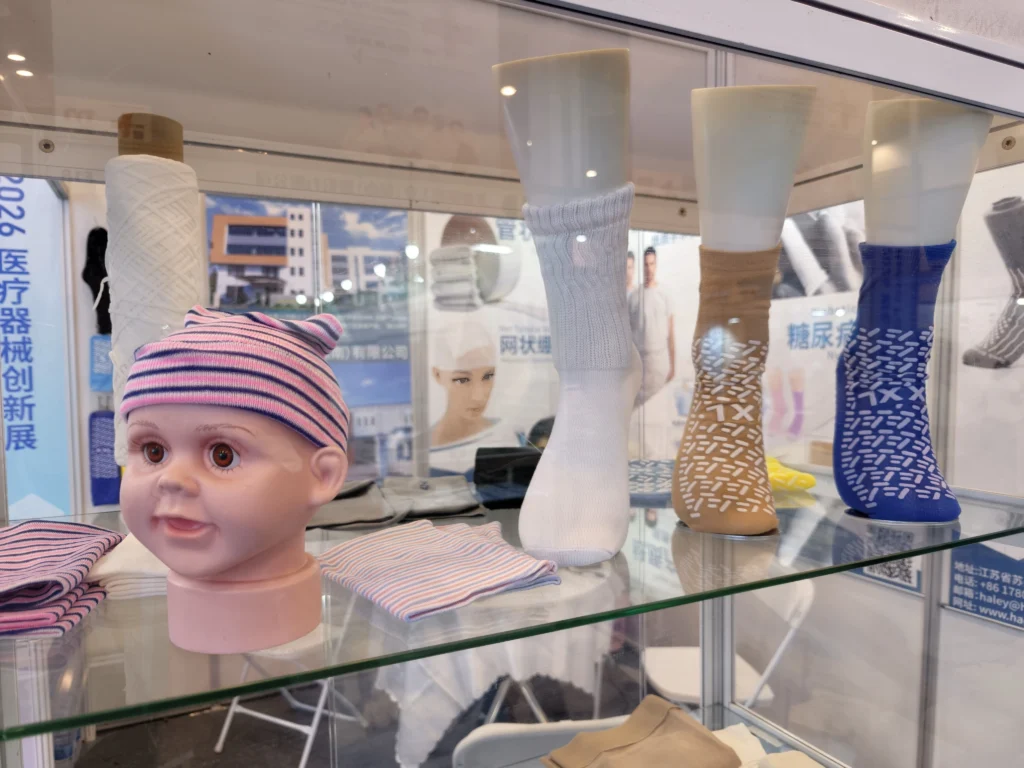
Compression hosiery formed a prominent part of the display, with packaged products on the main wall and leg forms showing selected styles. Visitors could also see hospital sock samples alongside the wider knitted medical product range.
For buyers reviewing compression stockings, useful follow-up information includes the required length, size range, compression specification and packaging format. Hospital sock inquiries can include material preferences, sizing and grip-pattern requirements.
Tubular Bandages and Knitted Medical Products
The exhibition panels also introduced tubular bandages and other knitted healthcare products. These categories are relevant to buyers building a broader medical consumables portfolio.
To help identify suitable options, buyers can share the intended application, dimensions, material requirements and preferred pack quantities. Our medical products overview provides a starting point for reviewing the range.
Cellulose Acetate Mesh
Cellulose acetate mesh featured in a dedicated display area. This material is supplied as a substrate for further processing in wound dressing manufacturing.
For dressing manufacturers evaluating a substrate, the next step is to discuss the required format, dimensions and compatibility with the intended manufacturing process. Material samples and technical specifications should be assessed against the requirements of the finished dressing.
Patient Transfer Boards
Patient transfer boards were also displayed, alongside visual information showing their care applications. Buyers interested in this category can request model-specific dimensions, product documentation and instructions for use.
Connecting with Distribution Partners in Vietnam
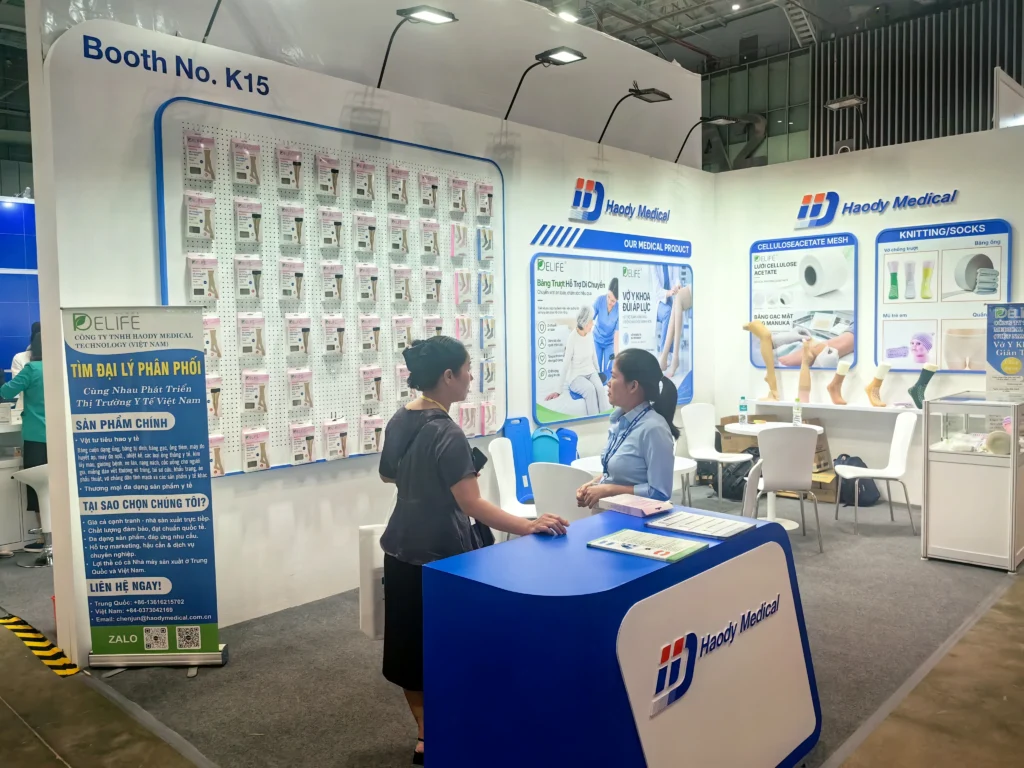
Local distribution was a clear focus of our booth, with Vietnamese-language materials inviting distributor inquiries. The exhibition provided a setting for direct introductions and product conversations with visitors.
We welcome follow-up inquiries from medical distributors, importers, medical supply retailers and healthcare procurement teams. Whether the requirement is a selected product category or a broader sourcing program, sharing the target market and purchasing needs helps our team prepare relevant information.
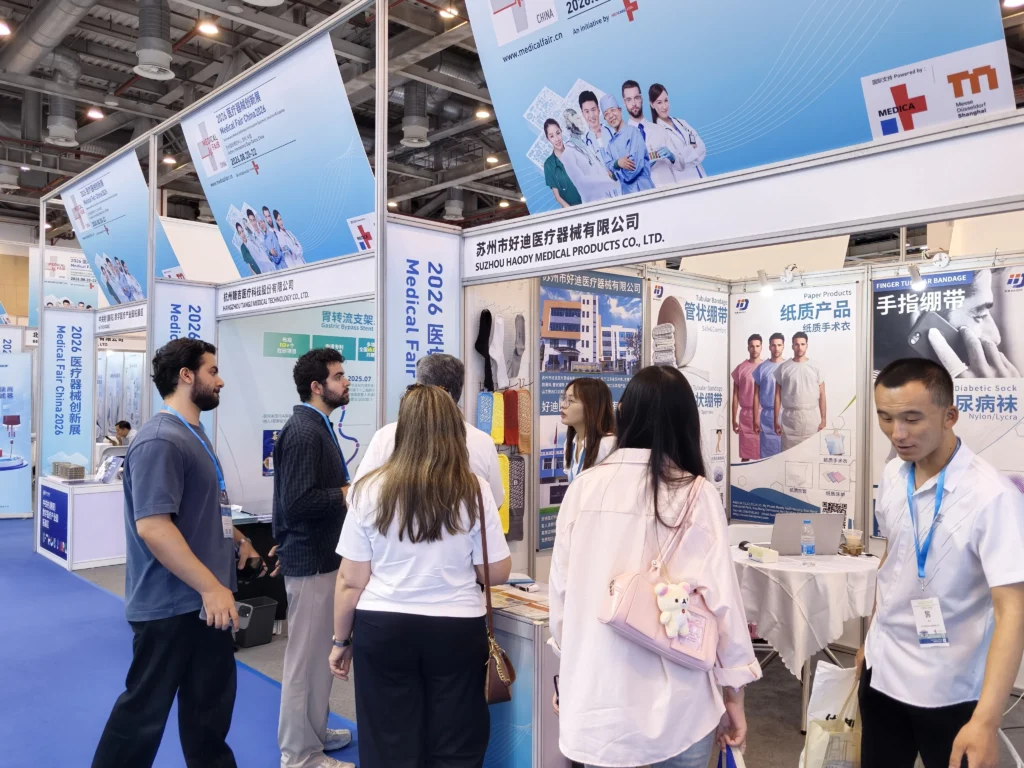
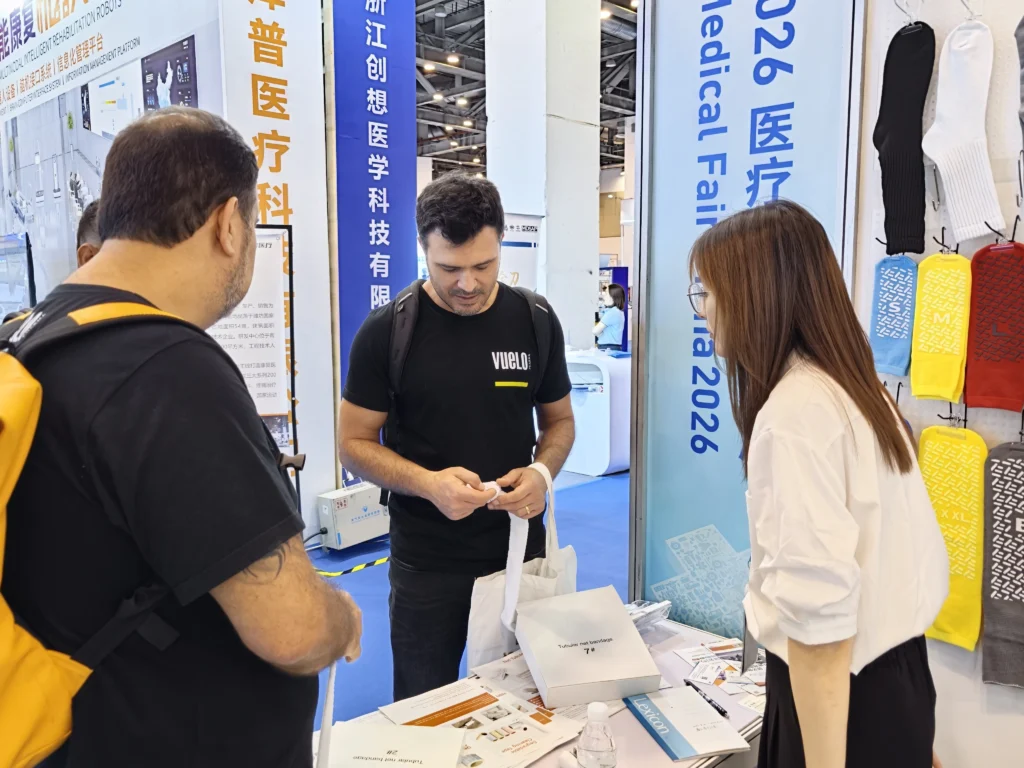
A Haody Medical team member speaking with a visitor at Booth K15 during PHARMEDI Vietnam 2026
Manufacturing in China and Vietnam
Haody Medical was established in 2008 and has manufacturing facilities in Suzhou and Anhui, China, and Ho Chi Minh City, Vietnam. This manufacturing presence is part of our work with healthcare distributors and brands in international markets.
For OEM/ODM projects, buyers are welcome to discuss product specifications, branding and packaging requirements. Available options, order quantities and production arrangements should be confirmed for each project.
Continue the Conversation After PHARMEDI Vietnam 2026
Thank you to everyone who visited Booth K15 and took the time to learn about our products.
If you met our team at the exhibition—or would like to explore the range after the event—contact Haody Medical to request a catalog, discuss samples or submit a sourcing inquiry.
To help us respond with relevant details, please include:
The product category or model you are interested in.
Your destination market and intended sales channel.
Required specifications and estimated order quantity.
Private-label or packaging needs.
Your expected purchasing timeline.
We look forward to continuing conversations with distribution and healthcare supply partners in Vietnam and other markets.
A dressing can be clinically appropriate, correctly applied, and still fail to stay where it should.
Tape can loosen around a moving joint. It can be inconvenient on fingers, toes, or other irregular body contours. And when a dressing needs frequent checks or changes, removing and reapplying adhesive tape again and again can make the process more complicated than it needs to be.
That is where a tubular net bandage comes in.
It is not a primary dressing. It is not automatically a compression product. And it is not simply another name for a standard tubular bandage.
Instead, a tubular net bandage is a lightweight, stretchable, open-mesh layer designed to help hold a dressing in place.
In this guide, you will learn what tubular net bandage is, where it is commonly used, how sizing works, and what distributors, healthcare suppliers, and private-label buyers should confirm before placing a bulk order.
Quick Answer: A tubular net bandage is an open-mesh, stretchable medical textile used as a secondary layer to retain a primary dressing. Buyers should select it based on the body area, finished dressing bulk, mesh construction, stretch and recovery, size system, packaging format, and intended market requirements.
What Is a Tubular Net Bandage?
A tubular net bandage is a seamless, tube-shaped, open-mesh textile that stretches over a body area and the dressing beneath it.
Its role is straightforward: it helps keep a primary dressing in position.
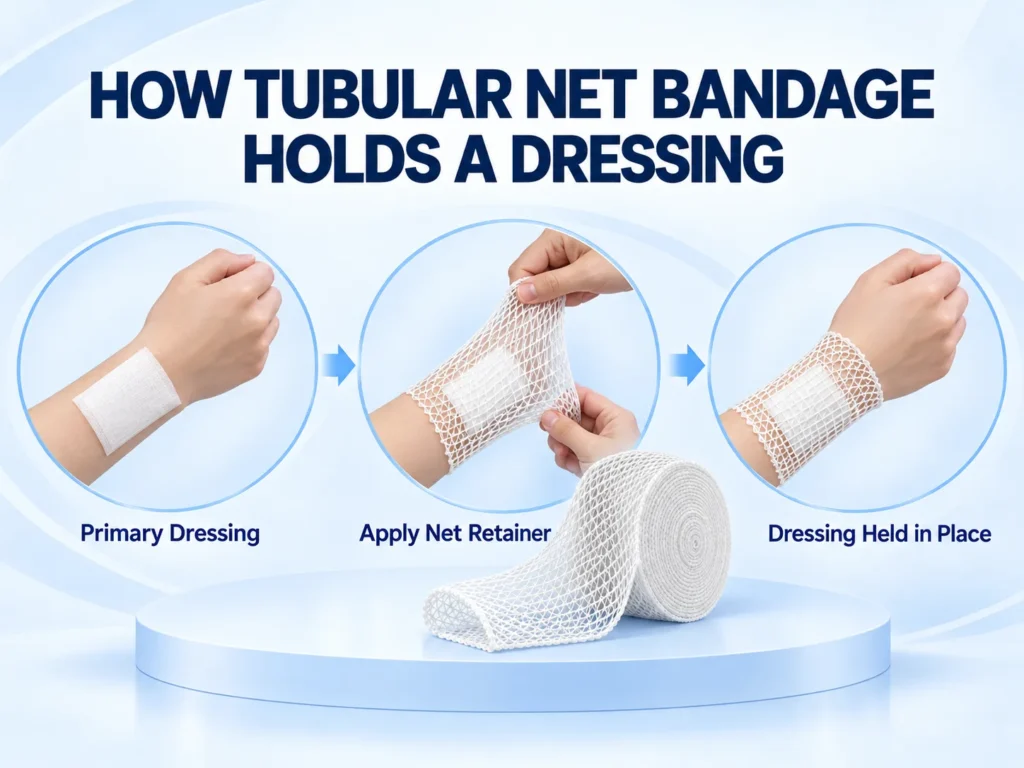
For example, a healthcare professional may apply a gauze pad, foam dressing, absorbent pad, or another appropriate primary dressing first. A tubular net bandage can then be placed over that dressing to help secure it without wrapping the area in dense fabric or applying adhesive tape around every edge.
Most tubular net bandages are supplied in one of several formats:
Continuous rolls
Dispensing boxes
Pre-cut lengths
Standard hospital packs
Distributor or private-label packaging
The open-mesh construction is what separates this product from many conventional tubular bandages. Rather than fully covering the area with a dense knit, the net structure provides flexible retention while keeping the outer layer relatively lightweight.
Here is the important distinction:
A tubular net bandage is generally a dressing-retention product. It should not be assumed to provide compression, therapeutic support, wound treatment, or clinical protection unless the specific product is designed, tested, and labeled for that purpose.
If you need a broader overview of tubular textile products, see our Tubular Bandage Guide.
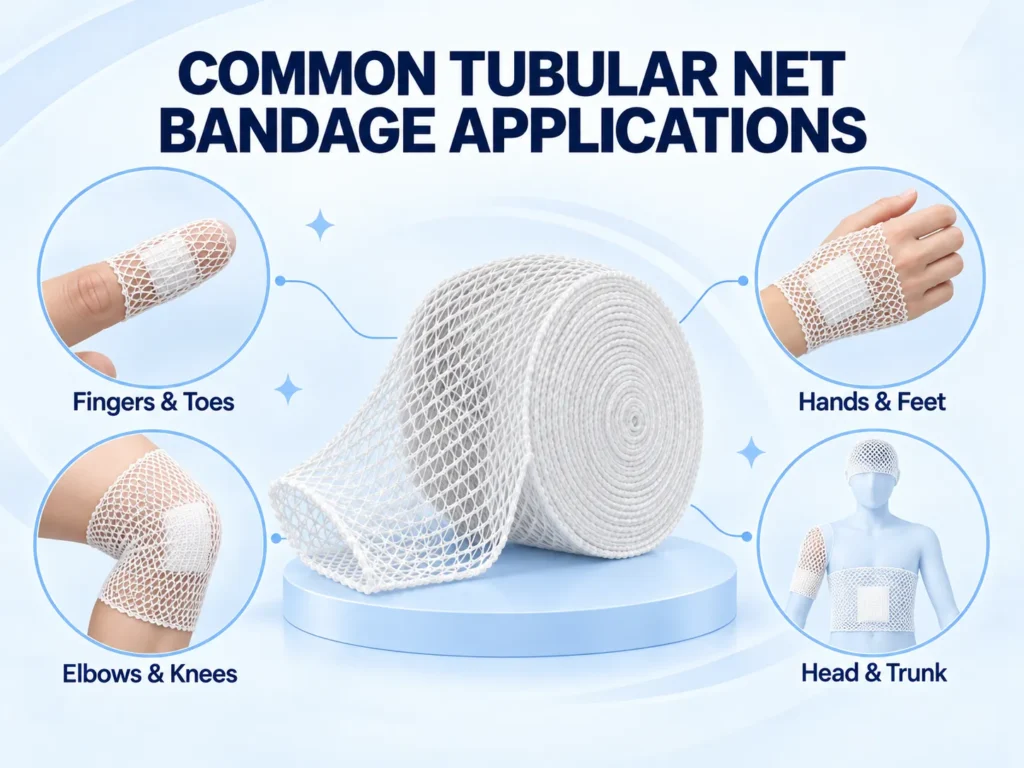
Tubular net bandage has one main job: helping hold a dressing in place.
But that simple function can be useful in several different care and supply situations.
Holding Primary Dressings in Place
This is the most common use.
After a primary dressing has been selected and applied, tubular net bandage can be placed over it as a secondary retention layer. It helps reduce the risk of the dressing shifting during normal movement.
This can be especially useful when a flat dressing needs to conform to a rounded, mobile, or difficult-to-wrap area.
The key point is simple:
Tubular net bandage helps retain a dressing. It does not replace the primary dressing itself.
Covering Difficult Body Contours
Some body areas are inconvenient to secure with adhesive tape or a traditional rolled bandage.
Think about:
Fingers and toes
Hands and feet
Elbows and knees
Shoulders
The head
Smaller limbs
Larger limbs
Parts of the trunk
These areas can move frequently, have uneven contours, or make tape placement difficult.
An elastic net structure can stretch over those contours more easily than a flat dressing-retention method. But suitability always depends on the specific dressing, body area, patient condition, product instructions, and applicable professional guidance.
Supporting Frequent Dressing-Change Workflows
In some care settings, dressings need to be checked, changed, or adjusted more often.
A tubular net retainer may simplify that workflow because it can be removed and repositioned without applying fresh adhesive tape each time.
That does not make it a treatment product. It is simply a practical fixation option for workflows where dressing access matters.
For healthcare providers and distributors, this can be a useful product-positioning point:
Easy to remove for dressing inspection
Easy to replace after a dressing change
Less dependence on adhesive fixation
Flexible for different body contours
Available in multiple sizes and formats
When Tape Is Not Preferred
In some situations, adhesive tape may not be the preferred fixation method.
For example, a care team may evaluate alternative retention options when tape is inconvenient, when the body contour makes taping difficult, or when frequent dressing changes make repeated tape application impractical.
Still, avoid overpromising.
Do not describe a tubular net bandage as “safe for all skin types,” “non-irritating for everyone,” or “able to prevent skin damage.” Product suitability depends on the actual material, application, dressing type, patient condition, and professional judgment.
Tubular Net Bandage vs. Tubular Bandage
The names sound similar.
The products are not interchangeable.
A standard tubular bandage is usually made from a denser knitted or elasticated textile. Depending on its construction, it may be used for coverage, protection, dressing retention, or light support.
A tubular net bandage has a different focus. Its open-mesh structure is primarily designed for flexible dressing retention.
Feature
Tubular Net Bandage
Tubular Bandage
Construction
Open-mesh, stretchable net structure
Denser knitted or elasticated tubular textile
Main role
Holding dressings in place
Coverage, protection, retention, or light support depending on design
Feel and coverage
Lightweight and open
More complete textile coverage
Airflow
More open by design
Depends on material and knit density
Compression
Should not be assumed
May be available in specific elasticated designs
Key sourcing focus
Mesh, stretch, recovery, fit, packaging
Material, density, width, stretch, intended function
Here is the practical rule:
Choose tubular net bandage when the main requirement is flexible dressing retention. Choose a standard tubular bandage when the project requires denser coverage, a different textile structure, or a product with specifically defined support characteristics.
This is where many buyers make avoidable mistakes.
A product can look correct in a catalog and still be the wrong size in actual use.
Why?
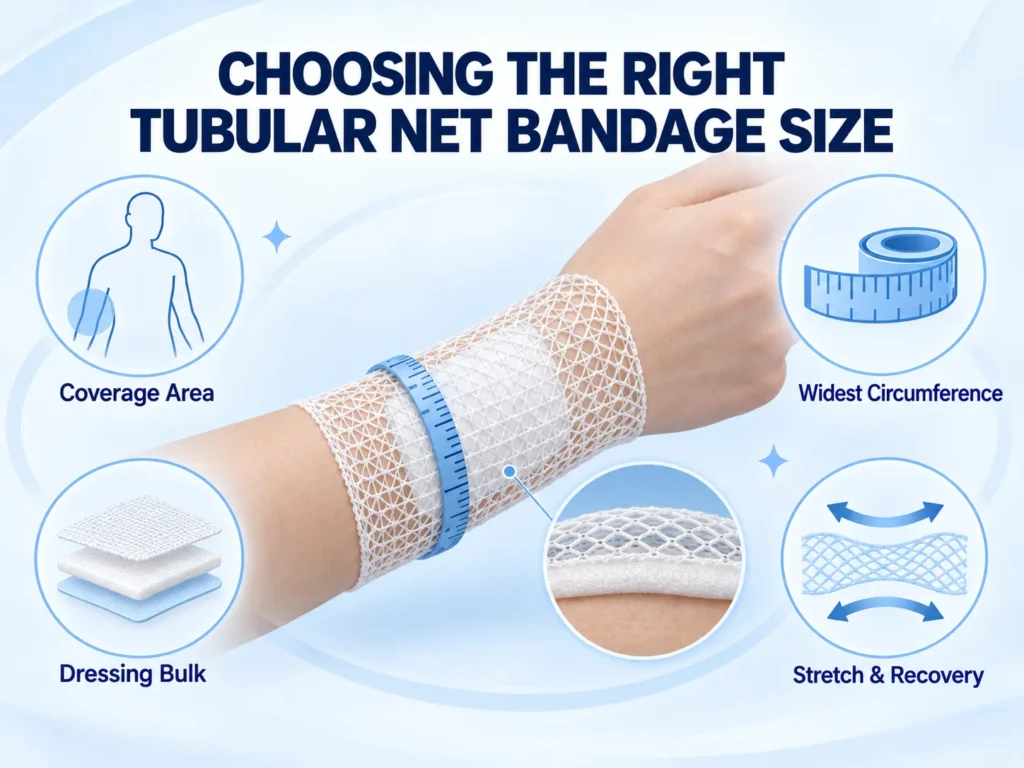
Because a tubular net bandage does not only need to fit the body area. It also needs to fit over the finished dressing.
Start With the Coverage Area
Do not begin with the wound size.
Instead, begin with the body area the net needs to cover.
For example:
Finger or toe
Hand or foot
Wrist or forearm
Arm or lower leg
Elbow or knee
Shoulder or thigh
Head
Trunk
The relevant measurement is the area the net must stretch over, not just the dimensions of the dressing underneath.
Measure the Widest Relevant Circumference
Once you know the coverage area, identify the widest point that the tubular net bandage must pass over.
Then compare that measurement with the supplier’s own sizing chart.
This matters because sizing systems are not standardized across the market.
One supplier may use letters such as A, B, C, D, and E. Another may use numbers such as 1 through 11. A third may list only flat width, relaxed circumference, or recommended body area.
So a “Size C” from one supplier may not match a “Size C” from another.
Buyer tip: Never approve a tubular net bandage based only on a size label. Ask for the actual product size chart, measurement method, and recommended body-area range.
Factor in Dressing Bulk
This is one of the most overlooked parts of tubular net bandage selection.
A net bandage may fit comfortably over bare skin. But once a foam dressing, gauze padding, absorbent pad, or multi-layer dressing is in place, the same net may become too tight.
Or too loose.
That is why the right sizing question is not:
“What size fits this arm?”
It is:
“What size fits this arm with the expected finished dressing underneath?”
A well-designed sample evaluation should consider:
The body area
The widest relevant circumference
The dressing thickness
The expected movement of the area
The product’s stretch and recovery characteristics
Check Recovery, Not Just Stretch
Stretch is only half the story.
A product must stretch enough to pass over the intended area. But it also needs reasonable recovery after stretching so it can continue to retain the dressing.
A net that stretches easily but does not recover well may feel acceptable during initial application and then become loose later.
When evaluating a sample, buyers should ask:
Does the net pass over the intended body area smoothly?
Does it sit evenly over the dressing?
Does it twist or bunch?
Does it become too loose after stretching?
Does it create unnecessary tightness?
Does it maintain the expected retention performance?
Product photos alone cannot answer these questions. Sample testing matters.
How to Apply Tubular Net Bandage Over a Dressing
This section is a general product-use overview, not a clinical procedure.
Actual use should follow the specific product instructions, local protocols, and qualified healthcare guidance where applicable.
Confirm that the primary dressing has already been selected and applied according to the appropriate care plan or product instructions.
Choose the tubular net bandage size based on the coverage area and the finished dressing bulk.
Prepare the required length according to the product instructions.
Gently position the net over the dressing without excessive stretching, twisting, rolling, or bunching.
Check that the dressing remains in position and that the net is not unnecessarily restrictive. Important: Tubular net bandage is designed for dressing retention. It should not be used or marketed as a substitute for a primary dressing, a prescribed compression system, or a medical support device unless the specific product is designed and labeled for that purpose.
tubular net bandage dressing retention guide
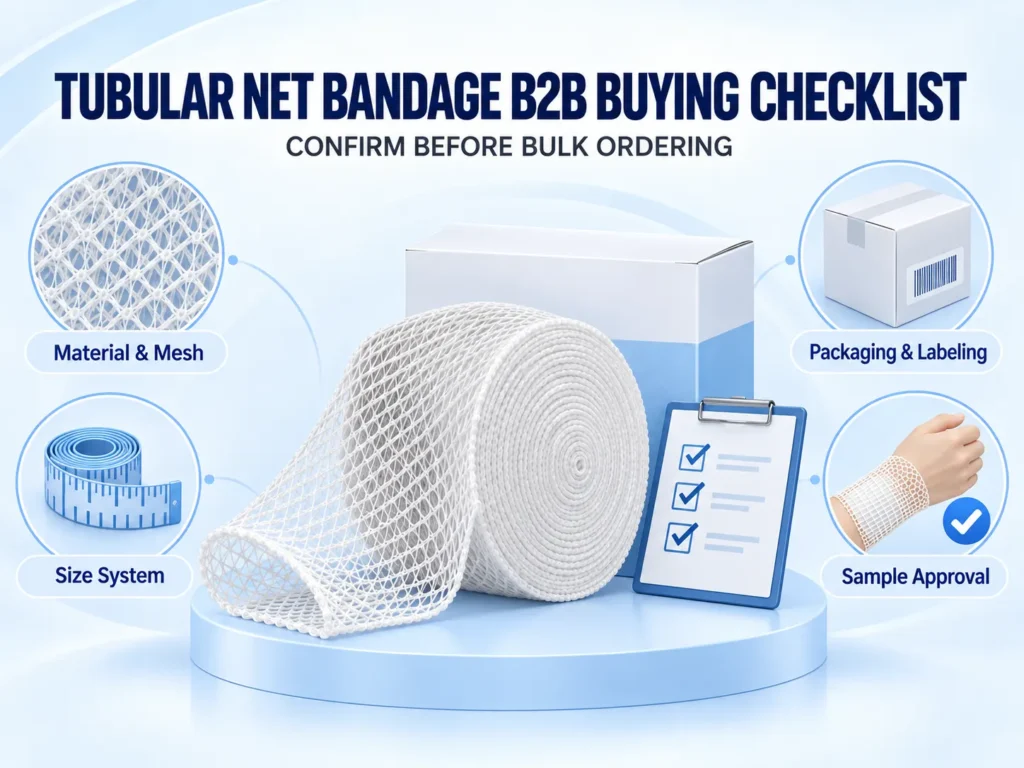
What B2B Buyers Should Specify Before Ordering
“T ubular net bandage” is a product category.
It is not a complete product specification.
For hospital supply projects, distributor programs, tenders, or private-label orders, buyers need more than a product name and a target price.
They need an agreed specification.
Specification area
What buyers should confirm
Intended use
Is the product intended for dressing retention only, or is another function expected?
Material composition
What fibers are used? Is a latex-free declaration required?
Mesh construction
What level of openness, mesh consistency, and softness is required?
Stretch and recovery
How much stretch is needed, and what recovery performance is expected?
Size system
Is sizing based on flat width, circumference, stretch range, or recommended body area?
Dressing bulk
What type and thickness of dressing must the product fit over?
Product format
Continuous roll, dispensing box, pre-cut length, or individual pack?
Packaging
Roll length, unit count, carton quantity, moisture protection, and storage requirements
Labeling
Brand name, artwork, barcode, lot number, language, and destination-market information
Private label
Custom logo, packaging design, SKU structure, and approved artwork process
Documentation
Product specification sheet, material declarations, traceability records, and quality documents
Sample approval
Will bulk production follow a signed specification and approved sample?
For B2B sourcing, this is the real difference between a smooth order and an avoidable problem.
A buyer may ask for “elastic net bandage, Size C, 25 m roll.”
But that request is still incomplete if it does not define:
What “Size C” means
What material is required
What mesh structure is expected
Whether the product needs to fit over a thick dressing
How the roll should be packaged
What label information is required
Which destination market the product will serve
A Practical Sample-Approval Checklist
Before confirming a bulk tubular net bandage order, test an approved sample against the real project requirements.
Use this checklist:
Confirm the size over the intended body area with a representative finished dressing in place.
Check whether the mesh looks consistent before and after stretching.
Test whether the net can be applied without excessive twisting or bunching.
Check whether the fit feels too loose, too tight, or appropriate for the intended retention role.
Confirm the cut edge performs as expected for the project.
Verify the roll length, packaging format, and unit quantity.
Check label content, barcode placement, batch information, and carton markings.
Confirm private-label artwork and destination-market language requirements.
Lock the approved sample and technical specification as the reference standard for production and reorders.
This extra step matters.
A size label and a product photo are not enough to guarantee that the finished product will work correctly in a real distribution or healthcare supply workflow.
Common Sourcing Mistakes to Avoid
Here are five mistakes that come up often.
Treating Tubular Net Bandage and Tubular Bandage as the Same Product
They may both be tubular. They do not necessarily have the same structure, purpose, or sourcing requirements.
Selecting Size Based Only on the Wound
The net needs to pass over the body area and the completed dressing. Wound dimensions alone are not enough.
Assuming Size Labels Match Across Suppliers
A, B, C, 1, 2, 3, Small, Medium, and Large are not universal standards.
Always request the supplier’s actual size chart.
Comparing Price Before Comparing Specifications
A lower price may reflect a different material blend, mesh construction, roll length, size range, packaging format, or quality-control standard.
Compare like for like.
Using Unsupported Medical Claims
Do not market a dressing-retention net as a wound-healing, compression, infection-prevention, or therapeutic-support product unless the specific product has been developed, tested, and labeled for those claims.
Tubular Net Bandage FAQ
What is a tubular net bandage used for?
A tubular net bandage is used to help retain an already-applied primary dressing. Its open-mesh structure can provide flexible fixation without relying on adhesive tape around the entire dressing area.
Is tubular net bandage the same as tubular bandage?
No. Tubular net bandage is generally an open-mesh dressing-retention product. Tubular bandage is usually denser and may serve coverage, protection, retention, or light-support functions depending on the product design.
How do I choose the right tubular net bandage size?
Start with the body area to be covered, measure the widest relevant circumference, consider the thickness of the finished dressing, and confirm the final choice using the supplier’s own size chart and an approved sample.
Does tubular net bandage provide compression?
Not by default. Its main role is dressing retention. Any compression or support characteristic depends on the specific product’s design, testing, labeling, and intended use.
Can tubular net bandage be supplied for private-label programs?
Depending on the supplier’s manufacturing capabilities, tubular net bandage may be available for private-label programs. Buyers should confirm the material, size range, packaging, label artwork, barcode requirements, destination market, and order quantity before requesting a quotation.
Source Tubular Net Bandage for Your Supply Program
Looking for tubular net bandage for a hospital supply chain, medical distributor, pharmacy brand, or private-label program?
Share your intended application, preferred material, target size range, packaging format, label requirements, and destination market with the Haody Medical team.
A clear specification at the beginning helps ensure that the final product fits your sourcing needs, packaging workflow, and end-user application.
This article provides general product information for sourcing and reference purposes only. It is not medical advice. Product selection and clinical use should follow the relevant product instructions, applicable regulations, and guidance from qualified healthcare professionals.
A transfer board can turn a difficult wheelchair-to-bed transfer into a routine one.
It can also go wrong fast.
A board that’s a few inches too short. A mattress edge that’s softer than it looks. A brake that wasn’t locked. None of these are dramatic mistakes — but any one of them is enough to turn a routine transfer into a fall.
Here’s the thing: most guides on this topic jump straight to “how to slide across the board.” That’s the easy part. The part that actually determines whether the transfer goes well happens before anyone touches the board — and that’s what this guide focuses on.
Quick Answer
A transfer board may help create a supported pathway between a wheelchair and a bed for a seated transfer. Whether it’s the right tool depends on:
The person’s transfer plan, sitting balance, and upper-body function
Skin condition and any medical restrictions
Whether the wheelchair and bed are actually set up to support it
The level of caregiver assistance available
A transfer board doesn’t lift the user. It’s not a substitute for a mechanical lift when more support is needed. Always follow the product’s instructions for use and guidance from a qualified healthcare professional.
In this guide:
Why the transfer plan matters more than the board
How to prepare the wheelchair-to-bed transfer space
How to check board-to-bed compatibility (the part most guides skip)
A pre-transfer safety checklist
5 setup mistakes that undermine an otherwise good transfer
How to choose the right board
What healthcare buyers should request from a supplier
1.Start With the Transfer Plan, Not the Board
Here’s a question worth asking before anything else: is a transfer board even the right tool for this person?
That’s not a rhetorical question. It has a real answer, and it depends on a handful of factors that have nothing to do with the board itself:
Sitting balance and trunk control
Upper-limb strength and pain
Ability to understand and follow instructions during the transfer
Skin condition and risk of pressure or shear injury
Wounds, tubing, recent surgery, or other medical restrictions
How many caregivers are needed — and whether they’re trained for this specific transfer
Whether a lift, slide sheet, or other aid might actually be the better fit
None of these are calls a blog post can make for you. They belong to an occupational therapist, physiotherapist, nurse, or another appropriately trained professional who knows the person and the situation.
Bottom line: the board is one variable in the system. It’s rarely the variable that decides whether the transfer is safe.
A transfer board is not a lifting device
Say it plainly, because marketing copy tends to blur this: a transfer board bridges a gap. It doesn’t lift body weight.
And here’s something worth being upfront about: research on wheelchair transfers has found that using a transfer board doesn’t automatically reduce upper-limb loading or improve transfer performance for every user. Technique, individual function, and training matter just as much as the equipment.
That doesn’t mean boards don’t help. It means the board isn’t the whole story — and any guide that implies otherwise is oversimplifying.
2. Prepare the Wheelchair-to-Bed Transfer Space
This is the part most guides do cover — for good reason. It’s where most avoidable problems happen.
Bring the wheelchair as close to the bed as possible
The closer the two surfaces, the shorter the gap the board actually has to cover. Before positioning the chair:
Clear away footstools, side tables, cables, or loose rugs
Make sure there’s enough room for a caregiver to move safely, if one is assisting
Position the wheelchair according to the individual’s transfer plan — the right angle depends on the room, the chair, and the person, not a fixed number
Stabilize both surfaces before the board goes anywhere near them
Lock the wheelchair brakes. Every time. No exceptions.
Lock the bed castors, if it has them.
Set the bed height according to the transfer plan.
Check the mattress edge isn’t so soft that it compresses under the board and undermines support.
Confirm the floor is dry and nothing underfoot can shift.
Create a transfer path with nothing in the way
Remove or adjust footrests and, if the chair allows it, the near-side armrest
Keep hands, feet, clothing, and any tubing clear of pinch points
Never let fingers rest under the edge of the board
Decide where the caregiver will stand before the transfer starts — not while it’s happening
3.Check Board-to-Bed Compatibility (The Part Most Guides Skip)
This is the section that actually separates a good setup guide from a generic one.
Check the overlap at both ends — not just the total length
A board needs stable support on the wheelchair and the bed. “Long enough to reach” isn’t the same as “stable enough to bear weight.”
What to look for in practice:
Both ends of the board rest on a firm, stable surface
The board doesn’t teeter, tip, or balance on just an edge
The board doesn’t interfere with the wheelchair frame, wheel, or cushion
How much overlap is enough depends on the board’s design and the product’s instructions for use — this isn’t something to eyeball.
Check bed height and mattress-edge support
Here’s a failure mode nobody talks about: a board that’s technically the right length can still fail if the mattress compresses too much where the board rests, or if the bed height doesn’t line up with the wheelchair seat.
This isn’t a spec you can read off a product page. It has to be checked in the actual room, with the actual bed, every time the setup changes.
Check the wheelchair configuration
Can the armrest be removed, or does it swing away?
Are the footrests fully out of the transfer path?
Is there enough clearance between the wheel and the board?
Does the cushion height match what the transfer plan assumes?
If any of these don’t line up, the fix usually isn’t a different board. It’s adjusting the setup — or reassessing the transfer plan altogether.
4.A Safety-First Framework for Using the Board
This isn’t a script to follow on autopilot. It’s a checklist to run through every time, because “every time” is exactly when shortcuts creep in.
Before the transfer
Confirm the individual transfer plan and required level of assistance
Read the board’s instructions for use and check its rated load
Inspect the board — no cracks, warping, sharp edges, deep scratches, or contamination
Confirm both the wheelchair and bed are stable
Lock the wheelchair brakes and clear the transfer path
Verify stable, adequate support at both ends of the board
Make sure clothing — not bare skin — is what touches the board
Explain what’s about to happen and agree on a cue or signal
If pain, dizziness, or fatigue shows up beforehand, stop and reassess
During the transfer
Follow the trained technique and the facility’s protocol — not shortcuts
Move in small, controlled increments rather than one long slide or a hard pull
Keep hands away from the board’s edges and any pinch points
If the board shifts, slips, or feels unstable, pause immediately
Use exactly the caregivers and equipment specified in the plan
After the transfer
Confirm the person is stable and correctly positioned before removing the board
Remove and store the board using the approved technique
Clean and inspect it per the manufacturer’s instructions
Log any damage, skin concerns, or difficulty, per facility policy
5. Setup Mistakes That Undermine an Otherwise Good Transfer
Mistake #1: Treating the board as a lift
A transfer board bridges a gap. It doesn’t replace a mechanical lift when someone needs to be fully supported or lifted rather than slid.
Mistake #2: Judging the board on length alone
A longer board isn’t automatically safer if it doesn’t have stable, firm support at both ends. Overlap and surface stability matter just as much as total length.
Mistake #3: Letting the board touch bare skin
Skin sliding directly against the board increases the risk of friction and shear injury. Clothing goes between the skin and the board — consistent with the person’s care plan.
Mistake #4: Assuming the same angle works for every transfer
Wheelchair type, armrest design, room layout, and the person’s ability all vary. What worked last time doesn’t automatically work for the next person, or even the next room.
Mistake #5: Skipping inspection because “it worked fine last time”
A reusable board that’s cracked, warped, or wasn’t cleaned properly isn’t the same product that shipped new. Every use deserves a quick check — not just the first one.
6.Choosing a Transfer Board for Wheelchair-to-Bed Transfers
Once the setup and technique are sorted, board selection comes down to a short list of concrete factors.
What to evaluate
What to confirm
Why it matters
Intended use
Designed for seated wheelchair transfers, not just labeled generically
Avoids confusion with hospital lateral transfer boards, which serve a different purpose
Shape
Straight, curved, or notched
Determines whether it clears armrests, wheels, or other obstacles
Dimensions
Length, width, thickness
Needs to match the actual gap and required overlap — not just “look long enough”
Rated load
Documented safe working load and how it was determined
Supports internal risk assessment, especially for institutional buyers
Surface and edges
Slide-friendly top, rounded edges, non-slip base
Affects comfort, skin safety, and control during the transfer
Material
Wood, plastic, or composite
Affects weight, rigidity, and how it holds up to repeated cleaning
Cleaning compatibility
Which disinfectants and methods are safe to use
Essential for reusable boards in institutional settings
Documentation
IFU, spec sheet, batch/traceability info
Required for procurement review and quality audits
7.What Healthcare Buyers Should Request From a Transfer Board Supplier
If you’re sourcing transfer boards for a care facility, distribution business, or private-label program, don’t place an order until you have these:
Product specification sheet
A clear intended-use statement
Instructions for use (IFU) and safety warnings
Rated-load documentation — and the basis for that rating
Dimensions, shape, thickness, and material details
Cleaning and disinfection compatibility guidance
Inspection and replacement guidance for reusable boards
Packaging, labeling, barcode, and language options
Traceability and quality-system documentation
Sample availability, MOQ, OEM/private-label options, and lead time
Sourcing a wheelchair transfer board for your care program or distribution project? Tell us your target market, intended use, required board type and size, documentation needs, packaging format, and forecast quantity. Our team can help you evaluate the right options.
A transfer board isn’t a universal answer to every wheelchair transfer.
When someone can’t safely maintain the position the transfer requires, can’t participate at the level the plan assumes, has skin or medical concerns that rule it out, or needs sling-supported assistance — a different transfer approach is usually the safer call.
For a broader look at transfer board types, safe-use fundamentals, and how transfer boards compare to slide sheets, gait belts, and patient lifts, see our complete guide: What Is a Transfer Board?
FAQ
Can a transfer board be used from a wheelchair to a bed? Yes, when it’s appropriate for the person’s transfer plan and the wheelchair and bed are set up correctly. Suitability should be assessed by a qualified healthcare professional — not decided from a product description alone.
How do I choose the right transfer board length for a wheelchair-to-bed transfer? Length needs to match the actual gap, with stable overlap on both ends — not just “long enough to reach.” Check the real setup, including bed height and mattress edge, rather than relying on dimensions alone.
Should the transfer board touch bare skin? No. Clothing should separate the skin from the board surface to reduce the risk of friction and shear injury.
Can a transfer board replace a patient lift? No. A transfer board bridges a gap for a seated transfer; it doesn’t lift the person. When someone needs to be lifted or fully supported, a mechanical lift or another transfer aid is more appropriate.
What should be checked before a wheelchair-to-bed transfer? At minimum: wheelchair brakes locked, bed stable, clear transfer path, board inspected for damage, stable support at both ends of the board, and confirmation that the person is ready and able to proceed as planned.
What documents should a healthcare buyer request from a transfer board supplier? A product specification sheet, IFU, rated-load documentation, material and dimension details, cleaning compatibility guidance, and traceability/quality documentation — plus sample and OEM options if relevant.
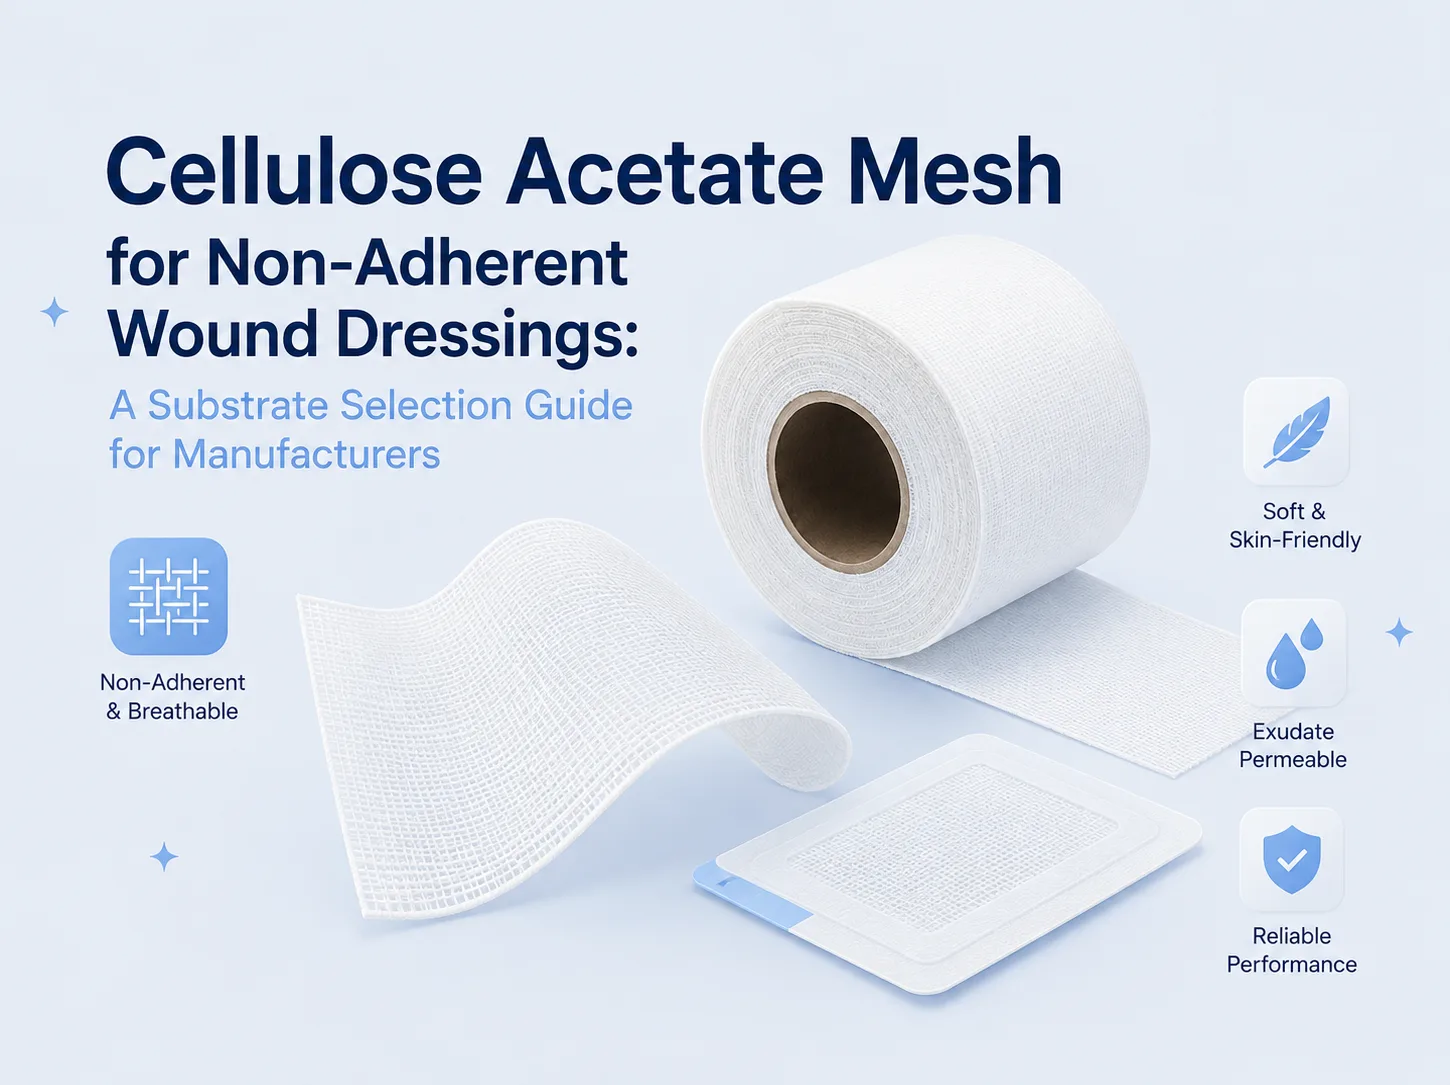
Quick answer: Cellulose acetate mesh is an open-knit dressing substrate. On its own, it’s not a finished wound dressing. It becomes one once a manufacturer adds a petrolatum emulsion, a honey-based formulation, a CMC coating, or a silicone system, then converts, packages, sterilizes, and validates it. This guide covers how the mesh fits into that system, which finished products it’s typically used for, and exactly what to specify when you’re sourcing it.
If you’re developing a non-adherent gauze, an oil-emulsion dressing, a honey-impregnated wound dressing, or a tubular finger dressing, keep reading. We’ll walk through the mesh’s role in each format, the sourcing checklist to bring to a supplier conversation, and where the line sits between “material supplier” and “finished-device manufacturer.”
In this guide:
Why knitted cellulose acetate mesh is used as a dressing substrate
How it works inside a non-adherent dressing system
The four finished-product formats it’s typically built into
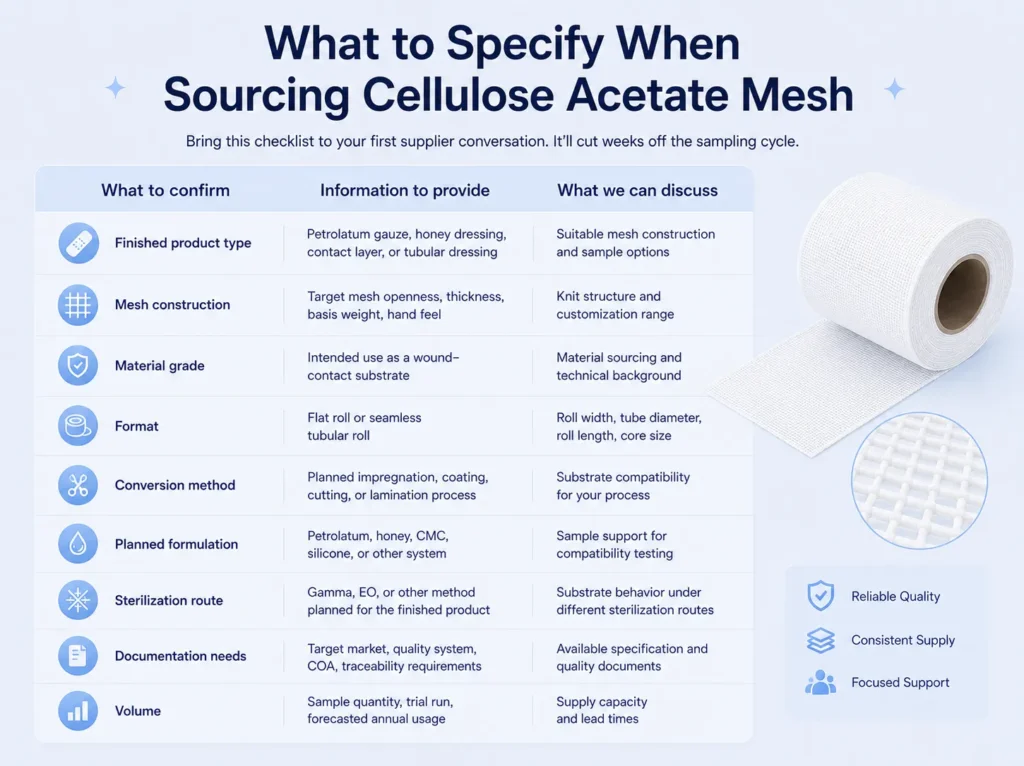
What to specify when sourcing it
Processing and validation considerations
FAQs
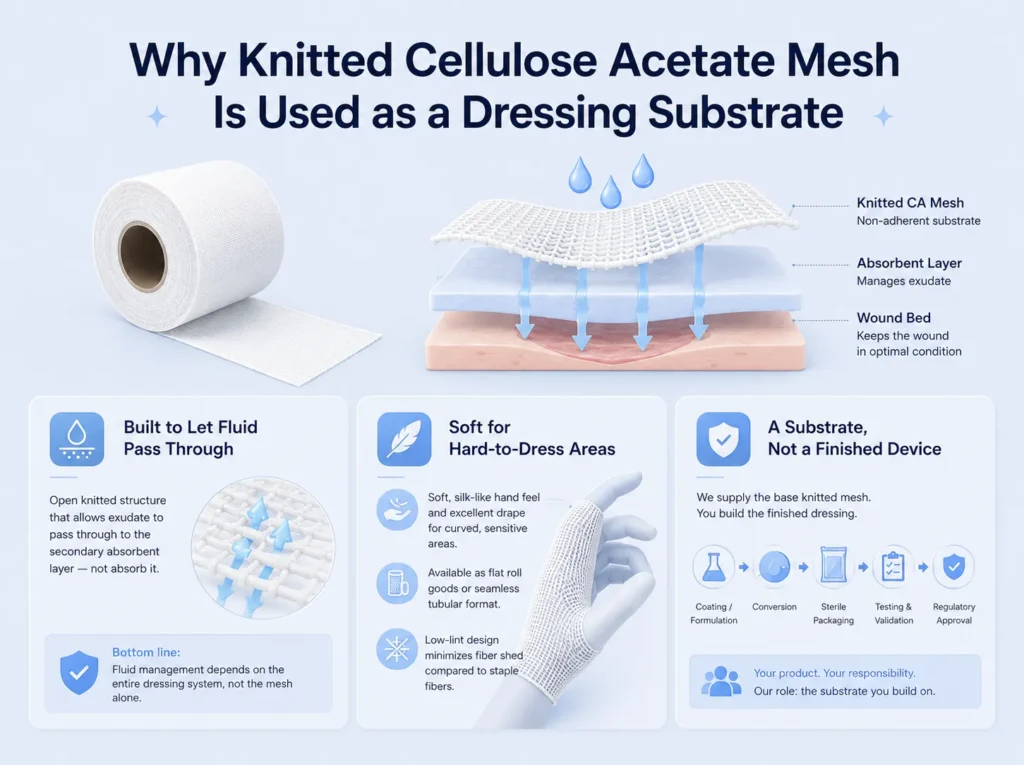
Why Cellulose Acetate Mesh Is Used as a Dressing Substrate
This guide focuses on cellulose acetate mesh as a substrate within a finished non-adherent dressing system. If you need a broader introduction to the material itself — including its composition, textile characteristics, and general medical-fabric applications — read our overview of cellulose acetate medical fabric.
It’s built to let fluid pass through, not soak it up
The defining feature of this material is its open, knitted structure. It isn’t an absorbent pad.
It’s a gate.
In a finished dressing, wound exudate moves from the wound bed, through the mesh, and into a secondary absorbent dressing sitting on top of it. That’s the same basic construction behind most commercial non-adherent primary dressings on the market today.
Bottom line: the mesh’s job is to stay out of the way of fluid movement. How much exudate a finished dressing can actually handle comes down to the whole stack — the mesh, the coating on it, and the absorbent layer behind it — not the mesh in isolation.
It’s soft enough for the hard-to-dress areas
Knitted cellulose acetate has a soft, silk-like hand feel and bends easily. That’s why it shows up in dressings built for fingers, joints, burn sites, and skin graft donor areas — the curved, sensitive spots where stiff fabric doesn’t cooperate.
It can be supplied as flat roll goods, cut to size. It can also be knitted as a seamless tube, which opens up finger and digit dressing formats without a flat-to-tube conversion step.
One more practical detail: filament-based cellulose acetate yarn tends to shed less than staple-fiber fabrics like cotton gauze. Fewer loose fibers left behind in a wound bed is a real advantage. That said, treat this as a property to test and specify for your finished product, not as an unconditional guarantee.
It’s a substrate — not a finished medical device
Worth saying plainly: what we supply is a dressing substrate, not a finished wound dressing.
Getting to “finished dressing” requires a formulation or coating system, a conversion process, sterile packaging, biocompatibility assessment, performance validation, and regulatory documentation — all owned by the company bringing the finished device to market. Our role is the base knitted mesh, in roll or tubular format, that you build your product around.
How Cellulose Acetate Mesh Works Inside a Non-Adherent Dressing
Strip a typical non-adherent dressing down to its layers and it looks like this:
Wound bed → cellulose acetate mesh substrate → impregnation or coating system → secondary absorbent dressing → fixation
Three parts do three different jobs.
The mesh substrate is the structural, open-knit base. It conforms to the wound, doesn’t cling to healing tissue the way plain cotton gauze can, and holds its shape through processing, cutting, and rolling.
The impregnation or coating system is where most of a finished dressing’s marketed benefit actually comes from — a petrolatum emulsion, a honey-based formulation, a CMC finish, or a silicone tack layer. This isn’t a theoretical setup: one well-known non-adhering primary dressing on the market is literally knitted cellulose acetate fabric impregnated with a specially formulated petrolatum emulsion, and a silicone-coated version of the same product line uses the identical open-mesh base with a soft-tack silicone finish instead.
The secondary absorbent dressing does the actual work of absorbing exudate once it passes through the mesh. For higher-exudate wounds, it’s this layer — plus the overall product design — that determines fluid-handling capacity, not the base mesh by itself.
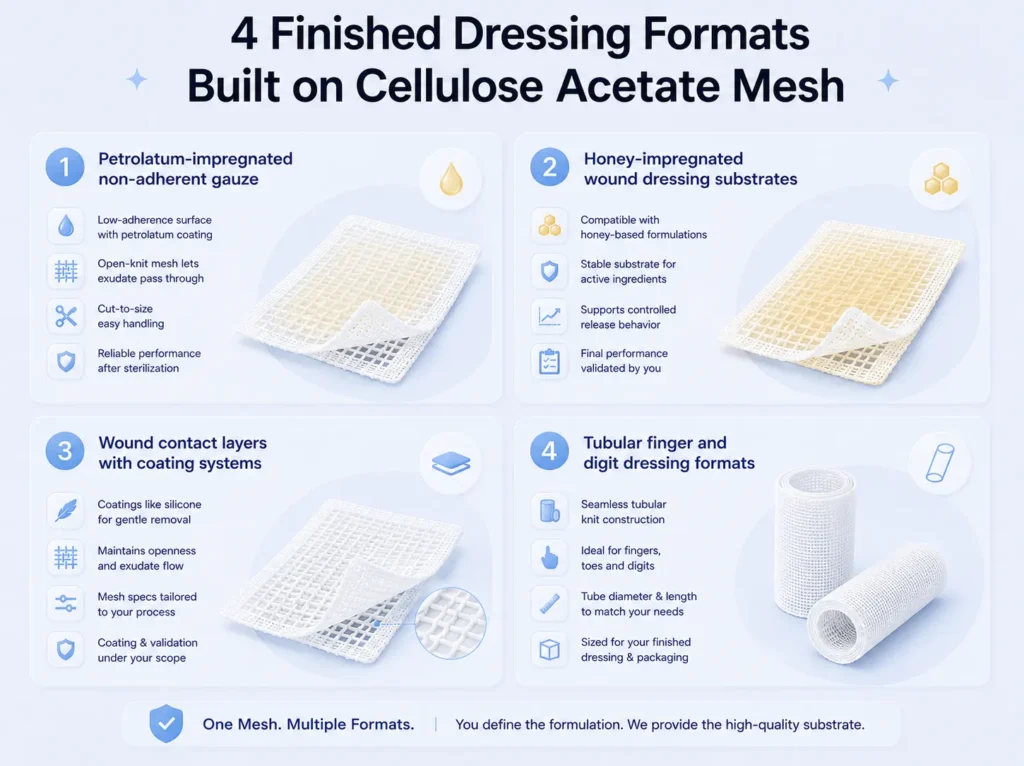
4 Finished Dressing Formats Built on Cellulose Acetate Mesh
1. Petrolatum-impregnated non-adherent gauze
This is the most established use case for this material in wound care, and the product type most consistently linked to it across major wound-care brands and distributors.
The mesh gets impregnated with a petrolatum or oil-emulsion coating to create a low-adherence surface, while the open-knit structure still lets exudate reach a secondary dressing.
Development variables to lock down: impregnation weight and uniformity, mesh openness after coating, cut-to-size handling, post-sterilization performance of the coated fabric.
2. Honey-impregnated wound dressing substrates
Honey-based wound dressings — Manuka honey formulations included — are another established application for acetate gauze substrates, sometimes paired with additional active agents.
We can discuss the mesh as a candidate substrate for this kind of formulation. Formulation compatibility, active-ingredient stability, release behavior, and finished-product validation stay on your side of the table. We don’t market our base mesh as antimicrobial or wound-healing on its own — those claims belong to the validated finished device, not the substrate.
3. Wound contact layers with coating systems
Beyond petrolatum, some finished dressings pair cellulose acetate mesh with other coatings — silicone, for example — to build a contact layer that lifts off with minimal disturbance to healing tissue.
If this is your target format, we can work through mesh openness, thickness, and conversion requirements to fit your coating process. The coating itself and its performance validation remain your development scope.
4. Tubular finger and digit dressing formats
The same mesh can be knitted as a seamless tube instead of flat sheeting — useful for finger, toe, and digit dressings that need to slip on without seams or overlaps.
Roll length, tube diameter, and cutting requirements get discussed against your target finished-dressing size and packaging format.
What to Specify When Sourcing Cellulose Acetate Mesh
Bring this checklist to your first supplier conversation. It’ll cut weeks off the sampling cycle.
What to confirm
Information to provide
What we can discuss
Finished product type
Petrolatum gauze, honey dressing, contact layer, or tubular dressing
Suitable mesh construction and sample options
Mesh construction
Target mesh openness, thickness, basis weight, hand feel
Knit structure and customization range
Material grade
Intended use as a wound-contact substrate
Material sourcing and technical background
Format
Flat roll or seamless tubular roll
Roll width, tube diameter, roll length, core size
Conversion method
Planned impregnation, coating, cutting, or lamination process
Substrate compatibility for your process
Planned formulation
Petrolatum, honey, CMC, silicone, or other system
Sample support for compatibility testing
Sterilization route
Gamma, EO, or other method planned for the finished product
Substrate behavior under different sterilization routes
Whatever gets coated or impregnated onto the mesh needs testing for viscosity, coating uniformity, and whether the mesh openness survives the coating process well enough to still transfer fluid. Migration and stability after packaging and storage belong in your development testing too.
Wet-state handling
Cellulose acetate loses tensile strength when wet. That means the finished dressing’s intended handling — including removal during a dressing change — needs testing under realistic wet-use conditions, not assumptions from dry-state fabric data.
This matters most for higher-exudate wounds, where the finished product design (not the substrate alone) has to account for wet-strength requirements.
Sterilization and packaging
Gamma irradiation and ethylene oxide are both generally workable sterilization routes for cellulose acetate-based materials. High-temperature steam autoclaving isn’t recommended — it can degrade fiber performance.
Whichever route you choose, validate it on the finished, packaged product, coating included. Don’t extrapolate from raw-substrate data alone.
Regulatory responsibility
Supplying a substrate isn’t the same as bringing a finished medical device to market. Confirming intended use, regulatory classification, biocompatibility testing, sterility assurance, labeling, and market authorization stays with the finished-dressing manufacturer.
Why Source Cellulose Acetate Mesh From Haody Medical
Developing a non-adherent dressing, an oil-emulsion gauze, a honey-based wound dressing, or a tubular finger dressing? Tell us your target format and formulation, and we’ll help you evaluate fit.
To request a sample or spec sheet, include:
Your finished dressing concept
Flat roll or tubular format requirement
Target width or tube diameter
Target mesh openness, thickness, or basis weight
Planned coating or impregnation system
Planned sterilization method
Target market and estimated annual quantity
FAQs
Is cellulose acetate mesh a finished wound dressing? No. It’s a knitted dressing substrate. Whether it becomes a sterile, non-adherent wound dressing depends on the coating system, conversion, packaging, sterilization, and validation the finished-device manufacturer carries out.
Can cellulose acetate mesh be used for petrolatum gauze development? Yes — it’s one of the material’s most established uses. Knitted cellulose acetate impregnated with a petrolatum or oil-emulsion coating is the basis for several established non-adherent gauze products on the market. Formulation compatibility and finished-product performance still need your validation.
Can the mesh be used in honey-based wound dressings? It can be evaluated as a substrate for honey-based or other active formulations. Formulation compatibility, active-ingredient stability, and finished-product validation are part of your development work.
Does cellulose acetate mesh absorb wound exudate? Not primarily. It lets exudate pass through to a secondary absorbent dressing rather than absorbing fluid itself. For high-exudate wounds, the finished dressing’s full construction determines fluid-handling capacity — not the mesh alone.
Is tubular cellulose acetate mesh available? Yes. It can be produced as a seamless tubular roll for finger and digit dressing formats, with diameter, length, and cutting specs discussed against your target product.
What information do you need for a quotation or sample request? Your intended finished product, planned coating or impregnation system, target mesh openness/thickness/basis weight, roll or tubular dimensions, planned sterilization method, target market, and estimated annual volume.
Single-tread hospital slipper socks have grip tread on the sole only. Double-tread styles place grip tread on both the sole and the upper side of the sock. For healthcare buyers, the better option doesn’t come down to which one sounds safer — it comes down to your facility’s intended use, distribution process, sizing system, fabric construction, and procurement specification.
This guide breaks down the real differences between the two designs, when each one tends to make sense for hospitals, care homes, and rehabilitation centers, and — just as importantly — what buyers and distributors should be specifying beyond “single” or “double” tread when placing a bulk or OEM order.
A quick note before we go further: hospital slipper socks are a product feature, not a safety guarantee. They shouldn’t replace proper footwear, facility mobility protocols, or a care team’s own risk assessment. Current research on non-slip socks in hospital settings hasn’t found strong evidence that grip socks alone reduce falls, so this guide focuses on product design and procurement — not clinical outcomes.
Quick Answer: What’s the Difference Between Single-Tread and Double-Tread Hospital Slipper Socks?
Single-tread hospital slipper socks have anti-slip tread applied to the bottom of the sock only.
Double-tread hospital slipper socks have anti-slip tread applied to both the bottom and the top surface of the sock.
Double-tread construction keeps a treaded surface facing the floor even if the sock rotates or turns during wear — but that doesn’t automatically make it the right choice for every facility or budget.
Feature
Single-Tread Slipper Socks
Double-Tread Slipper Socks
Grip placement
Bottom of the sock only
Bottom and top of the sock
Product structure
One-sided PVC or silicone tread
Two-sided PVC or silicone tread
Buyer consideration
Grip coverage, cost efficiency
Grip coverage regardless of orientation
Production consideration
Single tread-printing pass
Two-sided print alignment and consistency
Specification focus
Sole coverage, print adhesion, sizing
Two-sided coverage, alignment, uniformity
Typical order type
Standard bulk institutional supply
Facilities or distributors requiring two-sided grip
Key limitation
Not a substitute for facility safety protocols
Not a substitute for facility safety protocols
What Is a Single-Tread Hospital Slipper Sock?
A single-tread hospital slipper sock has its grip material — usually PVC dots, a silicone print, or a similar non-slip coating — applied only to the sole. The rest of the sock is a standard knit surface.
This is the more common configuration across bulk institutional supply programs, and it’s usually paired with:
Cotton, polyester, or cotton-polyester blend fabric
Terry-in or terry-out construction (more on that below)
Standard or color-coded sizing
Elastic or non-binding cuffs, depending on the intended patient group
Single-tread socks tend to fit facilities that want a straightforward, cost-controlled slipper sock specification with predictable sizing, color coding, and packaging — without needing tread coverage on both sides of the sock.
What Is a Double-Tread Hospital Slipper Sock?
A double-tread hospital slipper sock has grip material on both the sole and the upper surface. The idea is simple: if the sock rotates, bunches, or ends up facing the “wrong” way during wear, there’s still a treaded surface in contact with the floor.
From a manufacturing standpoint, double-tread styles require more than just adding a second print. Buyers should expect (and ask about):
Print alignment between the top and bottom surfaces
Consistent tread density and pattern on both sides
Slightly higher material and production input than single-tread styles
Double-tread is often requested by facilities or distributors that specifically want grip coverage regardless of how the sock is worn. It’s a legitimate specification — but it should be a deliberate choice based on your facility’s use case, not just the “upgraded” option by default.
Single-Tread vs Double-Tread: Which Specification Fits Your Facility?
Rather than thinking in terms of “basic vs. better,” it’s more useful to match the tread design to what your facility or distribution program actually needs.
Procurement Priority
What to Discuss With Your Supplier
Standard bulk slipper sock supply
Single tread, fabric composition, size range, color coding, carton quantity
Agreed wash-test method, tread appearance after laundering
Single-patient-use program
Individual packaging, labeling, disposal guidance
Buyer note: “Single tread” or “double tread” shouldn’t be the entire specification you send to a supplier. A complete spec should also define fabric, terry orientation, tread material, sizing, packaging, and quality-inspection criteria — which we’ll cover next.
Terry-In vs Terry-Out: A Specification Buyers Often Overlook
Most hospital slipper sock suppliers offer both terry-in and terry-out construction, but it’s rarely explained why it matters for a buyer’s specification sheet — and it’s just as relevant whether you’re ordering single-tread or double-tread socks.
Construction
What It Means
Questions to Ask
Terry-in
The terry loop surface faces the inside of the sock
Is inner softness or moisture absorption a priority for your patient population?
Terry-out
The terry loop surface faces the outside
Does your facility have a handling or laundering preference tied to the outer texture?
Plain knit (no terry)
A lighter, simpler knit construction
Does the project prioritize lower bulk or a specific cost target over terry cushioning?
This is a fabric and comfort detail, not a clinical claim — terry-in construction doesn’t prevent pressure injuries or improve circulation, and it shouldn’t be marketed that way. What it does affect is feel, warmth, and moisture handling, which matter for patient comfort and facility-specific preferences.
How to Write a Hospital Slipper Socks Procurement Specification
This is where most buyers lose time — going back and forth with a supplier because the original spec only mentioned “single or double tread” and a size range. Here’s a checklist you can send directly to a manufacturer or use to evaluate a quote:
Hospital Slipper Socks Specification Checklist
Product type: single-tread or double-tread
Fabric composition (e.g., cotton/polyester blend)
Construction: terry-in, terry-out, or plain knit
Tread material: PVC, silicone, or agreed alternative
Tread coverage: sole only / both sides / custom pattern
Sizes: full requested size range
Color coding: by size, department, or custom program
Cuff type: standard elastic, wider cuff, or bariatric fit
Latex requirement: latex-free if needed
Packaging: individual pair, bulk pack, or retail pack
Carton quantity and carton marking
Labeling: SKU, barcode, country of origin, lot number
Sending this level of detail upfront usually shortens the sampling process significantly, because the supplier isn’t guessing at unstated requirements.
Quality Control: What Should Buyers Check Before Bulk Production?
Once a spec is agreed, the next question is how to verify it before committing to a full production run.
Tread-print consistency Check that the grip pattern isn’t misaligned or unevenly applied. For double-tread styles, confirm both surfaces have clear, uniform coverage — and that this consistency holds across different sizes in the same batch.
Adhesion and handling performance After the agreed washing or handling conditions, inspect the tread for cracking, peeling, or visible wear. Avoid claims like “never wears off” — instead, confirm performance against a specific, agreed test method and cycle count.
Sizing and color-coding accuracy Verify sock length, foot length, cuff width, and stretch recovery against your approved sample. If your order includes bariatric sizing, confirm cuff width and wearing space match what was approved — not just the standard size chart.
Packaging and traceability Confirm pair packaging, carton quantity, product codes, batch numbers, and label language match the approved sample exactly. If you’re distributing under your own brand, this is also the point to verify any required documentation, such as material declarations or test reports.
Can Hospitals Use All-Around Tread Slipper Socks?
Some suppliers also offer all-around tread slipper socks, where grip material extends more broadly around the sock rather than being limited to top and bottom surfaces. This is worth knowing about, but it’s a distinct specification — material use, stretch, feel, and cost structure can all differ from standard single- or double-tread designs. If an all-around tread option comes up in your sourcing process, treat it as a separate quote and sample request rather than assuming it’s simply a version of “double tread.”
FAQ
Is double-tread better than single-tread hospital slipper socks? Not automatically. Double-tread provides grip coverage on both sides of the sock, which some facilities specifically want. But the right choice depends on your use case, budget, and how the socks will be distributed and managed — not on which option sounds more advanced.
What’s the difference between terry-in and terry-out slipper socks? Terry-in means the terry loop fabric faces the inside of the sock, against the skin. Terry-out means it faces outward. Either can be combined with single or double tread; the choice affects comfort and feel, not grip performance.
Can hospital slipper socks be customized for distributors? Yes. Buyers can typically discuss custom colors, tread patterns, logos, packaging artwork, barcodes, and carton marking for private-label programs. MOQ and lead time will depend on the specific materials and customization requested.
Can non-slip hospital socks replace proper footwear? No. Grip socks are a product feature, not a substitute for appropriate footwear, facility safety protocols, patient mobility assessments, or care team guidance. Facility footwear recommendations typically weigh fit, sole support, and heel support alongside — not instead of — sock tread design.
Need a Hospital Slipper Socks Specification Review?
Haody Medical supports bulk and OEM hospital slipper sock orders, including single-tread and double-tread designs, custom fabrics, terry constructions, color-coded sizing, packaging, and private-label options. Share your target market, size range, tread configuration, and packaging requirements with our team to discuss samples and production timelines.
Written by the Haody Medical Product Team. This article is for general product and procurement information and does not constitute medical or clinical advice. Facilities should follow their own safety protocols, product instructions, and applicable regulations when selecting patient footwear.
Haody Medical is currently taking part in Medical Fair China 2026, running from August 20 to 22 at the Suzhou International Expo Center. As a manufacturer of medical textiles and healthcare consumables, we are using this year’s show to meet face-to-face with international distributors, importers, healthcare product suppliers and OEM partners, and to talk through the kind of practical, everyday sourcing questions that shape long-term supply relationships.
For a company like ours, exhibitions are less about a big stage and more about direct conversation. Buyers walk up with real questions — about specifications, packaging, lead times, certifications — and those conversations tend to tell us more about the market than any report could. This year’s Medical Fair China is no exception, and our team has been on the floor engaging with visitors throughout the show.
If you’re sourcing medical bandages, compression stockings, hospital socks or stockinette, or exploring an OEM partnership with a Chinese manufacturer, this article covers what we’re showing at MFC 2026 and how to start a conversation with our team.
Why Medical Fair China Matters for Buyers
Medical Fair China is organized by Messe Düsseldorf (Shanghai) and positioned as the only satellite exhibition of MEDICA in China, which gives it a fairly specific role in the exhibition calendar: it’s where international buyers come to look closely at China’s medical consumables and raw materials supply chain, alongside device manufacturing, IVD and smart medical technology.
For sourcing teams and distributors, that focus matters. Rather than browsing a broad general trade show, buyers at MFC are typically there with a purpose — comparing suppliers on consumables and materials, checking documentation, and assessing whether a factory can support both current orders and future product development. For Haody Medical, that’s exactly the kind of audience we want to be talking to.
What We’re Showing on the Floor
Our booth this year is built around the product lines we manufacture day to day, not a curated “showcase-only” selection. Here’s what visitors have been asking about most.
Medical bandages and wound care textiles. We’re showing our range of elastic and tubular bandages, the kind used across basic wound care, fixation and general medical supply channels. Most conversations here have centered on specification consistency — buyers want to know that a bandage ordered in month one matches the one ordered in month six, and that packaging and labeling can be adapted for their own market.
Compression stockings and diabetic socks. This is one of our core categories, and it’s drawn steady interest from pharmacy-channel distributors and healthcare product brands. Questions have ranged from compression classes and sizing ranges to knit construction and private-label packaging options. We’re careful not to oversell these products as treatments — they’re presented as what they are: compression and comfort products for everyday health management, with the technical documentation buyers need to evaluate them properly.
Hospital slipper socks and patient care products. These come up often with buyers connected to hospitals, care homes and rehabilitation centers, where non-slip design, comfort and consistent sizing across large orders matter more than novelty features.
Stockinette and medical textile components. For OEM and component buyers, this category tends to generate the most technical back-and-forth — material choice, width and weight tolerances, and how well we can match an existing supplier’s spec sheet.
Each of these lines connects back to a simple point we keep making at the booth: we’re a manufacturer first, which means the conversation can move from sample to spec sheet to production plan without a middleman in between.
What Buyers Are Asking About
A few themes have come up repeatedly in conversations so far. Buyers want to understand minimum order quantities and how they scale with customization. They’re asking about lead times realistically — not the best-case number, but what typically happens with a first order versus a repeat order. Packaging and labeling flexibility comes up almost every time private label is mentioned. And quality documentation — test reports, certifications, production records — is often the deciding factor in whether a conversation turns into a quote request.
None of this is unusual for a B2B medical consumables show, but it’s a useful reminder that buyers are evaluating suppliers on reliability and communication just as much as on price or product range.
From Booth Conversation to Supply Partnership
For any buyer we’ve spoken with at MFC 2026, the next steps generally follow the same pattern:
Product matching — sharing your target market, application and price range so we can point you to the right specification, rather than a generic catalog listing.
Sample and packaging review — confirming size, material, color and labeling before committing to a production run.
Production and delivery planning — agreeing on MOQ, lead time, quality checks and export packaging for the first and subsequent orders.
If you weren’t able to visit our booth in person, this process works just as well by email or a video call — we’re happy to walk through specifications and samples remotely.
A Manufacturer You Can Talk To Directly
Haody Medical has been producing medical textiles and consumables since our founding, and exhibitions like this one are a chance to put faces and conversations behind what is otherwise a fairly technical product category. We manufacture under an ISO 13485 quality management system, and our team can walk any buyer through certification documents, production capacity and quality-control processes on request.
We’d rather be judged on the specifics — actual specification sheets, actual lead times, actual sample quality — than on general claims, and that’s how we’re approaching every conversation on the floor this week.
Get in Touch
Looking for a reliable medical textile or medical consumables supplier in China? Whether you visited us at Medical Fair China 2026 or are reading this after the show, our team is happy to discuss specifications, OEM requirements, sample requests and order planning.