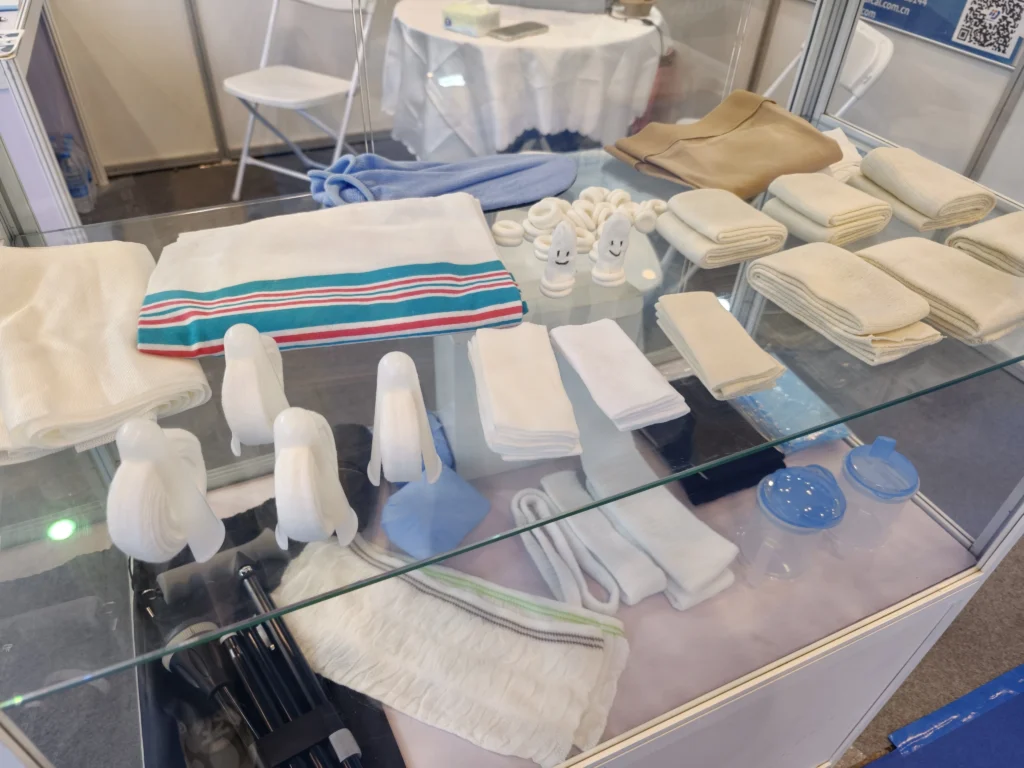
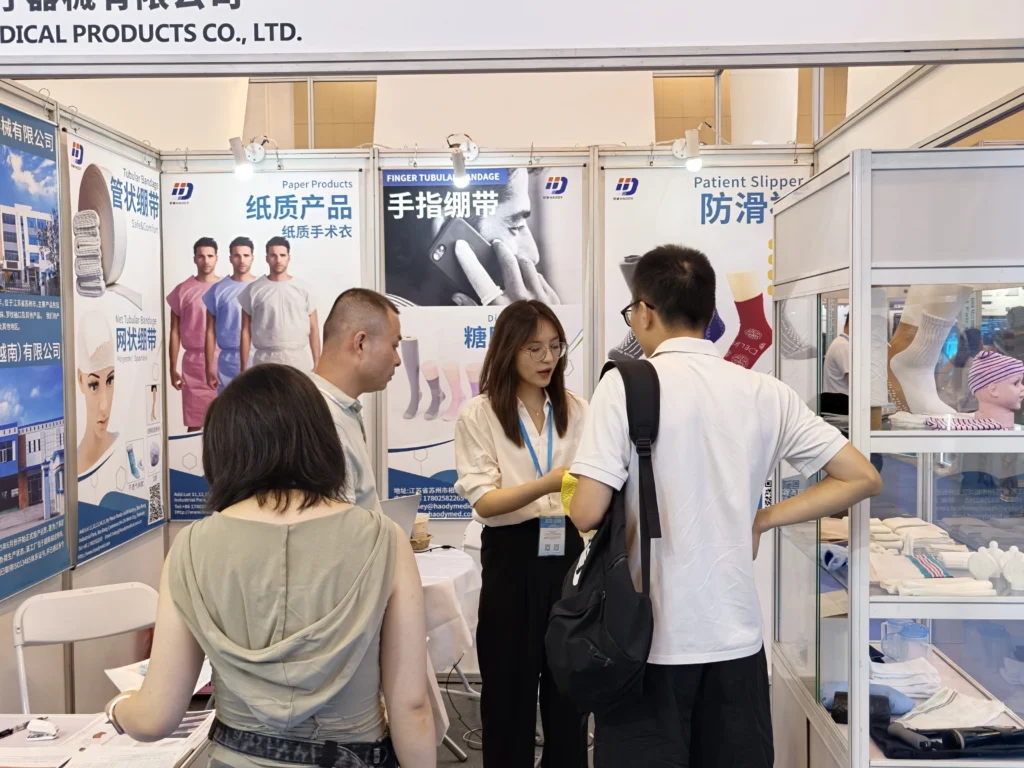
Haody Medical exhibited at PHARMEDI & Healthcare Vietnam 2026, held from 22–24 September 2026 at the Saigon Exhibition and Convention Center (SECC), Ho Chi Minh City, Vietnam. At Booth K15, we presented medical textiles and patient care products, with displays featuring compression stockings, hospital socks, tubular bandages, cellulose acetate mesh and patient transfer boards.
Our booth brought product samples, Vietnamese-language information and face-to-face conversations together, giving visitors a closer look at the range and a direct way to connect with our team.
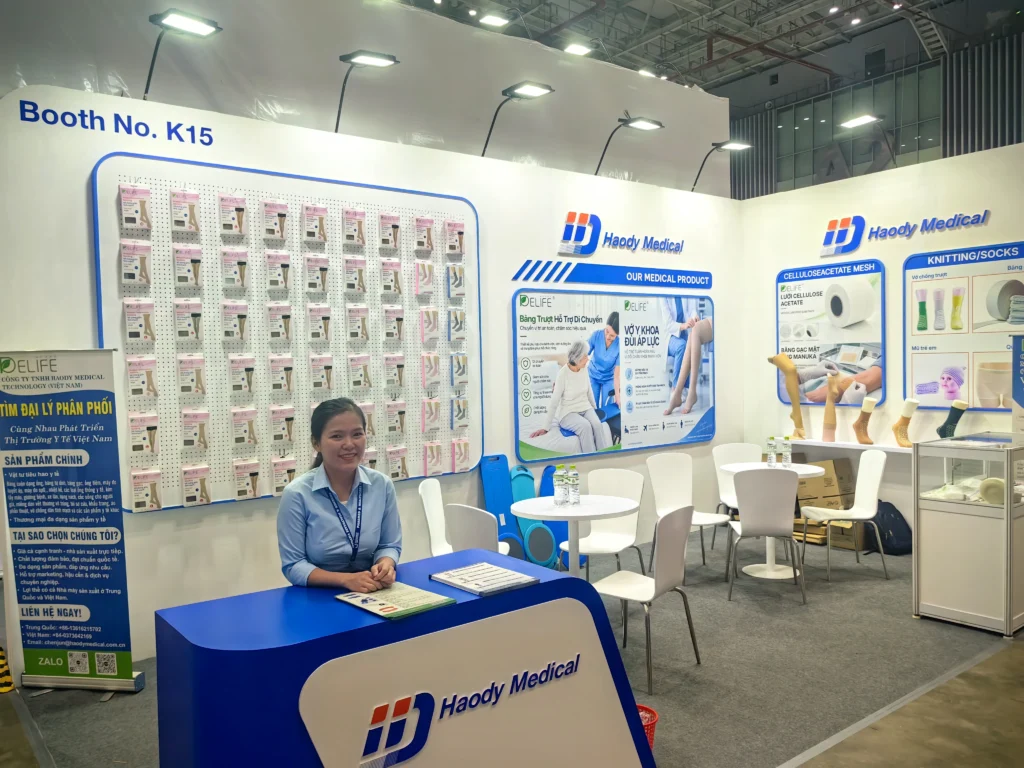
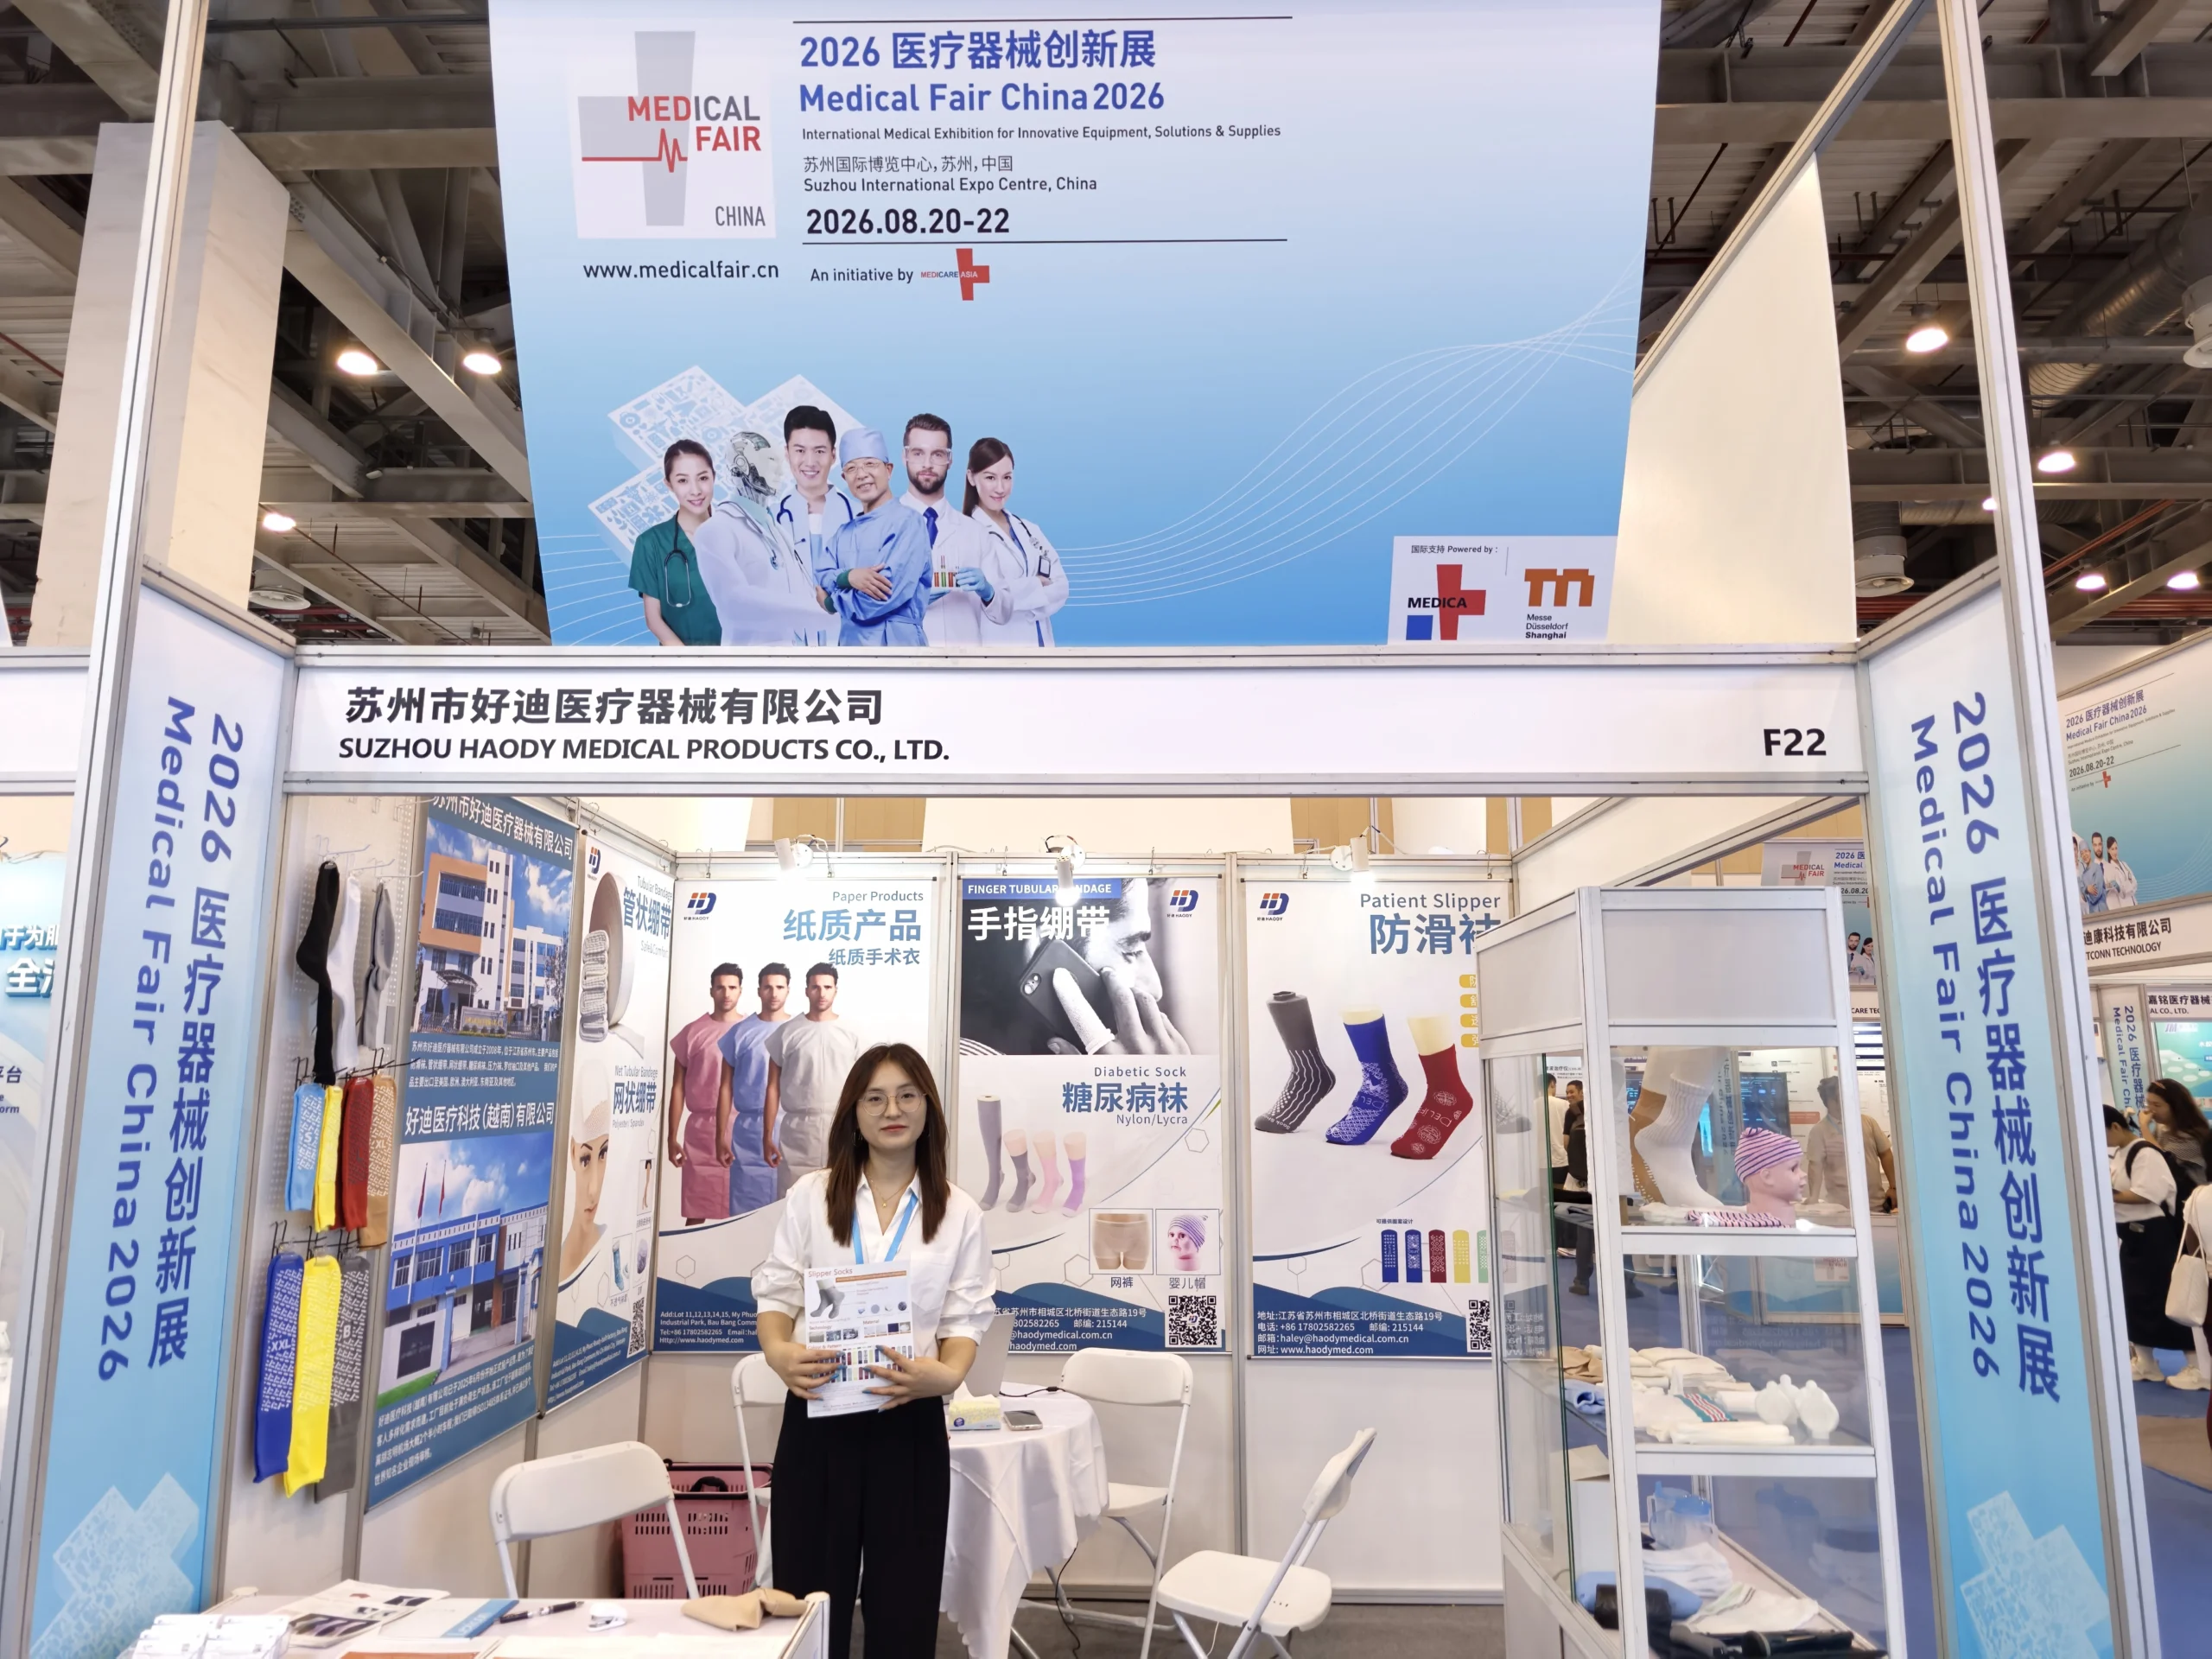
Haody Medical Booth K15 with a team member, packaged hosiery and medical product displays at PHARMEDI Vietnam 2026
A Closer Look at the Products at Booth K15
The booth combined packaged products, display samples and application posters. Visitors could view the product range and speak with our team about items relevant to their sourcing needs.
Compression Stockings and Hospital Socks
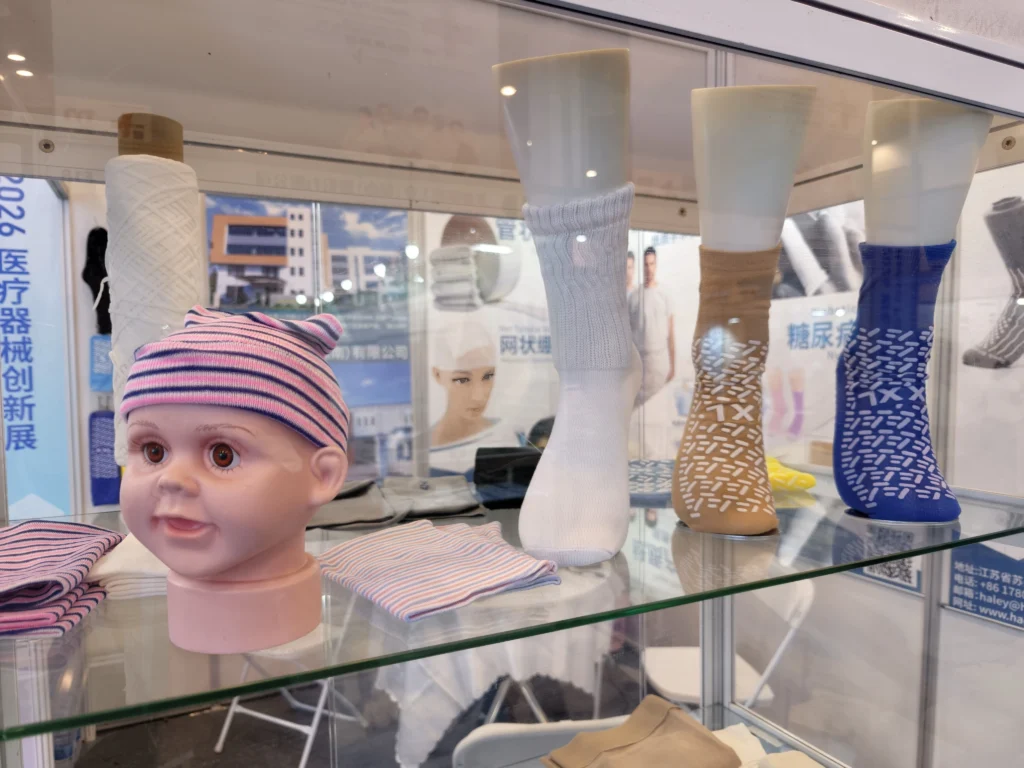
Compression hosiery formed a prominent part of the display, with packaged products on the main wall and leg forms showing selected styles. Visitors could also see hospital sock samples alongside the wider knitted medical product range.
For buyers reviewing compression stockings, useful follow-up information includes the required length, size range, compression specification and packaging format. Hospital sock inquiries can include material preferences, sizing and grip-pattern requirements.
Tubular Bandages and Knitted Medical Products
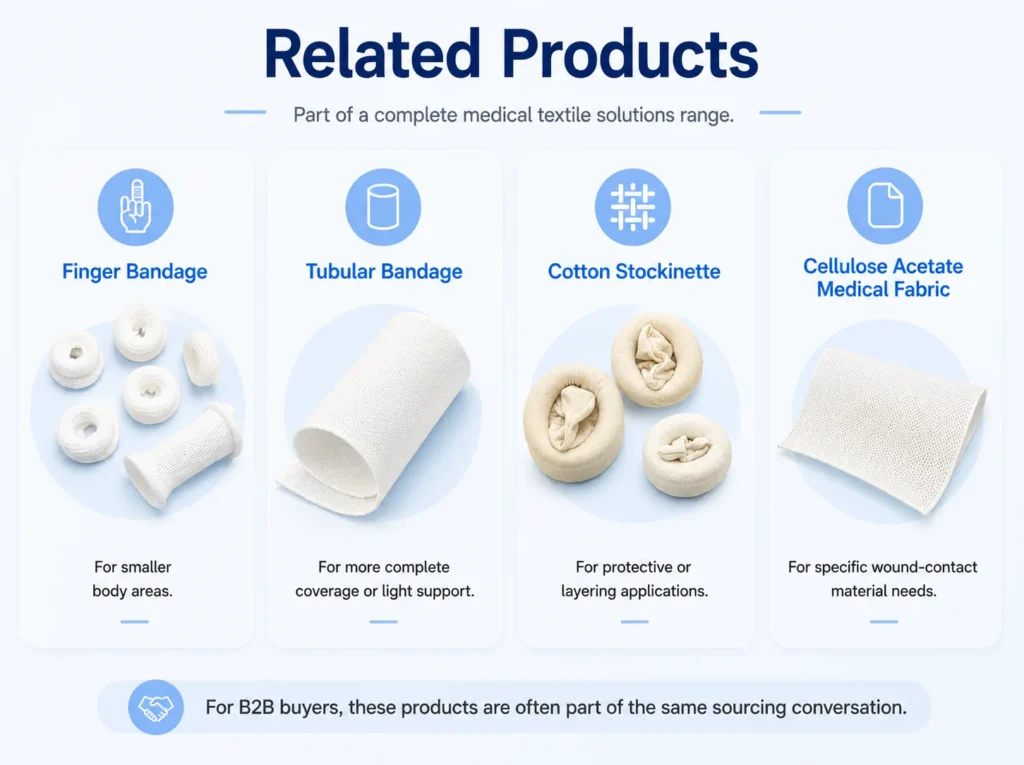
The exhibition panels also introduced tubular bandages and other knitted healthcare products. These categories are relevant to buyers building a broader medical consumables portfolio.
To help identify suitable options, buyers can share the intended application, dimensions, material requirements and preferred pack quantities. Our medical products overview provides a starting point for reviewing the range.
Cellulose Acetate Mesh
Cellulose acetate mesh featured in a dedicated display area. This material is supplied as a substrate for further processing in wound dressing manufacturing.
For dressing manufacturers evaluating a substrate, the next step is to discuss the required format, dimensions and compatibility with the intended manufacturing process. Material samples and technical specifications should be assessed against the requirements of the finished dressing.
Patient Transfer Boards
Patient transfer boards were also displayed, alongside visual information showing their care applications. Buyers interested in this category can request model-specific dimensions, product documentation and instructions for use.
Connecting with Distribution Partners in Vietnam
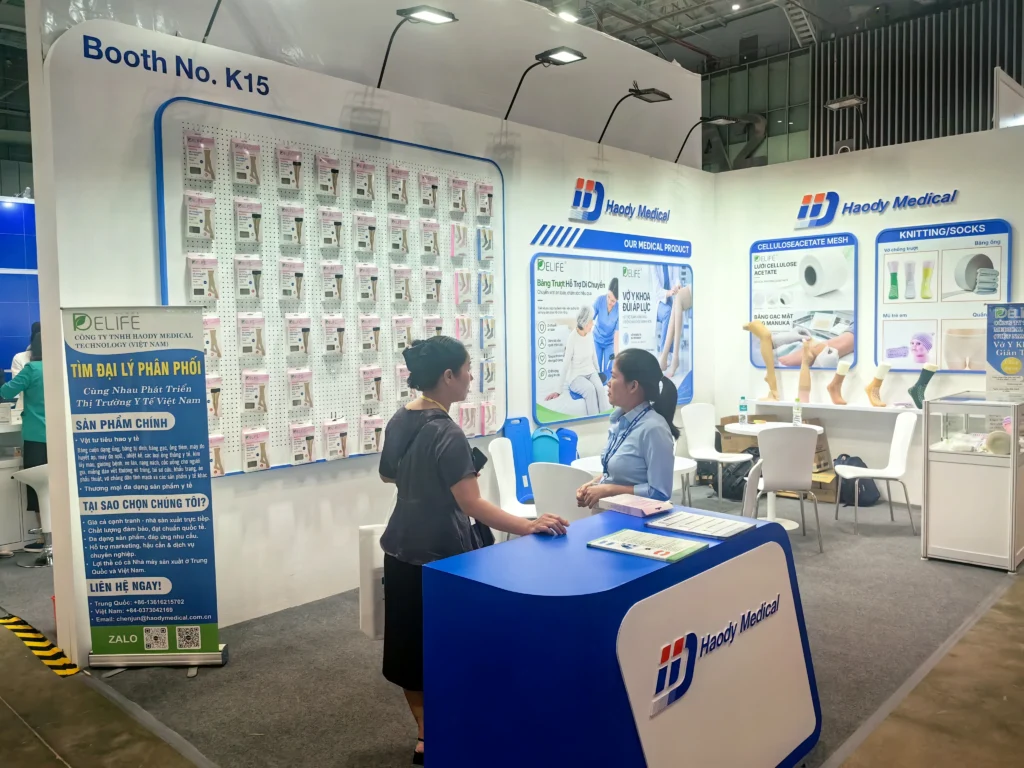
Local distribution was a clear focus of our booth, with Vietnamese-language materials inviting distributor inquiries. The exhibition provided a setting for direct introductions and product conversations with visitors.
We welcome follow-up inquiries from medical distributors, importers, medical supply retailers and healthcare procurement teams. Whether the requirement is a selected product category or a broader sourcing program, sharing the target market and purchasing needs helps our team prepare relevant information.
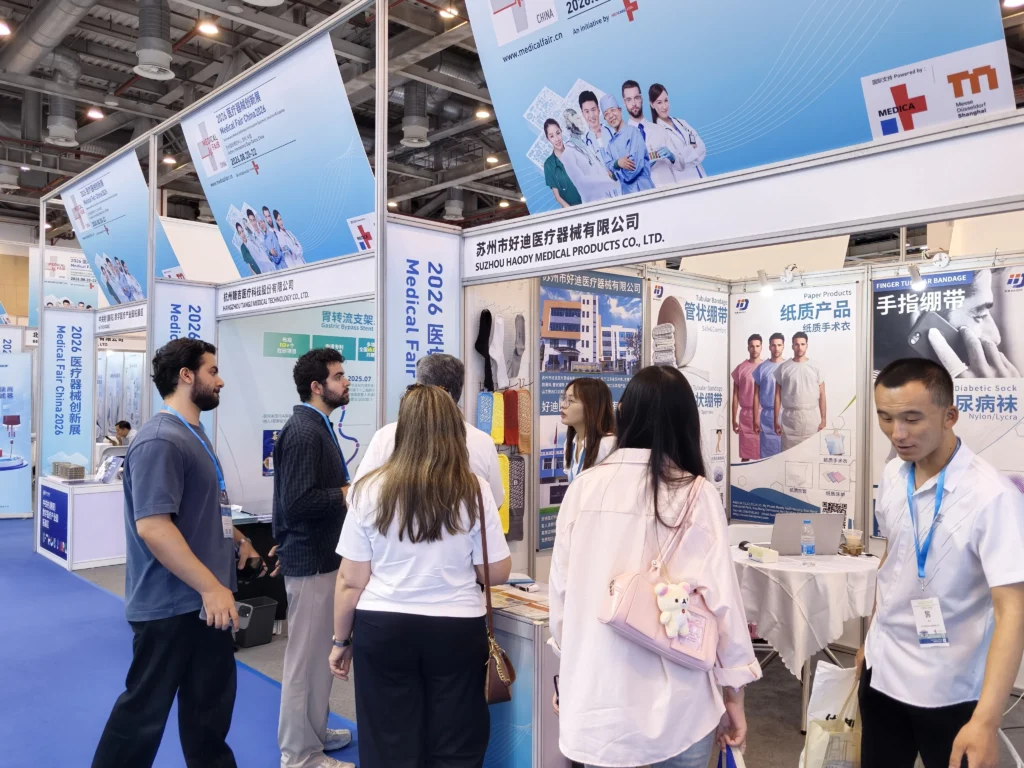
A Haody Medical team member speaking with a visitor at Booth K15 during PHARMEDI Vietnam 2026
Manufacturing in China and Vietnam
Haody Medical was established in 2008 and has manufacturing facilities in Suzhou and Anhui, China, and Ho Chi Minh City, Vietnam. This manufacturing presence is part of our work with healthcare distributors and brands in international markets.
For OEM/ODM projects, buyers are welcome to discuss product specifications, branding and packaging requirements. Available options, order quantities and production arrangements should be confirmed for each project.
Continue the Conversation After PHARMEDI Vietnam 2026
Thank you to everyone who visited Booth K15 and took the time to learn about our products.
If you met our team at the exhibition—or would like to explore the range after the event—contact Haody Medical to request a catalog, discuss samples or submit a sourcing inquiry.
To help us respond with relevant details, please include:
The product category or model you are interested in.
Your destination market and intended sales channel.
Required specifications and estimated order quantity.
Private-label or packaging needs.
Your expected purchasing timeline.
We look forward to continuing conversations with distribution and healthcare supply partners in Vietnam and other markets.
A dressing can be clinically appropriate, correctly applied, and still fail to stay where it should.
Tape can loosen around a moving joint. It can be inconvenient on fingers, toes, or other irregular body contours. And when a dressing needs frequent checks or changes, removing and reapplying adhesive tape again and again can make the process more complicated than it needs to be.
That is where a tubular net bandage comes in.
It is not a primary dressing. It is not automatically a compression product. And it is not simply another name for a standard tubular bandage.
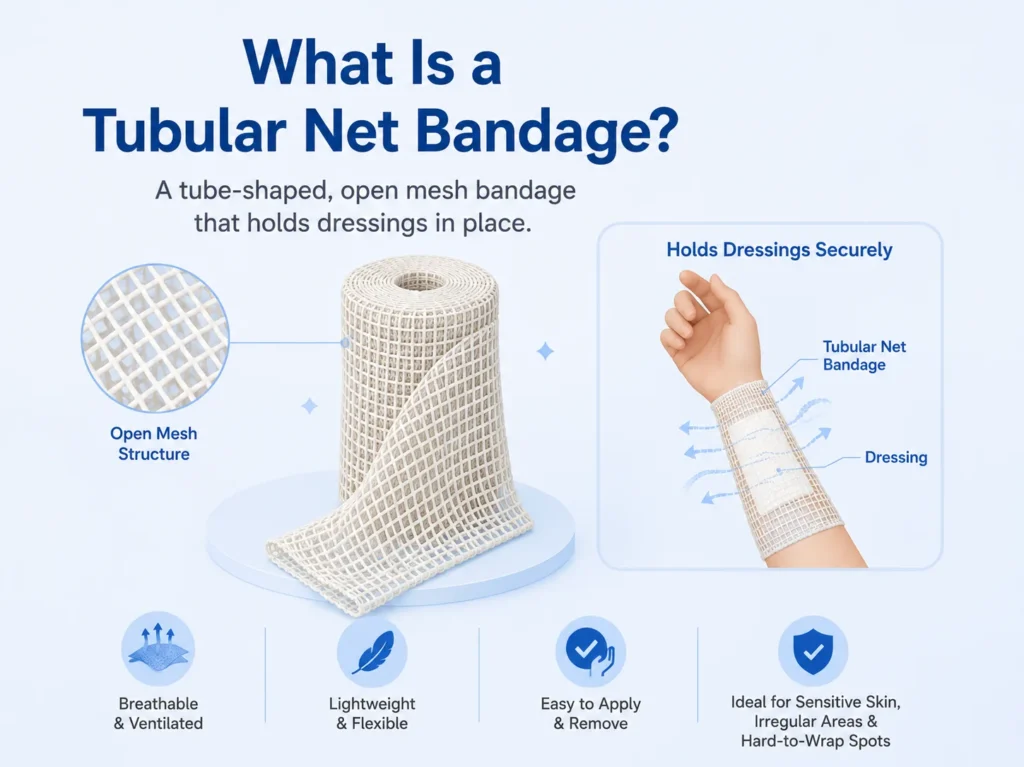
Instead, a tubular net bandage is a lightweight, stretchable, open-mesh layer designed to help hold a dressing in place.
In this guide, you will learn what tubular net bandage is, where it is commonly used, how sizing works, and what distributors, healthcare suppliers, and private-label buyers should confirm before placing a bulk order.
Quick Answer: A tubular net bandage is an open-mesh, stretchable medical textile used as a secondary layer to retain a primary dressing. Buyers should select it based on the body area, finished dressing bulk, mesh construction, stretch and recovery, size system, packaging format, and intended market requirements.
What Is a Tubular Net Bandage?
A tubular net bandage is a seamless, tube-shaped, open-mesh textile that stretches over a body area and the dressing beneath it.
Its role is straightforward: it helps keep a primary dressing in position.
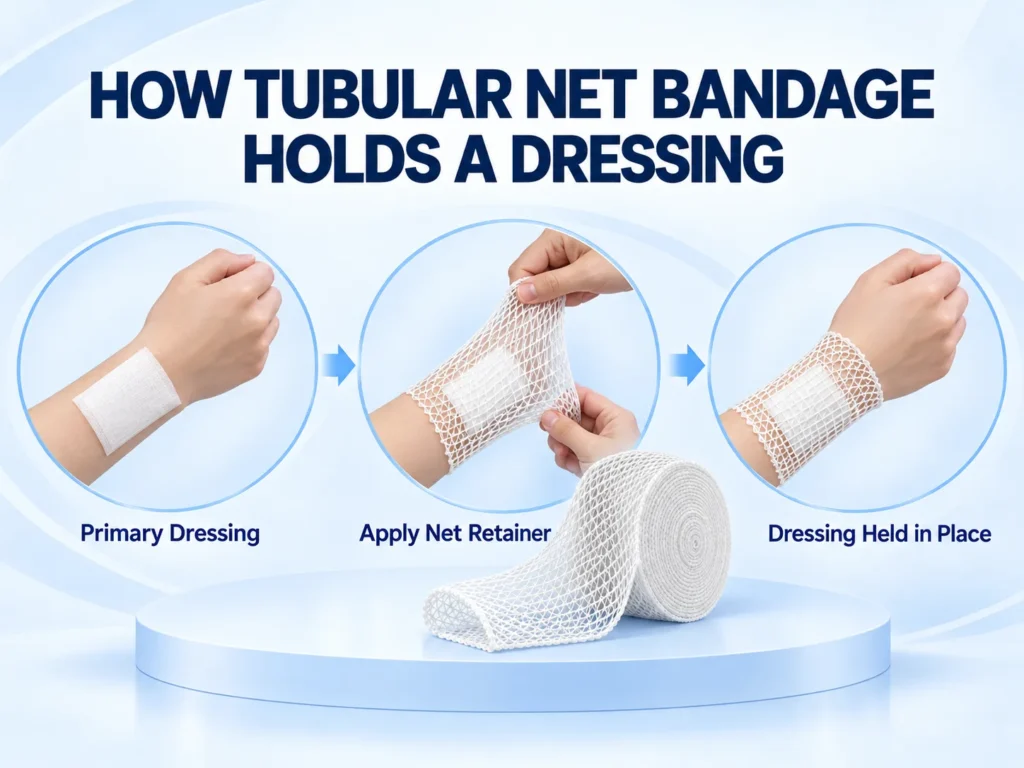
For example, a healthcare professional may apply a gauze pad, foam dressing, absorbent pad, or another appropriate primary dressing first. A tubular net bandage can then be placed over that dressing to help secure it without wrapping the area in dense fabric or applying adhesive tape around every edge.
Most tubular net bandages are supplied in one of several formats:
Continuous rolls
Dispensing boxes
Pre-cut lengths
Standard hospital packs
Distributor or private-label packaging
The open-mesh construction is what separates this product from many conventional tubular bandages. Rather than fully covering the area with a dense knit, the net structure provides flexible retention while keeping the outer layer relatively lightweight.
Here is the important distinction:
A tubular net bandage is generally a dressing-retention product. It should not be assumed to provide compression, therapeutic support, wound treatment, or clinical protection unless the specific product is designed, tested, and labeled for that purpose.
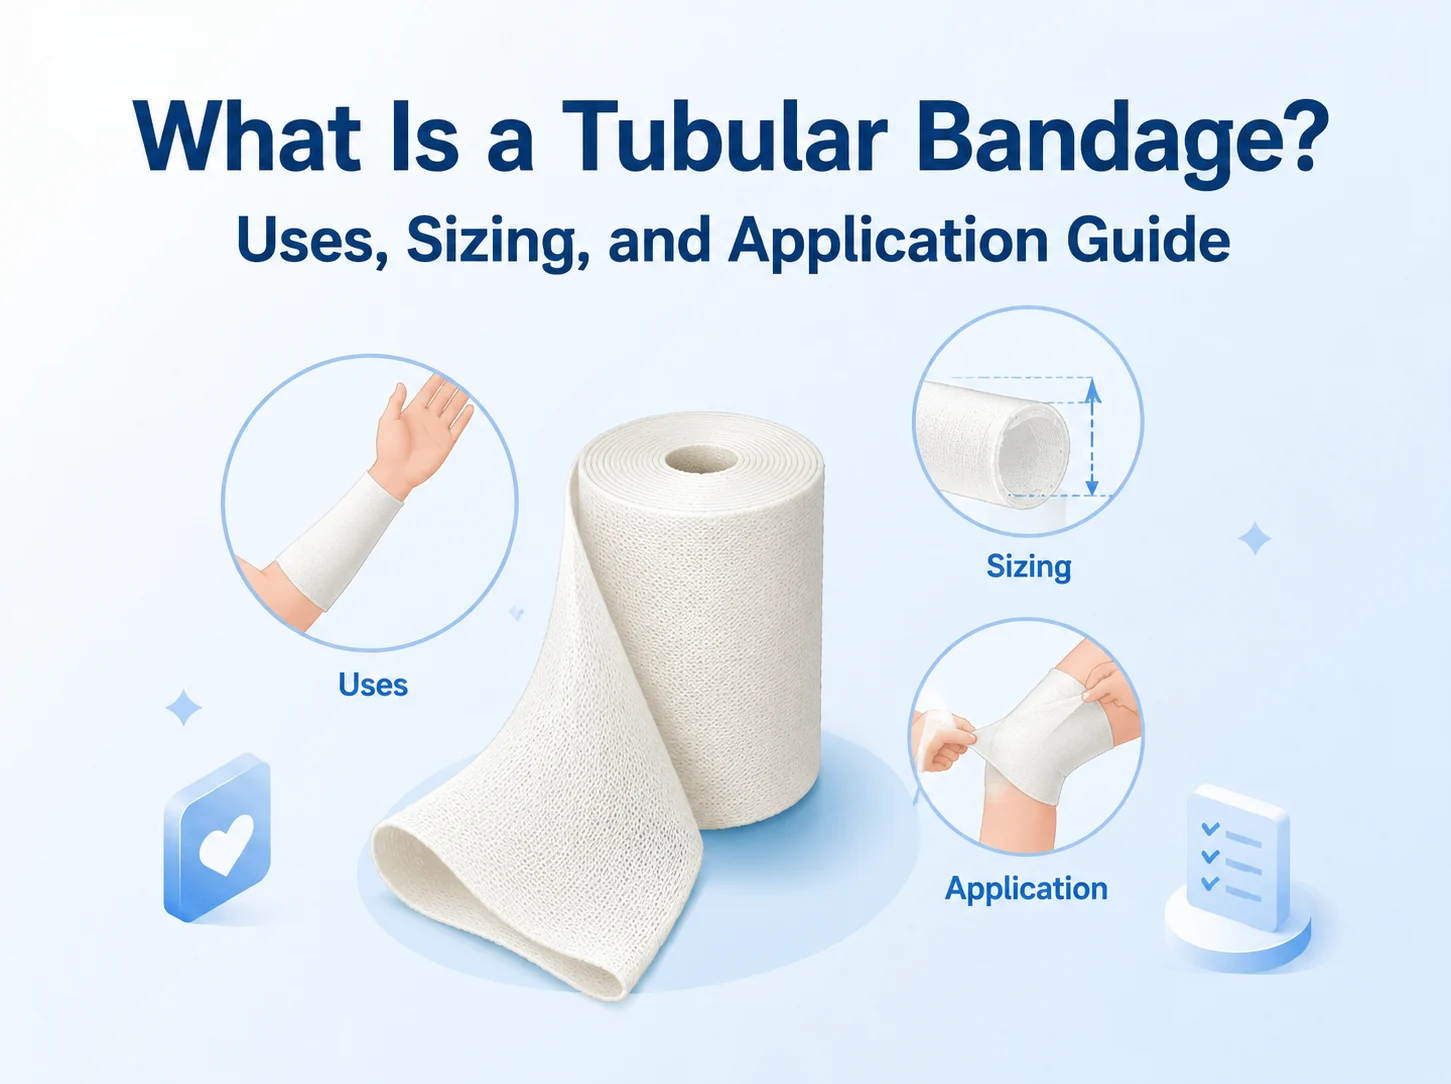
If you need a broader overview of tubular textile products, see our Tubular Bandage Guide.
Tubular net bandage has one main job: helping hold a dressing in place.
But that simple function can be useful in several different care and supply situations.
Holding Primary Dressings in Place
This is the most common use.
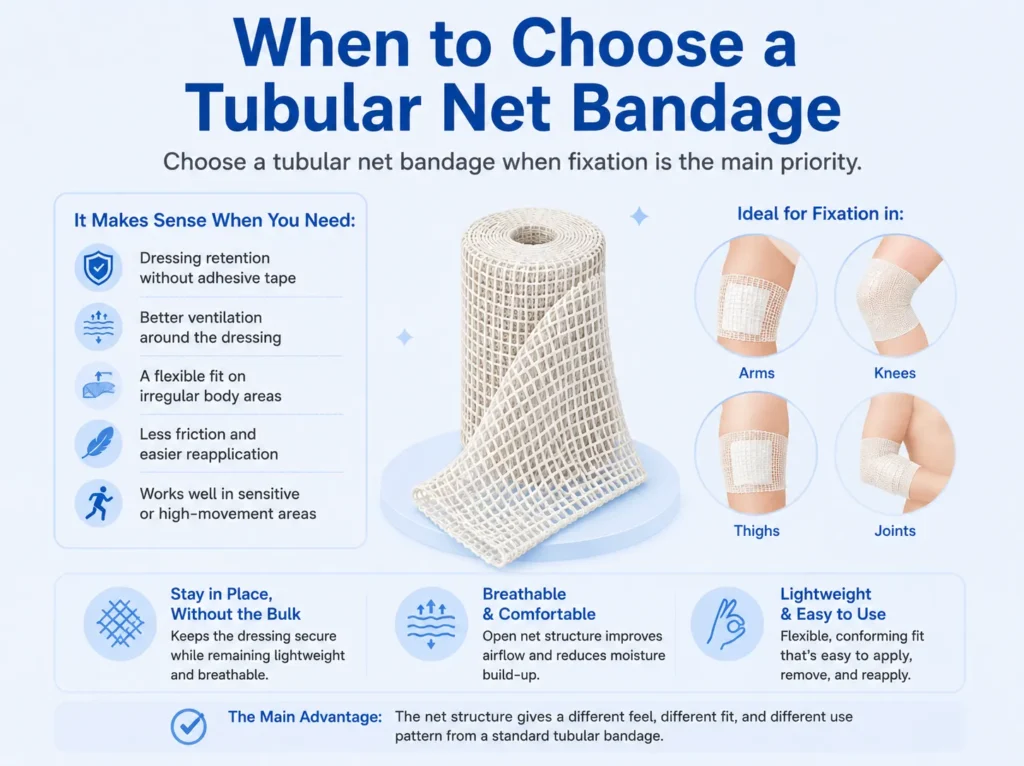
After a primary dressing has been selected and applied, tubular net bandage can be placed over it as a secondary retention layer. It helps reduce the risk of the dressing shifting during normal movement.
This can be especially useful when a flat dressing needs to conform to a rounded, mobile, or difficult-to-wrap area.
The key point is simple:
Tubular net bandage helps retain a dressing. It does not replace the primary dressing itself.
Covering Difficult Body Contours
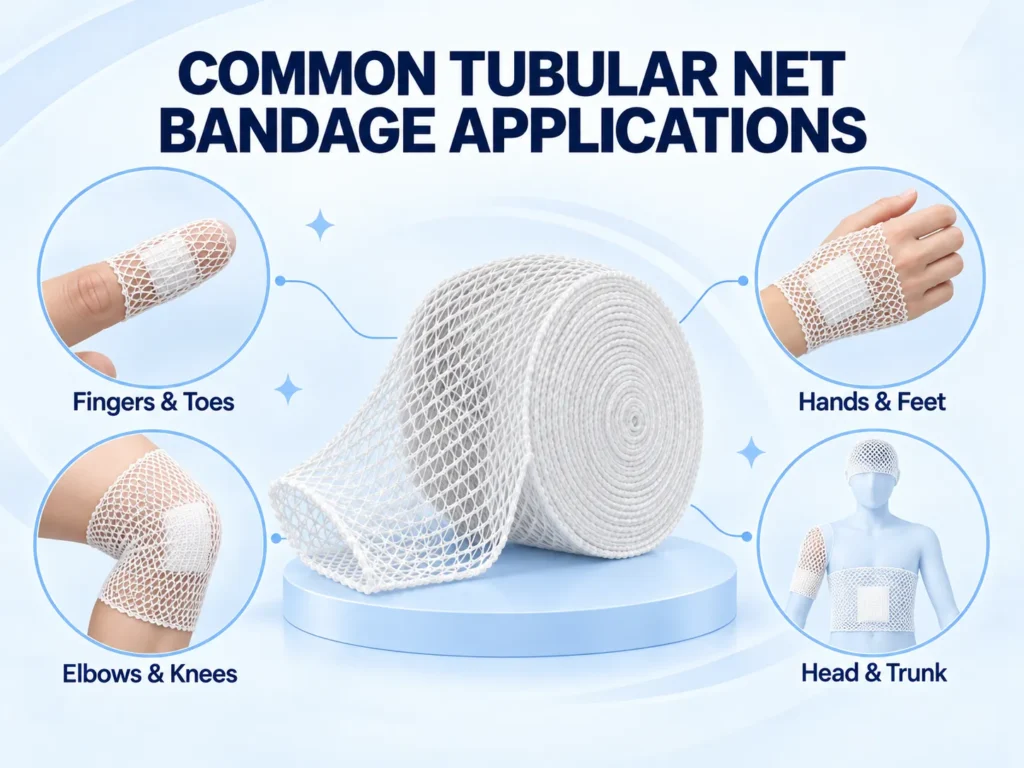
Some body areas are inconvenient to secure with adhesive tape or a traditional rolled bandage.
Think about:
Fingers and toes
Hands and feet
Elbows and knees
Shoulders
The head
Smaller limbs
Larger limbs
Parts of the trunk
These areas can move frequently, have uneven contours, or make tape placement difficult.
An elastic net structure can stretch over those contours more easily than a flat dressing-retention method. But suitability always depends on the specific dressing, body area, patient condition, product instructions, and applicable professional guidance.
Supporting Frequent Dressing-Change Workflows
In some care settings, dressings need to be checked, changed, or adjusted more often.
A tubular net retainer may simplify that workflow because it can be removed and repositioned without applying fresh adhesive tape each time.
That does not make it a treatment product. It is simply a practical fixation option for workflows where dressing access matters.
For healthcare providers and distributors, this can be a useful product-positioning point:
Easy to remove for dressing inspection
Easy to replace after a dressing change
Less dependence on adhesive fixation
Flexible for different body contours
Available in multiple sizes and formats
When Tape Is Not Preferred
In some situations, adhesive tape may not be the preferred fixation method.
For example, a care team may evaluate alternative retention options when tape is inconvenient, when the body contour makes taping difficult, or when frequent dressing changes make repeated tape application impractical.
Still, avoid overpromising.
Do not describe a tubular net bandage as “safe for all skin types,” “non-irritating for everyone,” or “able to prevent skin damage.” Product suitability depends on the actual material, application, dressing type, patient condition, and professional judgment.
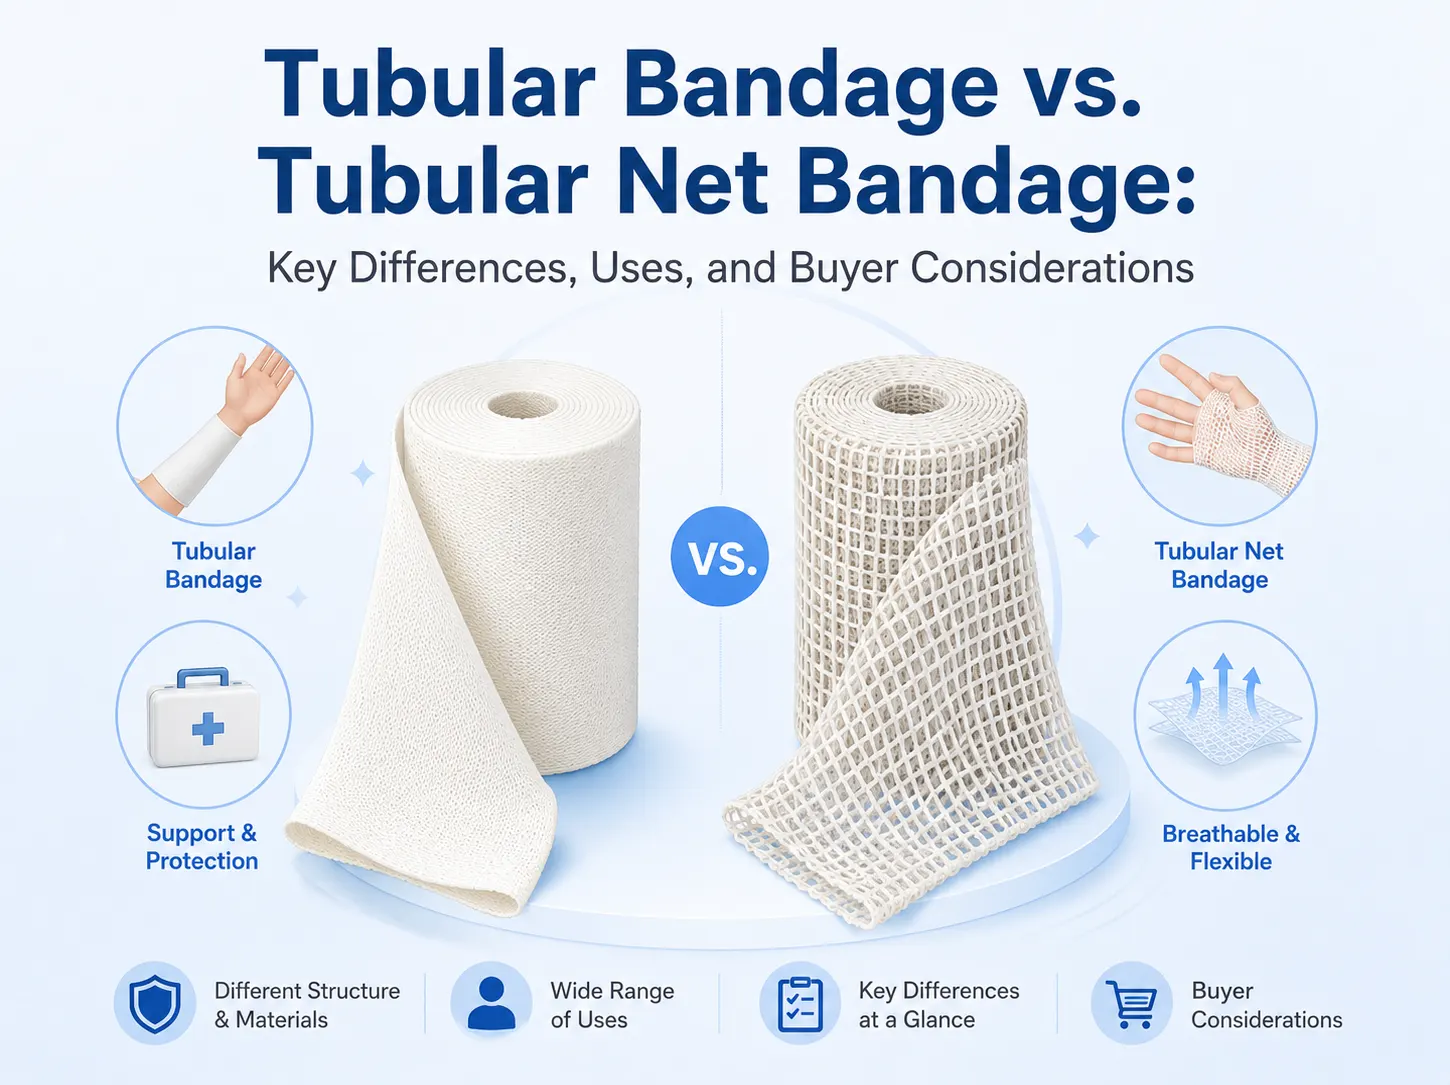
Tubular Net Bandage vs. Tubular Bandage
The names sound similar.
The products are not interchangeable.
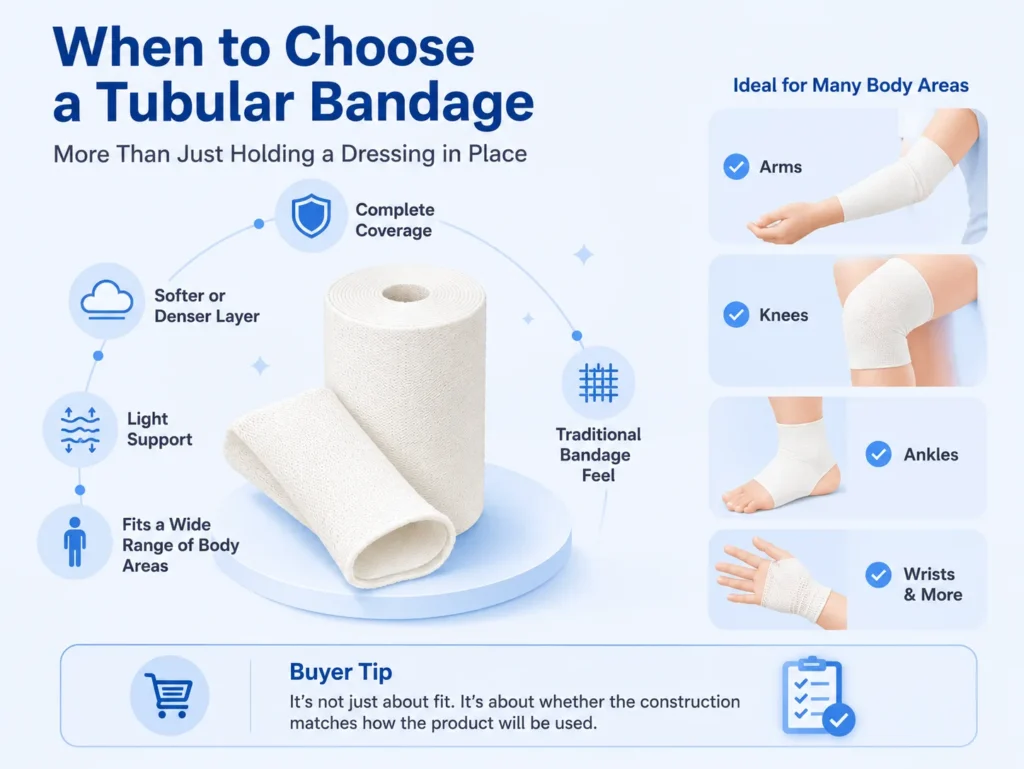
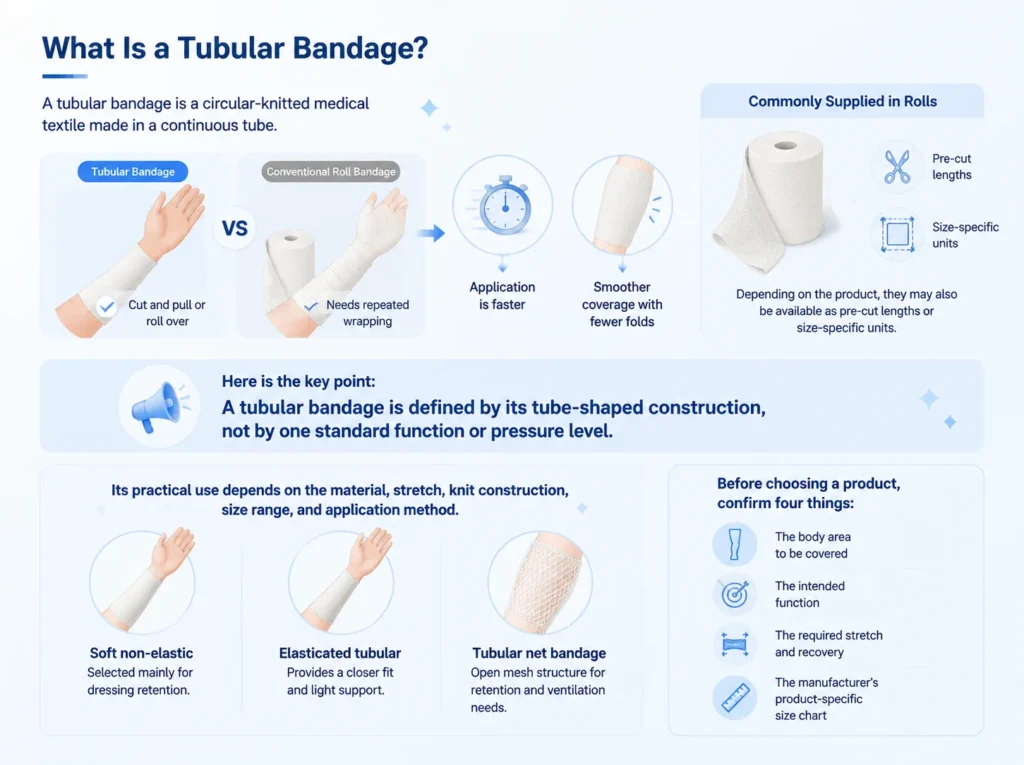
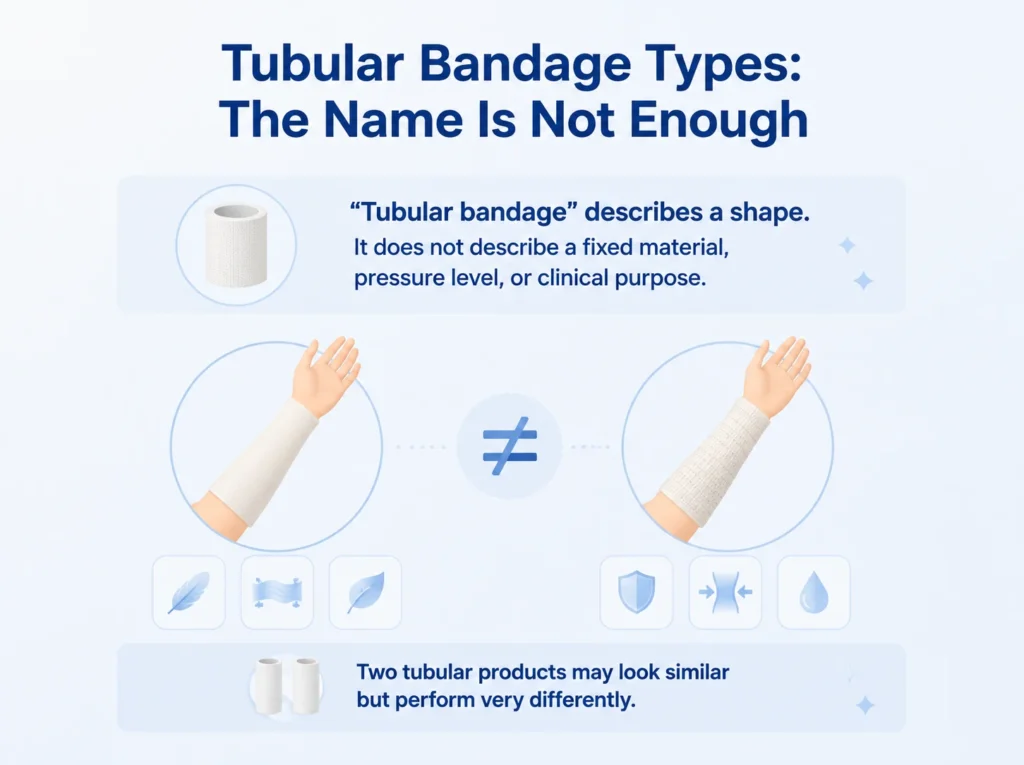
A standard tubular bandage is usually made from a denser knitted or elasticated textile. Depending on its construction, it may be used for coverage, protection, dressing retention, or light support.
A tubular net bandage has a different focus. Its open-mesh structure is primarily designed for flexible dressing retention.
Feature
Tubular Net Bandage
Tubular Bandage
Construction
Open-mesh, stretchable net structure
Denser knitted or elasticated tubular textile
Main role
Holding dressings in place
Coverage, protection, retention, or light support depending on design
Feel and coverage
Lightweight and open
More complete textile coverage
Airflow
More open by design
Depends on material and knit density
Compression
Should not be assumed
May be available in specific elasticated designs
Key sourcing focus
Mesh, stretch, recovery, fit, packaging
Material, density, width, stretch, intended function
Here is the practical rule:
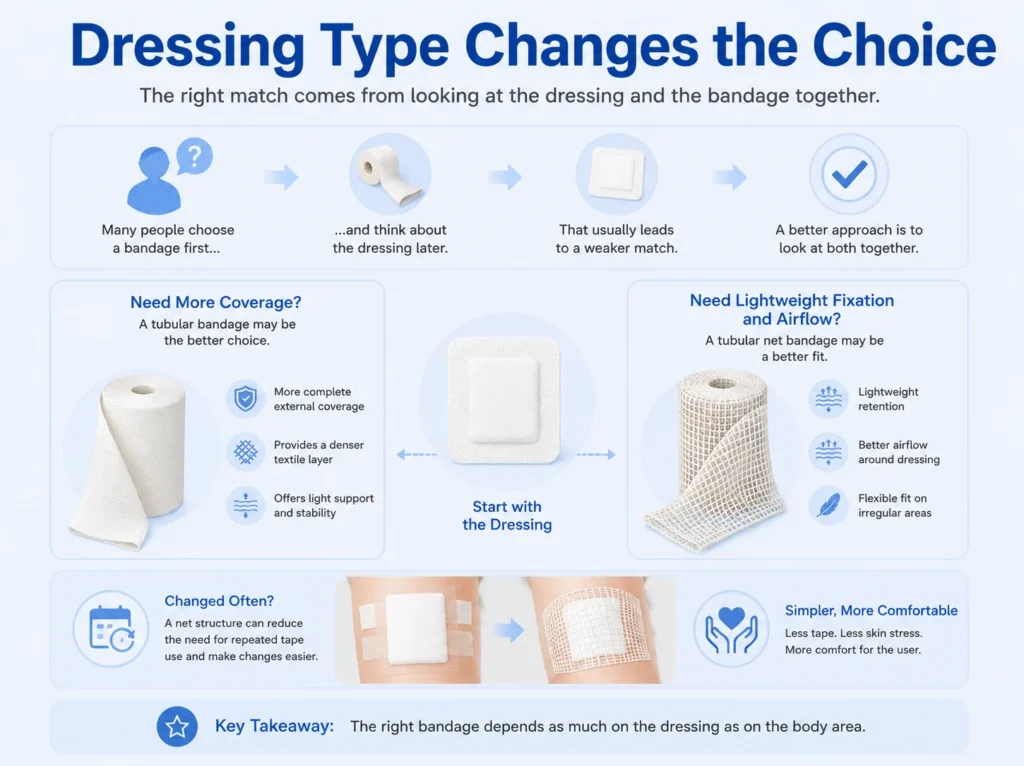
Choose tubular net bandage when the main requirement is flexible dressing retention. Choose a standard tubular bandage when the project requires denser coverage, a different textile structure, or a product with specifically defined support characteristics.
This is where many buyers make avoidable mistakes.
A product can look correct in a catalog and still be the wrong size in actual use.
Why?
Because a tubular net bandage does not only need to fit the body area. It also needs to fit over the finished dressing.
Start With the Coverage Area
Do not begin with the wound size.
Instead, begin with the body area the net needs to cover.
For example:
Finger or toe
Hand or foot
Wrist or forearm
Arm or lower leg
Elbow or knee
Shoulder or thigh
Head
Trunk
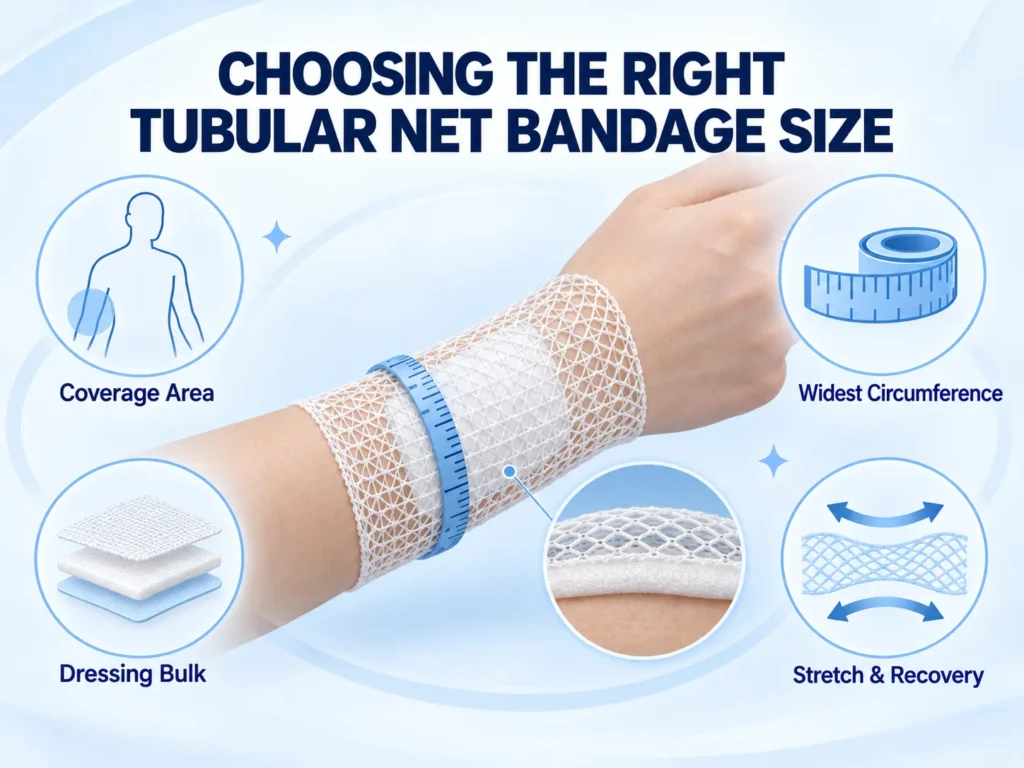
The relevant measurement is the area the net must stretch over, not just the dimensions of the dressing underneath.
Measure the Widest Relevant Circumference
Once you know the coverage area, identify the widest point that the tubular net bandage must pass over.
Then compare that measurement with the supplier’s own sizing chart.
This matters because sizing systems are not standardized across the market.
One supplier may use letters such as A, B, C, D, and E. Another may use numbers such as 1 through 11. A third may list only flat width, relaxed circumference, or recommended body area.
So a “Size C” from one supplier may not match a “Size C” from another.
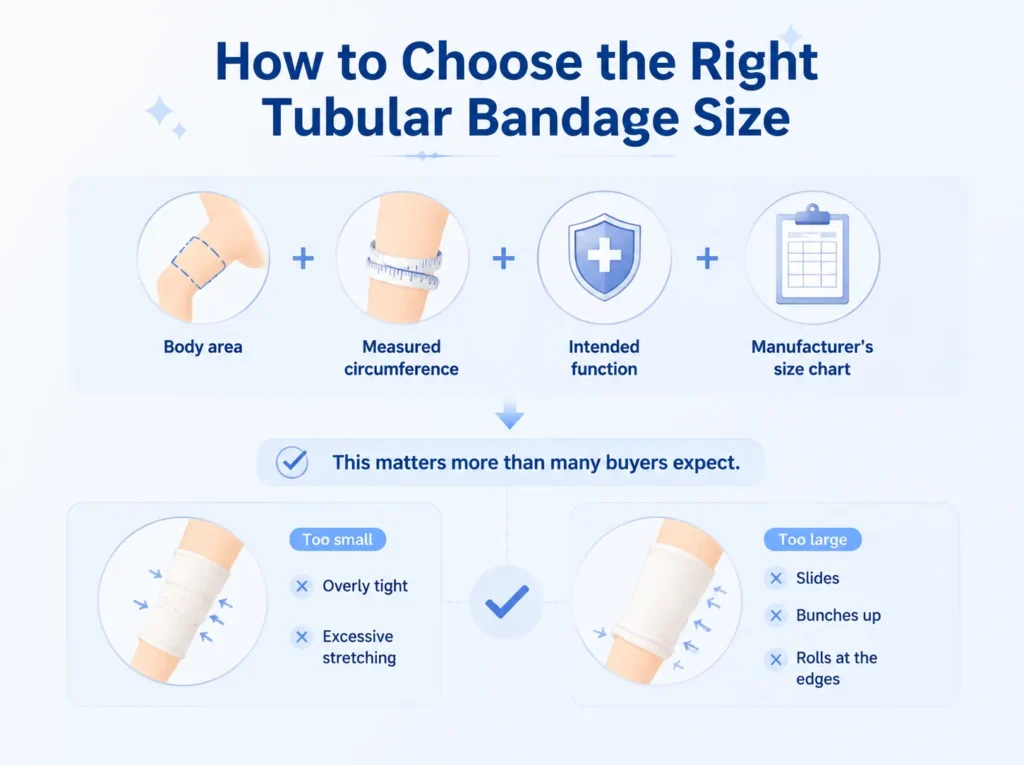
Buyer tip: Never approve a tubular net bandage based only on a size label. Ask for the actual product size chart, measurement method, and recommended body-area range.
Factor in Dressing Bulk
This is one of the most overlooked parts of tubular net bandage selection.
A net bandage may fit comfortably over bare skin. But once a foam dressing, gauze padding, absorbent pad, or multi-layer dressing is in place, the same net may become too tight.
Or too loose.
That is why the right sizing question is not:
“What size fits this arm?”
It is:
“What size fits this arm with the expected finished dressing underneath?”
A well-designed sample evaluation should consider:
The body area
The widest relevant circumference
The dressing thickness
The expected movement of the area
The product’s stretch and recovery characteristics
Check Recovery, Not Just Stretch
Stretch is only half the story.
A product must stretch enough to pass over the intended area. But it also needs reasonable recovery after stretching so it can continue to retain the dressing.
A net that stretches easily but does not recover well may feel acceptable during initial application and then become loose later.
When evaluating a sample, buyers should ask:
Does the net pass over the intended body area smoothly?
Does it sit evenly over the dressing?
Does it twist or bunch?
Does it become too loose after stretching?
Does it create unnecessary tightness?
Does it maintain the expected retention performance?
Product photos alone cannot answer these questions. Sample testing matters.
How to Apply Tubular Net Bandage Over a Dressing
This section is a general product-use overview, not a clinical procedure.
Actual use should follow the specific product instructions, local protocols, and qualified healthcare guidance where applicable.
Confirm that the primary dressing has already been selected and applied according to the appropriate care plan or product instructions.
Choose the tubular net bandage size based on the coverage area and the finished dressing bulk.
Prepare the required length according to the product instructions.
Gently position the net over the dressing without excessive stretching, twisting, rolling, or bunching.
Check that the dressing remains in position and that the net is not unnecessarily restrictive. Important: Tubular net bandage is designed for dressing retention. It should not be used or marketed as a substitute for a primary dressing, a prescribed compression system, or a medical support device unless the specific product is designed and labeled for that purpose.
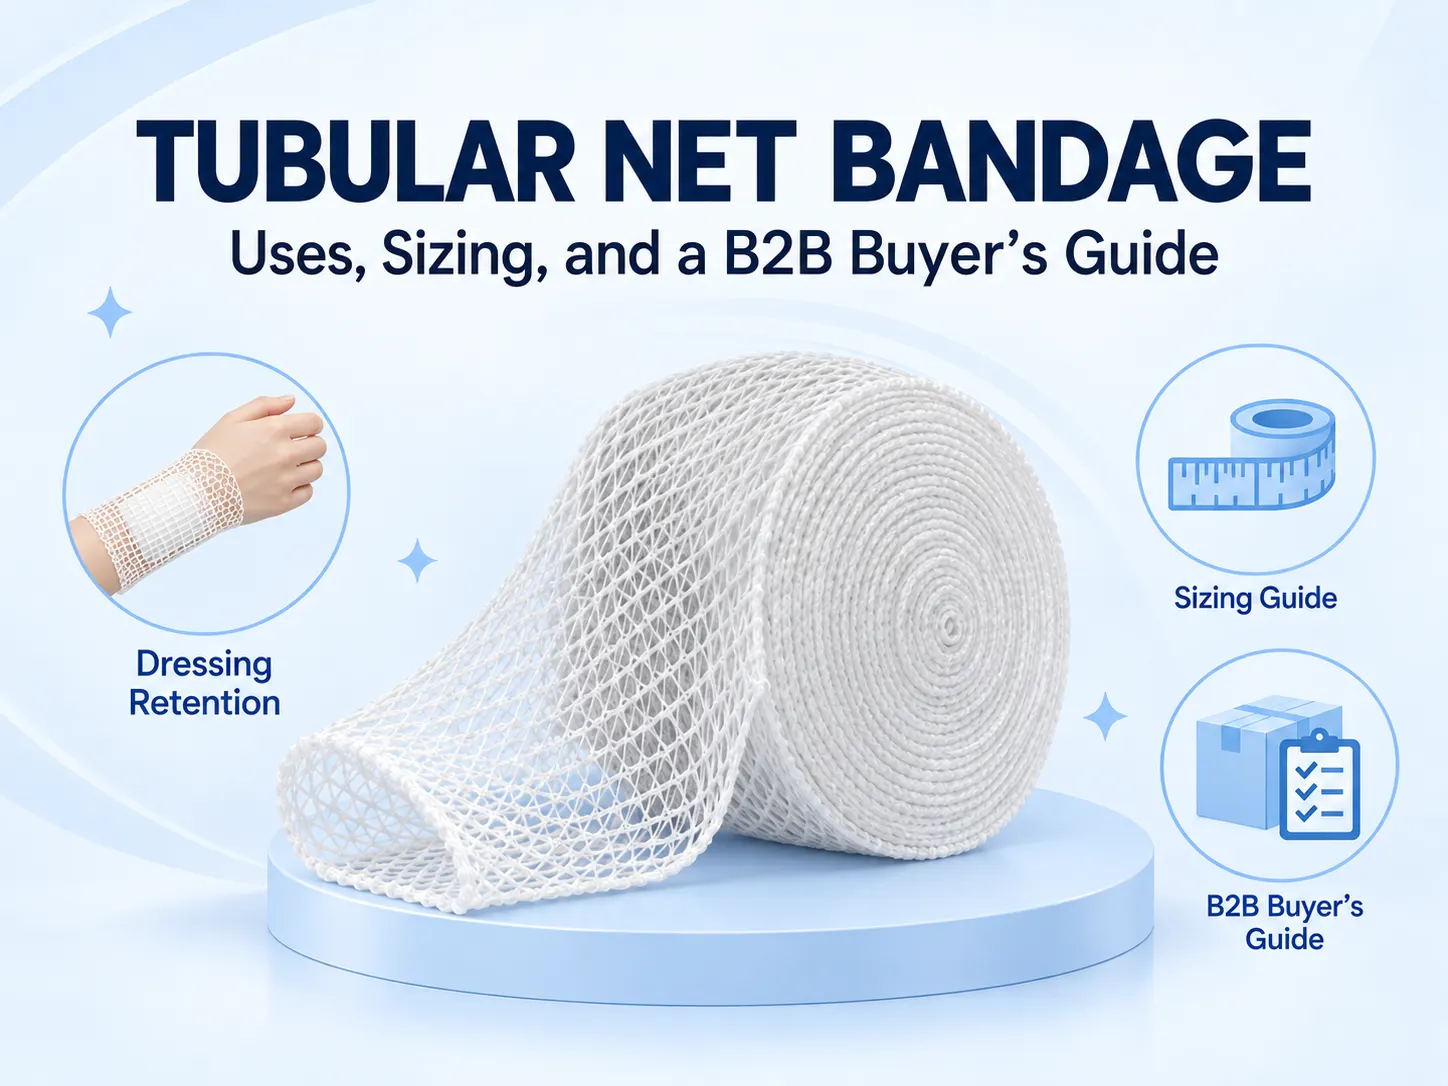
tubular net bandage dressing retention guide
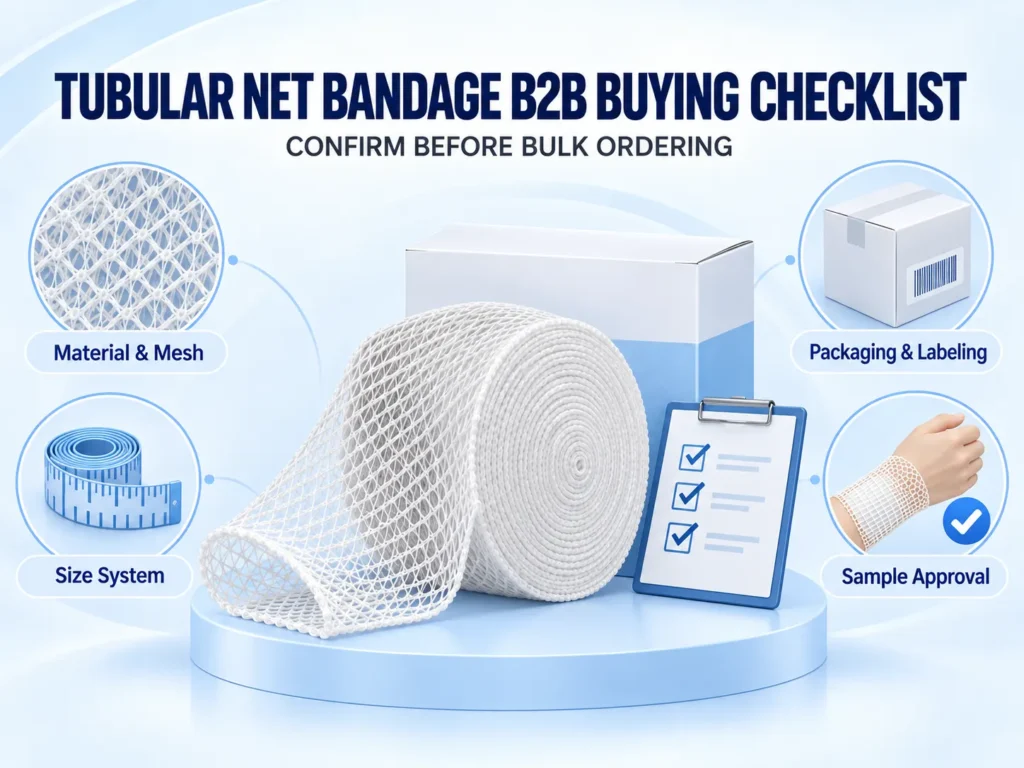
What B2B Buyers Should Specify Before Ordering
“T ubular net bandage” is a product category.
It is not a complete product specification.
For hospital supply projects, distributor programs, tenders, or private-label orders, buyers need more than a product name and a target price.
They need an agreed specification.
Specification area
What buyers should confirm
Intended use
Is the product intended for dressing retention only, or is another function expected?
Material composition
What fibers are used? Is a latex-free declaration required?
Mesh construction
What level of openness, mesh consistency, and softness is required?
Stretch and recovery
How much stretch is needed, and what recovery performance is expected?
Size system
Is sizing based on flat width, circumference, stretch range, or recommended body area?
Dressing bulk
What type and thickness of dressing must the product fit over?
Product format
Continuous roll, dispensing box, pre-cut length, or individual pack?
Packaging
Roll length, unit count, carton quantity, moisture protection, and storage requirements
Labeling
Brand name, artwork, barcode, lot number, language, and destination-market information
Private label
Custom logo, packaging design, SKU structure, and approved artwork process
Documentation
Product specification sheet, material declarations, traceability records, and quality documents
Sample approval
Will bulk production follow a signed specification and approved sample?
For B2B sourcing, this is the real difference between a smooth order and an avoidable problem.
A buyer may ask for “elastic net bandage, Size C, 25 m roll.”
But that request is still incomplete if it does not define:
What “Size C” means
What material is required
What mesh structure is expected
Whether the product needs to fit over a thick dressing
How the roll should be packaged
What label information is required
Which destination market the product will serve
A Practical Sample-Approval Checklist
Before confirming a bulk tubular net bandage order, test an approved sample against the real project requirements.
Use this checklist:
Confirm the size over the intended body area with a representative finished dressing in place.
Check whether the mesh looks consistent before and after stretching.
Test whether the net can be applied without excessive twisting or bunching.
Check whether the fit feels too loose, too tight, or appropriate for the intended retention role.
Confirm the cut edge performs as expected for the project.
Verify the roll length, packaging format, and unit quantity.
Check label content, barcode placement, batch information, and carton markings.
Confirm private-label artwork and destination-market language requirements.
Lock the approved sample and technical specification as the reference standard for production and reorders.
This extra step matters.
A size label and a product photo are not enough to guarantee that the finished product will work correctly in a real distribution or healthcare supply workflow.
Common Sourcing Mistakes to Avoid
Here are five mistakes that come up often.
Treating Tubular Net Bandage and Tubular Bandage as the Same Product
They may both be tubular. They do not necessarily have the same structure, purpose, or sourcing requirements.
Selecting Size Based Only on the Wound
The net needs to pass over the body area and the completed dressing. Wound dimensions alone are not enough.
Assuming Size Labels Match Across Suppliers
A, B, C, 1, 2, 3, Small, Medium, and Large are not universal standards.
Always request the supplier’s actual size chart.
Comparing Price Before Comparing Specifications
A lower price may reflect a different material blend, mesh construction, roll length, size range, packaging format, or quality-control standard.
Compare like for like.
Using Unsupported Medical Claims
Do not market a dressing-retention net as a wound-healing, compression, infection-prevention, or therapeutic-support product unless the specific product has been developed, tested, and labeled for those claims.
Tubular Net Bandage FAQ
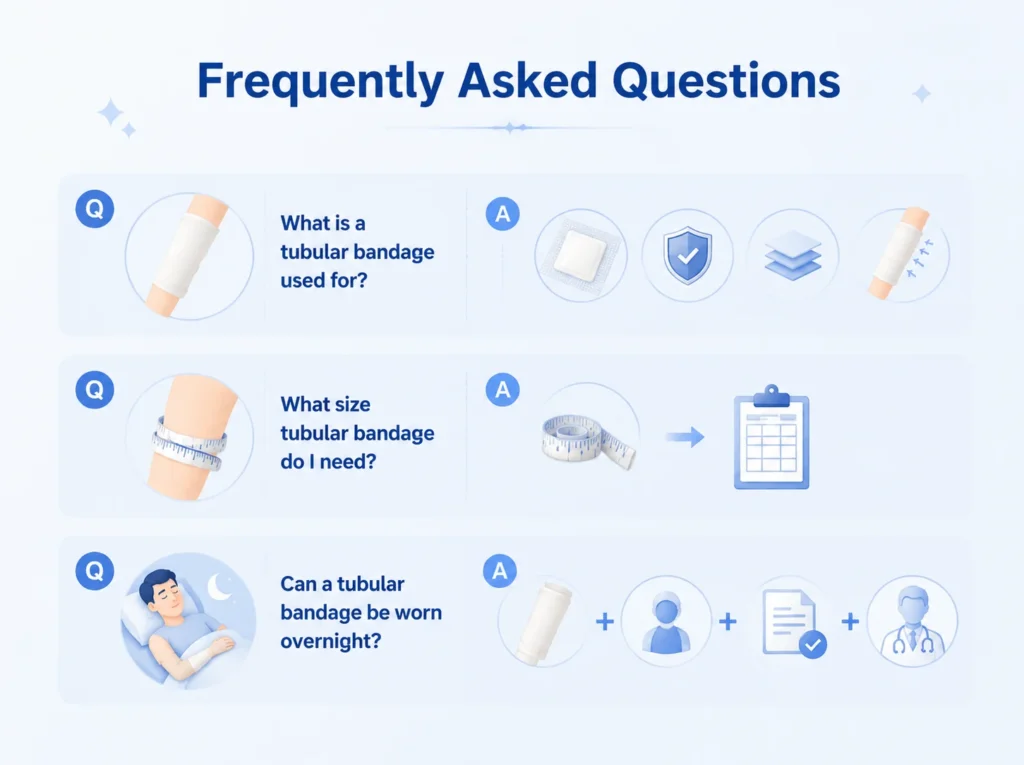
What is a tubular net bandage used for?
A tubular net bandage is used to help retain an already-applied primary dressing. Its open-mesh structure can provide flexible fixation without relying on adhesive tape around the entire dressing area.
Is tubular net bandage the same as tubular bandage?
No. Tubular net bandage is generally an open-mesh dressing-retention product. Tubular bandage is usually denser and may serve coverage, protection, retention, or light-support functions depending on the product design.
How do I choose the right tubular net bandage size?
Start with the body area to be covered, measure the widest relevant circumference, consider the thickness of the finished dressing, and confirm the final choice using the supplier’s own size chart and an approved sample.
Does tubular net bandage provide compression?
Not by default. Its main role is dressing retention. Any compression or support characteristic depends on the specific product’s design, testing, labeling, and intended use.
Can tubular net bandage be supplied for private-label programs?
Depending on the supplier’s manufacturing capabilities, tubular net bandage may be available for private-label programs. Buyers should confirm the material, size range, packaging, label artwork, barcode requirements, destination market, and order quantity before requesting a quotation.
Source Tubular Net Bandage for Your Supply Program
Looking for tubular net bandage for a hospital supply chain, medical distributor, pharmacy brand, or private-label program?
Share your intended application, preferred material, target size range, packaging format, label requirements, and destination market with the Haody Medical team.
A clear specification at the beginning helps ensure that the final product fits your sourcing needs, packaging workflow, and end-user application.
This article provides general product information for sourcing and reference purposes only. It is not medical advice. Product selection and clinical use should follow the relevant product instructions, applicable regulations, and guidance from qualified healthcare professionals.
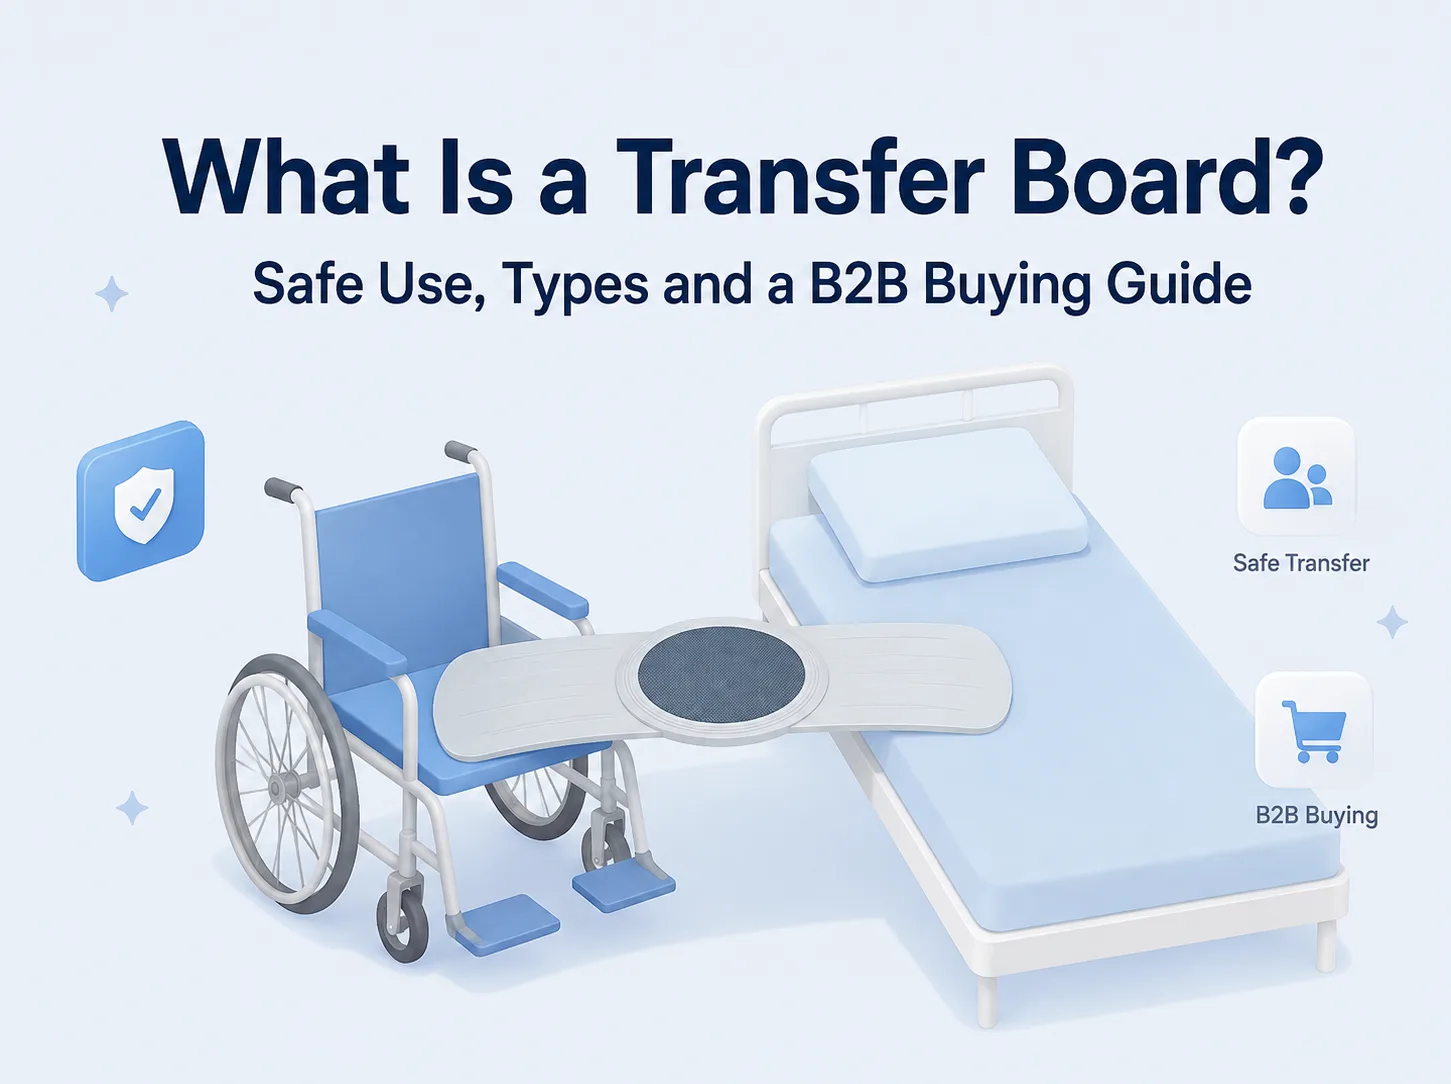
A transfer board can turn a difficult wheelchair-to-bed transfer into a routine one.
It can also go wrong fast.
A board that’s a few inches too short. A mattress edge that’s softer than it looks. A brake that wasn’t locked. None of these are dramatic mistakes — but any one of them is enough to turn a routine transfer into a fall.
Here’s the thing: most guides on this topic jump straight to “how to slide across the board.” That’s the easy part. The part that actually determines whether the transfer goes well happens before anyone touches the board — and that’s what this guide focuses on.
Quick Answer
A transfer board may help create a supported pathway between a wheelchair and a bed for a seated transfer. Whether it’s the right tool depends on:
The person’s transfer plan, sitting balance, and upper-body function
Skin condition and any medical restrictions
Whether the wheelchair and bed are actually set up to support it
The level of caregiver assistance available
A transfer board doesn’t lift the user. It’s not a substitute for a mechanical lift when more support is needed. Always follow the product’s instructions for use and guidance from a qualified healthcare professional.
In this guide:
Why the transfer plan matters more than the board
How to prepare the wheelchair-to-bed transfer space
How to check board-to-bed compatibility (the part most guides skip)
A pre-transfer safety checklist
5 setup mistakes that undermine an otherwise good transfer
How to choose the right board
What healthcare buyers should request from a supplier
1.Start With the Transfer Plan, Not the Board
Here’s a question worth asking before anything else: is a transfer board even the right tool for this person?
That’s not a rhetorical question. It has a real answer, and it depends on a handful of factors that have nothing to do with the board itself:
Sitting balance and trunk control
Upper-limb strength and pain
Ability to understand and follow instructions during the transfer
Skin condition and risk of pressure or shear injury
Wounds, tubing, recent surgery, or other medical restrictions
How many caregivers are needed — and whether they’re trained for this specific transfer
Whether a lift, slide sheet, or other aid might actually be the better fit
None of these are calls a blog post can make for you. They belong to an occupational therapist, physiotherapist, nurse, or another appropriately trained professional who knows the person and the situation.
Bottom line: the board is one variable in the system. It’s rarely the variable that decides whether the transfer is safe.
A transfer board is not a lifting device
Say it plainly, because marketing copy tends to blur this: a transfer board bridges a gap. It doesn’t lift body weight.
And here’s something worth being upfront about: research on wheelchair transfers has found that using a transfer board doesn’t automatically reduce upper-limb loading or improve transfer performance for every user. Technique, individual function, and training matter just as much as the equipment.
That doesn’t mean boards don’t help. It means the board isn’t the whole story — and any guide that implies otherwise is oversimplifying.
2. Prepare the Wheelchair-to-Bed Transfer Space
This is the part most guides do cover — for good reason. It’s where most avoidable problems happen.
Bring the wheelchair as close to the bed as possible
The closer the two surfaces, the shorter the gap the board actually has to cover. Before positioning the chair:
Clear away footstools, side tables, cables, or loose rugs
Make sure there’s enough room for a caregiver to move safely, if one is assisting
Position the wheelchair according to the individual’s transfer plan — the right angle depends on the room, the chair, and the person, not a fixed number
Stabilize both surfaces before the board goes anywhere near them
Lock the wheelchair brakes. Every time. No exceptions.
Lock the bed castors, if it has them.
Set the bed height according to the transfer plan.
Check the mattress edge isn’t so soft that it compresses under the board and undermines support.
Confirm the floor is dry and nothing underfoot can shift.
Create a transfer path with nothing in the way
Remove or adjust footrests and, if the chair allows it, the near-side armrest
Keep hands, feet, clothing, and any tubing clear of pinch points
Never let fingers rest under the edge of the board
Decide where the caregiver will stand before the transfer starts — not while it’s happening
3.Check Board-to-Bed Compatibility (The Part Most Guides Skip)
This is the section that actually separates a good setup guide from a generic one.
Check the overlap at both ends — not just the total length
A board needs stable support on the wheelchair and the bed. “Long enough to reach” isn’t the same as “stable enough to bear weight.”
What to look for in practice:
Both ends of the board rest on a firm, stable surface
The board doesn’t teeter, tip, or balance on just an edge
The board doesn’t interfere with the wheelchair frame, wheel, or cushion
How much overlap is enough depends on the board’s design and the product’s instructions for use — this isn’t something to eyeball.
Check bed height and mattress-edge support
Here’s a failure mode nobody talks about: a board that’s technically the right length can still fail if the mattress compresses too much where the board rests, or if the bed height doesn’t line up with the wheelchair seat.
This isn’t a spec you can read off a product page. It has to be checked in the actual room, with the actual bed, every time the setup changes.
Check the wheelchair configuration
Can the armrest be removed, or does it swing away?
Are the footrests fully out of the transfer path?
Is there enough clearance between the wheel and the board?
Does the cushion height match what the transfer plan assumes?
If any of these don’t line up, the fix usually isn’t a different board. It’s adjusting the setup — or reassessing the transfer plan altogether.
4.A Safety-First Framework for Using the Board
This isn’t a script to follow on autopilot. It’s a checklist to run through every time, because “every time” is exactly when shortcuts creep in.
Before the transfer
Confirm the individual transfer plan and required level of assistance
Read the board’s instructions for use and check its rated load
Inspect the board — no cracks, warping, sharp edges, deep scratches, or contamination
Confirm both the wheelchair and bed are stable
Lock the wheelchair brakes and clear the transfer path
Verify stable, adequate support at both ends of the board
Make sure clothing — not bare skin — is what touches the board
Explain what’s about to happen and agree on a cue or signal
If pain, dizziness, or fatigue shows up beforehand, stop and reassess
During the transfer
Follow the trained technique and the facility’s protocol — not shortcuts
Move in small, controlled increments rather than one long slide or a hard pull
Keep hands away from the board’s edges and any pinch points
If the board shifts, slips, or feels unstable, pause immediately
Use exactly the caregivers and equipment specified in the plan
After the transfer
Confirm the person is stable and correctly positioned before removing the board
Remove and store the board using the approved technique
Clean and inspect it per the manufacturer’s instructions
Log any damage, skin concerns, or difficulty, per facility policy
5. Setup Mistakes That Undermine an Otherwise Good Transfer
Mistake #1: Treating the board as a lift
A transfer board bridges a gap. It doesn’t replace a mechanical lift when someone needs to be fully supported or lifted rather than slid.
Mistake #2: Judging the board on length alone
A longer board isn’t automatically safer if it doesn’t have stable, firm support at both ends. Overlap and surface stability matter just as much as total length.
Mistake #3: Letting the board touch bare skin
Skin sliding directly against the board increases the risk of friction and shear injury. Clothing goes between the skin and the board — consistent with the person’s care plan.
Mistake #4: Assuming the same angle works for every transfer
Wheelchair type, armrest design, room layout, and the person’s ability all vary. What worked last time doesn’t automatically work for the next person, or even the next room.
Mistake #5: Skipping inspection because “it worked fine last time”
A reusable board that’s cracked, warped, or wasn’t cleaned properly isn’t the same product that shipped new. Every use deserves a quick check — not just the first one.
6.Choosing a Transfer Board for Wheelchair-to-Bed Transfers
Once the setup and technique are sorted, board selection comes down to a short list of concrete factors.
What to evaluate
What to confirm
Why it matters
Intended use
Designed for seated wheelchair transfers, not just labeled generically
Avoids confusion with hospital lateral transfer boards, which serve a different purpose
Shape
Straight, curved, or notched
Determines whether it clears armrests, wheels, or other obstacles
Dimensions
Length, width, thickness
Needs to match the actual gap and required overlap — not just “look long enough”
Rated load
Documented safe working load and how it was determined
Supports internal risk assessment, especially for institutional buyers
Surface and edges
Slide-friendly top, rounded edges, non-slip base
Affects comfort, skin safety, and control during the transfer
Material
Wood, plastic, or composite
Affects weight, rigidity, and how it holds up to repeated cleaning
Cleaning compatibility
Which disinfectants and methods are safe to use
Essential for reusable boards in institutional settings
Documentation
IFU, spec sheet, batch/traceability info
Required for procurement review and quality audits
7.What Healthcare Buyers Should Request From a Transfer Board Supplier
If you’re sourcing transfer boards for a care facility, distribution business, or private-label program, don’t place an order until you have these:
Product specification sheet
A clear intended-use statement
Instructions for use (IFU) and safety warnings
Rated-load documentation — and the basis for that rating
Dimensions, shape, thickness, and material details
Cleaning and disinfection compatibility guidance
Inspection and replacement guidance for reusable boards
Packaging, labeling, barcode, and language options
Traceability and quality-system documentation
Sample availability, MOQ, OEM/private-label options, and lead time
Sourcing a wheelchair transfer board for your care program or distribution project? Tell us your target market, intended use, required board type and size, documentation needs, packaging format, and forecast quantity. Our team can help you evaluate the right options.
A transfer board isn’t a universal answer to every wheelchair transfer.
When someone can’t safely maintain the position the transfer requires, can’t participate at the level the plan assumes, has skin or medical concerns that rule it out, or needs sling-supported assistance — a different transfer approach is usually the safer call.
For a broader look at transfer board types, safe-use fundamentals, and how transfer boards compare to slide sheets, gait belts, and patient lifts, see our complete guide: What Is a Transfer Board?
FAQ
Can a transfer board be used from a wheelchair to a bed? Yes, when it’s appropriate for the person’s transfer plan and the wheelchair and bed are set up correctly. Suitability should be assessed by a qualified healthcare professional — not decided from a product description alone.
How do I choose the right transfer board length for a wheelchair-to-bed transfer? Length needs to match the actual gap, with stable overlap on both ends — not just “long enough to reach.” Check the real setup, including bed height and mattress edge, rather than relying on dimensions alone.
Should the transfer board touch bare skin? No. Clothing should separate the skin from the board surface to reduce the risk of friction and shear injury.
Can a transfer board replace a patient lift? No. A transfer board bridges a gap for a seated transfer; it doesn’t lift the person. When someone needs to be lifted or fully supported, a mechanical lift or another transfer aid is more appropriate.
What should be checked before a wheelchair-to-bed transfer? At minimum: wheelchair brakes locked, bed stable, clear transfer path, board inspected for damage, stable support at both ends of the board, and confirmation that the person is ready and able to proceed as planned.
What documents should a healthcare buyer request from a transfer board supplier? A product specification sheet, IFU, rated-load documentation, material and dimension details, cleaning compatibility guidance, and traceability/quality documentation — plus sample and OEM options if relevant.
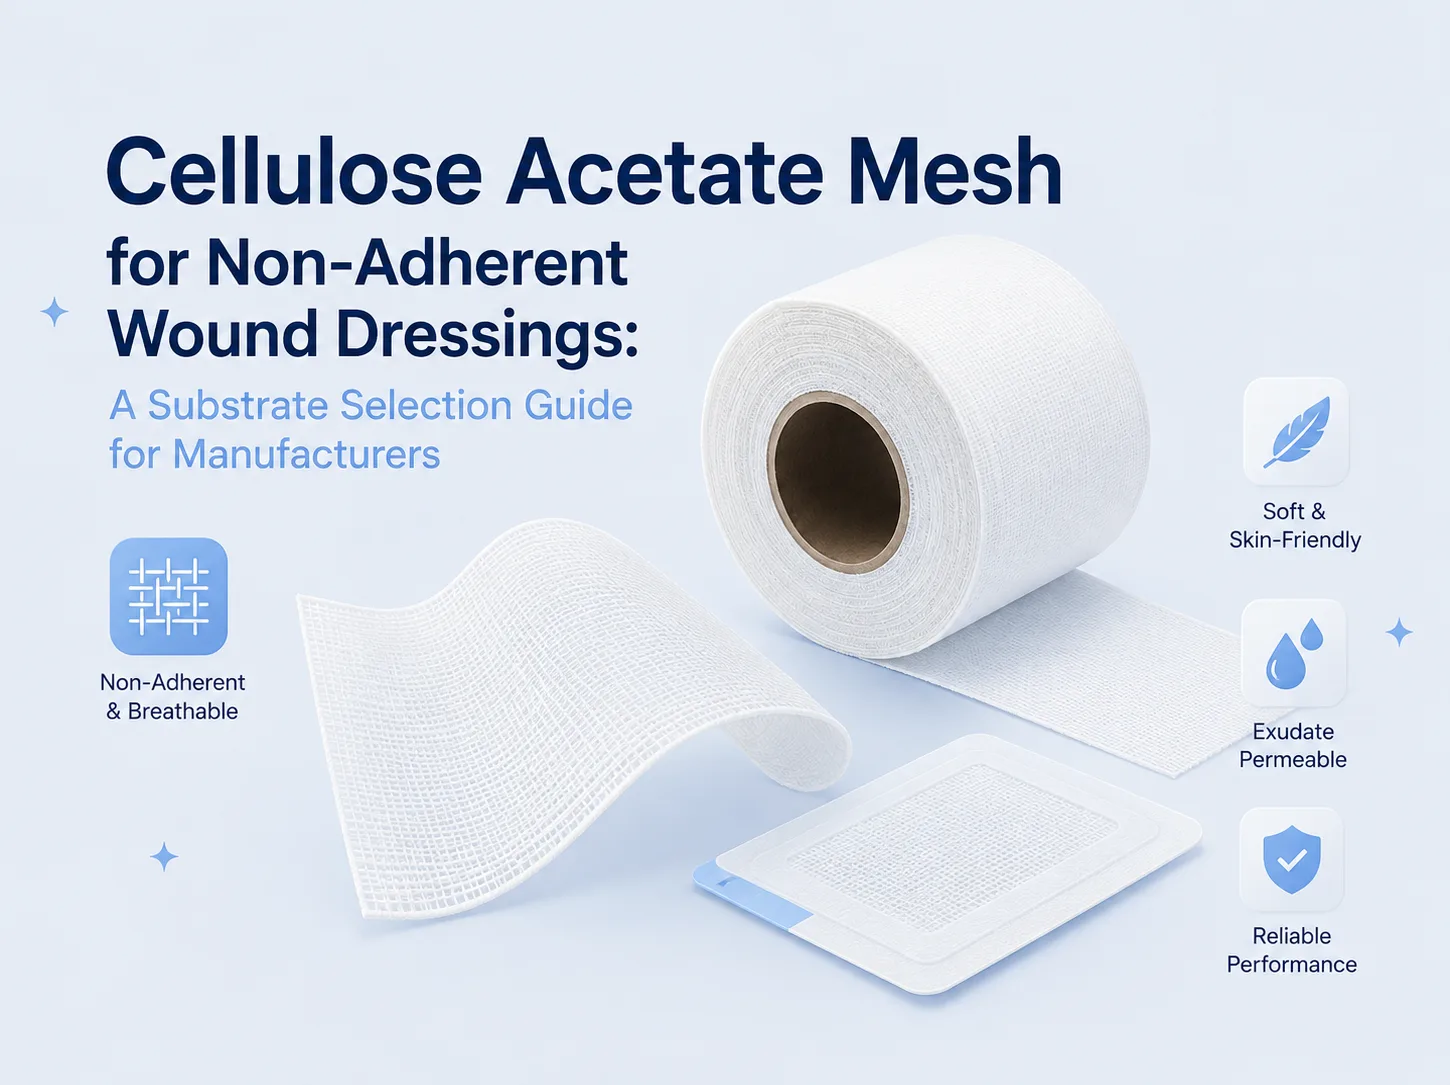
Quick answer: Cellulose acetate mesh is an open-knit dressing substrate. On its own, it’s not a finished wound dressing. It becomes one once a manufacturer adds a petrolatum emulsion, a honey-based formulation, a CMC coating, or a silicone system, then converts, packages, sterilizes, and validates it. This guide covers how the mesh fits into that system, which finished products it’s typically used for, and exactly what to specify when you’re sourcing it.
If you’re developing a non-adherent gauze, an oil-emulsion dressing, a honey-impregnated wound dressing, or a tubular finger dressing, keep reading. We’ll walk through the mesh’s role in each format, the sourcing checklist to bring to a supplier conversation, and where the line sits between “material supplier” and “finished-device manufacturer.”
In this guide:
Why knitted cellulose acetate mesh is used as a dressing substrate
How it works inside a non-adherent dressing system
The four finished-product formats it’s typically built into
What to specify when sourcing it
Processing and validation considerations
FAQs
Why Cellulose Acetate Mesh Is Used as a Dressing Substrate
This guide focuses on cellulose acetate mesh as a substrate within a finished non-adherent dressing system. If you need a broader introduction to the material itself — including its composition, textile characteristics, and general medical-fabric applications — read our overview of cellulose acetate medical fabric.
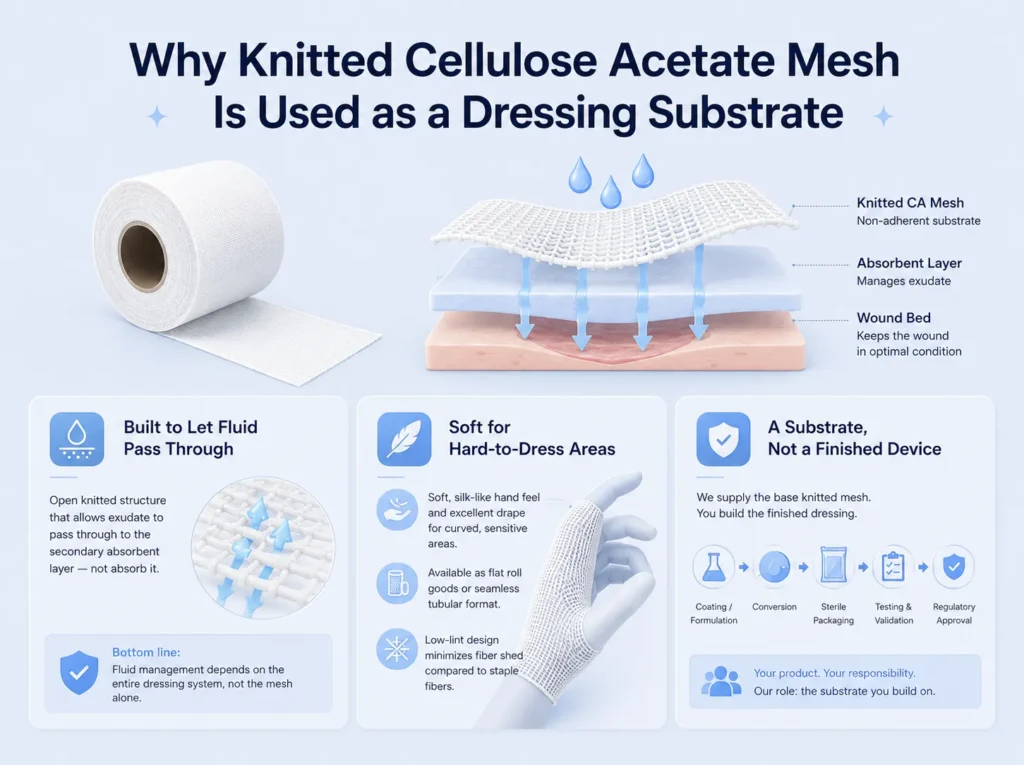
It’s built to let fluid pass through, not soak it up
The defining feature of this material is its open, knitted structure. It isn’t an absorbent pad.
It’s a gate.
In a finished dressing, wound exudate moves from the wound bed, through the mesh, and into a secondary absorbent dressing sitting on top of it. That’s the same basic construction behind most commercial non-adherent primary dressings on the market today.
Bottom line: the mesh’s job is to stay out of the way of fluid movement. How much exudate a finished dressing can actually handle comes down to the whole stack — the mesh, the coating on it, and the absorbent layer behind it — not the mesh in isolation.
It’s soft enough for the hard-to-dress areas
Knitted cellulose acetate has a soft, silk-like hand feel and bends easily. That’s why it shows up in dressings built for fingers, joints, burn sites, and skin graft donor areas — the curved, sensitive spots where stiff fabric doesn’t cooperate.
It can be supplied as flat roll goods, cut to size. It can also be knitted as a seamless tube, which opens up finger and digit dressing formats without a flat-to-tube conversion step.
One more practical detail: filament-based cellulose acetate yarn tends to shed less than staple-fiber fabrics like cotton gauze. Fewer loose fibers left behind in a wound bed is a real advantage. That said, treat this as a property to test and specify for your finished product, not as an unconditional guarantee.
It’s a substrate — not a finished medical device
Worth saying plainly: what we supply is a dressing substrate, not a finished wound dressing.
Getting to “finished dressing” requires a formulation or coating system, a conversion process, sterile packaging, biocompatibility assessment, performance validation, and regulatory documentation — all owned by the company bringing the finished device to market. Our role is the base knitted mesh, in roll or tubular format, that you build your product around.
How Cellulose Acetate Mesh Works Inside a Non-Adherent Dressing
Strip a typical non-adherent dressing down to its layers and it looks like this:
Wound bed → cellulose acetate mesh substrate → impregnation or coating system → secondary absorbent dressing → fixation
Three parts do three different jobs.
The mesh substrate is the structural, open-knit base. It conforms to the wound, doesn’t cling to healing tissue the way plain cotton gauze can, and holds its shape through processing, cutting, and rolling.
The impregnation or coating system is where most of a finished dressing’s marketed benefit actually comes from — a petrolatum emulsion, a honey-based formulation, a CMC finish, or a silicone tack layer. This isn’t a theoretical setup: one well-known non-adhering primary dressing on the market is literally knitted cellulose acetate fabric impregnated with a specially formulated petrolatum emulsion, and a silicone-coated version of the same product line uses the identical open-mesh base with a soft-tack silicone finish instead.
The secondary absorbent dressing does the actual work of absorbing exudate once it passes through the mesh. For higher-exudate wounds, it’s this layer — plus the overall product design — that determines fluid-handling capacity, not the base mesh by itself.
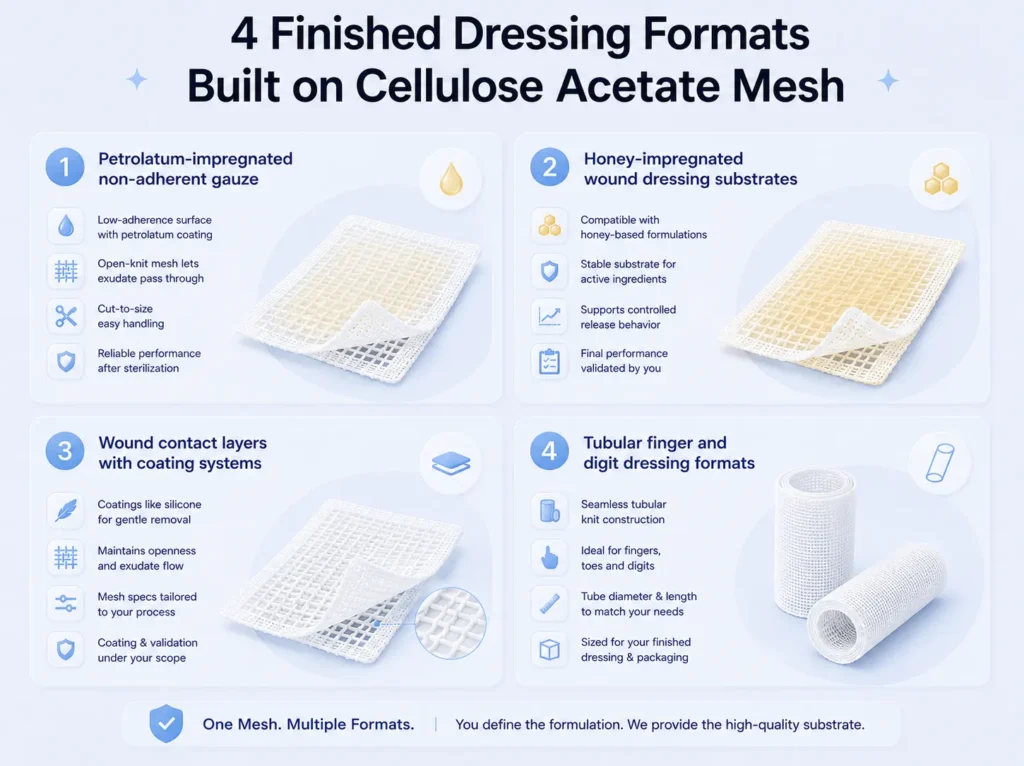
4 Finished Dressing Formats Built on Cellulose Acetate Mesh
1. Petrolatum-impregnated non-adherent gauze
This is the most established use case for this material in wound care, and the product type most consistently linked to it across major wound-care brands and distributors.
The mesh gets impregnated with a petrolatum or oil-emulsion coating to create a low-adherence surface, while the open-knit structure still lets exudate reach a secondary dressing.
Development variables to lock down: impregnation weight and uniformity, mesh openness after coating, cut-to-size handling, post-sterilization performance of the coated fabric.
2. Honey-impregnated wound dressing substrates
Honey-based wound dressings — Manuka honey formulations included — are another established application for acetate gauze substrates, sometimes paired with additional active agents.
We can discuss the mesh as a candidate substrate for this kind of formulation. Formulation compatibility, active-ingredient stability, release behavior, and finished-product validation stay on your side of the table. We don’t market our base mesh as antimicrobial or wound-healing on its own — those claims belong to the validated finished device, not the substrate.
3. Wound contact layers with coating systems
Beyond petrolatum, some finished dressings pair cellulose acetate mesh with other coatings — silicone, for example — to build a contact layer that lifts off with minimal disturbance to healing tissue.
If this is your target format, we can work through mesh openness, thickness, and conversion requirements to fit your coating process. The coating itself and its performance validation remain your development scope.
4. Tubular finger and digit dressing formats
The same mesh can be knitted as a seamless tube instead of flat sheeting — useful for finger, toe, and digit dressings that need to slip on without seams or overlaps.
Roll length, tube diameter, and cutting requirements get discussed against your target finished-dressing size and packaging format.
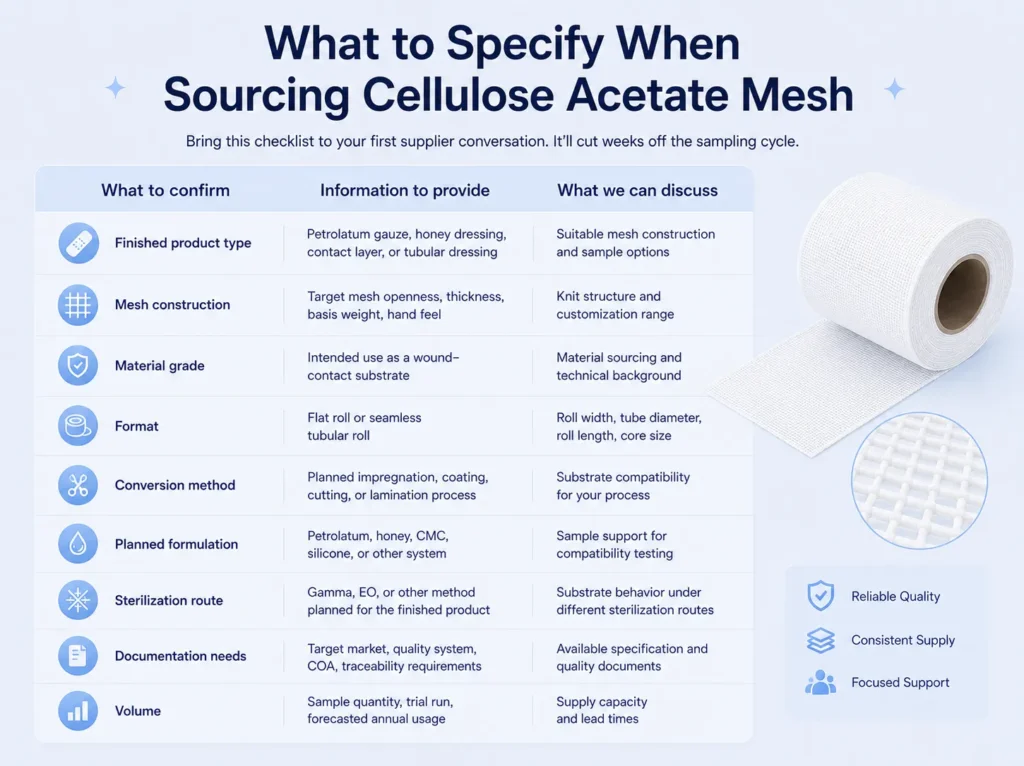
What to Specify When Sourcing Cellulose Acetate Mesh
Bring this checklist to your first supplier conversation. It’ll cut weeks off the sampling cycle.
What to confirm
Information to provide
What we can discuss
Finished product type
Petrolatum gauze, honey dressing, contact layer, or tubular dressing
Suitable mesh construction and sample options
Mesh construction
Target mesh openness, thickness, basis weight, hand feel
Knit structure and customization range
Material grade
Intended use as a wound-contact substrate
Material sourcing and technical background
Format
Flat roll or seamless tubular roll
Roll width, tube diameter, roll length, core size
Conversion method
Planned impregnation, coating, cutting, or lamination process
Substrate compatibility for your process
Planned formulation
Petrolatum, honey, CMC, silicone, or other system
Sample support for compatibility testing
Sterilization route
Gamma, EO, or other method planned for the finished product
Substrate behavior under different sterilization routes
Whatever gets coated or impregnated onto the mesh needs testing for viscosity, coating uniformity, and whether the mesh openness survives the coating process well enough to still transfer fluid. Migration and stability after packaging and storage belong in your development testing too.
Wet-state handling
Cellulose acetate loses tensile strength when wet. That means the finished dressing’s intended handling — including removal during a dressing change — needs testing under realistic wet-use conditions, not assumptions from dry-state fabric data.
This matters most for higher-exudate wounds, where the finished product design (not the substrate alone) has to account for wet-strength requirements.
Sterilization and packaging
Gamma irradiation and ethylene oxide are both generally workable sterilization routes for cellulose acetate-based materials. High-temperature steam autoclaving isn’t recommended — it can degrade fiber performance.
Whichever route you choose, validate it on the finished, packaged product, coating included. Don’t extrapolate from raw-substrate data alone.
Regulatory responsibility
Supplying a substrate isn’t the same as bringing a finished medical device to market. Confirming intended use, regulatory classification, biocompatibility testing, sterility assurance, labeling, and market authorization stays with the finished-dressing manufacturer.
Why Source Cellulose Acetate Mesh From Haody Medical
Developing a non-adherent dressing, an oil-emulsion gauze, a honey-based wound dressing, or a tubular finger dressing? Tell us your target format and formulation, and we’ll help you evaluate fit.
To request a sample or spec sheet, include:
Your finished dressing concept
Flat roll or tubular format requirement
Target width or tube diameter
Target mesh openness, thickness, or basis weight
Planned coating or impregnation system
Planned sterilization method
Target market and estimated annual quantity
FAQs
Is cellulose acetate mesh a finished wound dressing? No. It’s a knitted dressing substrate. Whether it becomes a sterile, non-adherent wound dressing depends on the coating system, conversion, packaging, sterilization, and validation the finished-device manufacturer carries out.
Can cellulose acetate mesh be used for petrolatum gauze development? Yes — it’s one of the material’s most established uses. Knitted cellulose acetate impregnated with a petrolatum or oil-emulsion coating is the basis for several established non-adherent gauze products on the market. Formulation compatibility and finished-product performance still need your validation.
Can the mesh be used in honey-based wound dressings? It can be evaluated as a substrate for honey-based or other active formulations. Formulation compatibility, active-ingredient stability, and finished-product validation are part of your development work.
Does cellulose acetate mesh absorb wound exudate? Not primarily. It lets exudate pass through to a secondary absorbent dressing rather than absorbing fluid itself. For high-exudate wounds, the finished dressing’s full construction determines fluid-handling capacity — not the mesh alone.
Is tubular cellulose acetate mesh available? Yes. It can be produced as a seamless tubular roll for finger and digit dressing formats, with diameter, length, and cutting specs discussed against your target product.
What information do you need for a quotation or sample request? Your intended finished product, planned coating or impregnation system, target mesh openness/thickness/basis weight, roll or tubular dimensions, planned sterilization method, target market, and estimated annual volume.
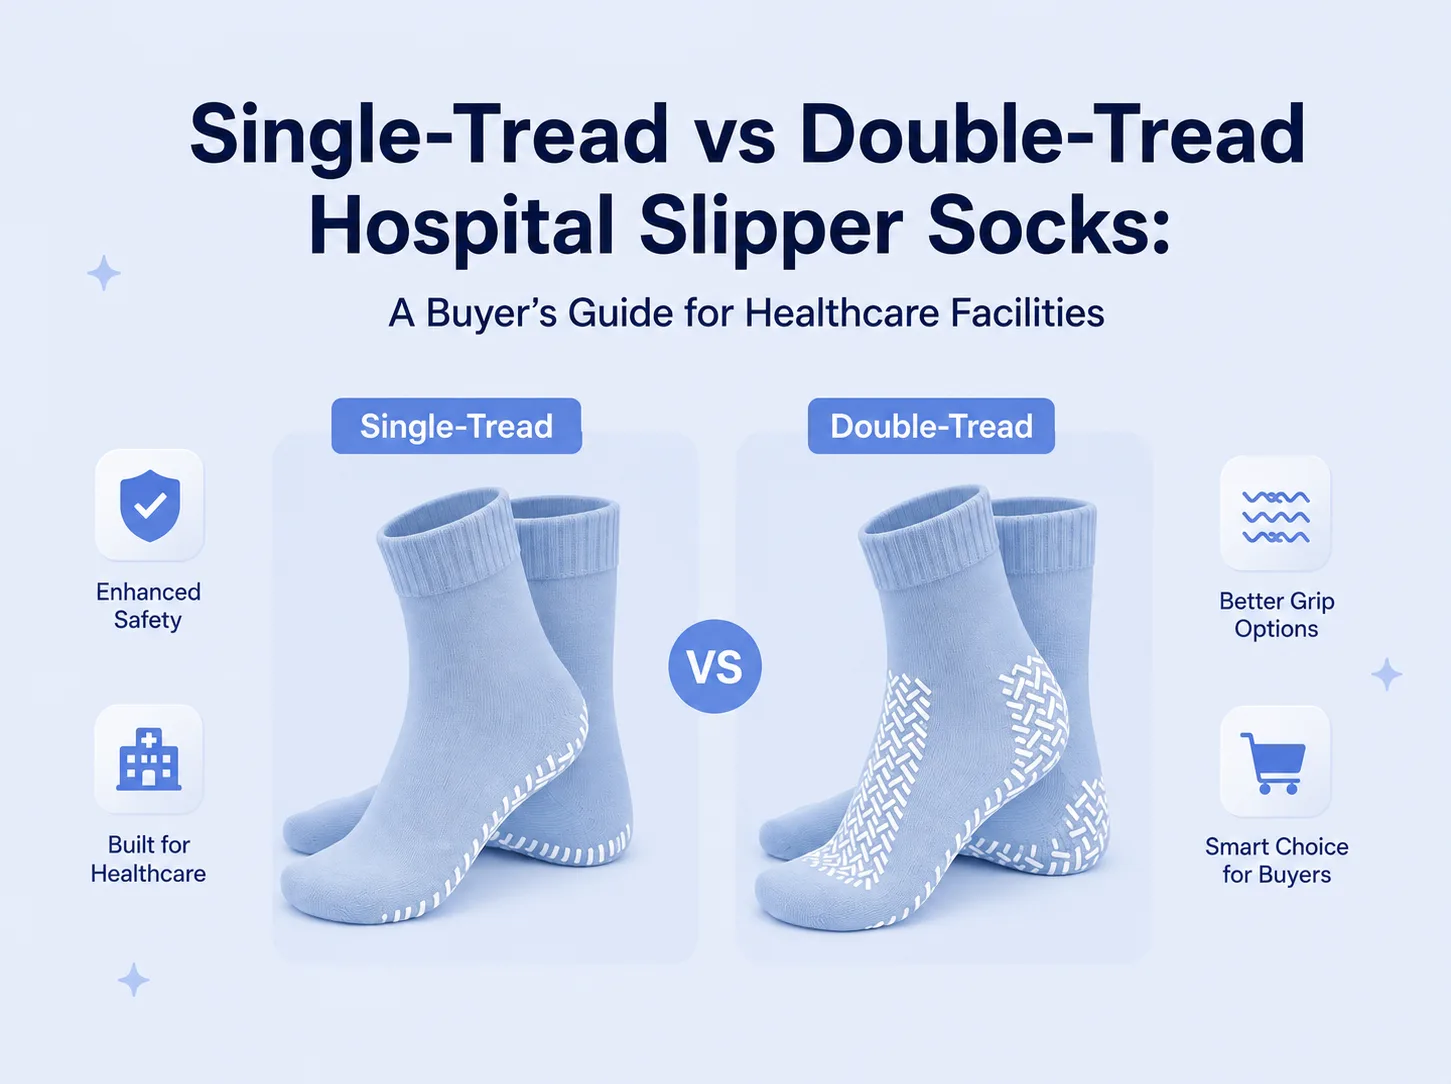
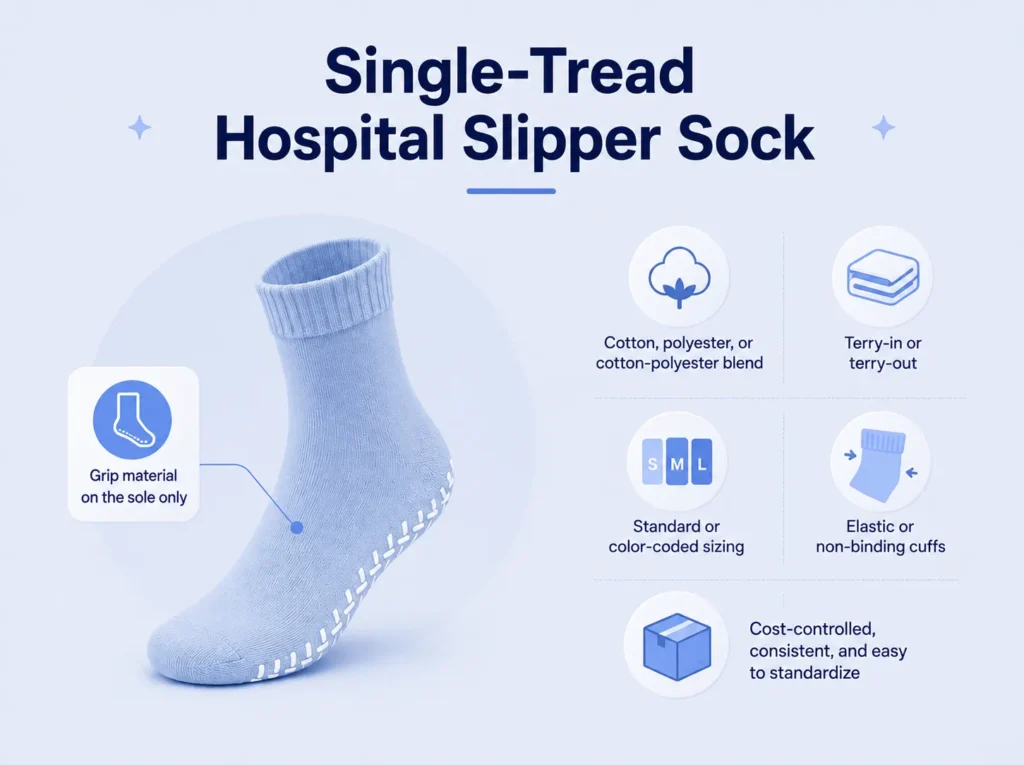
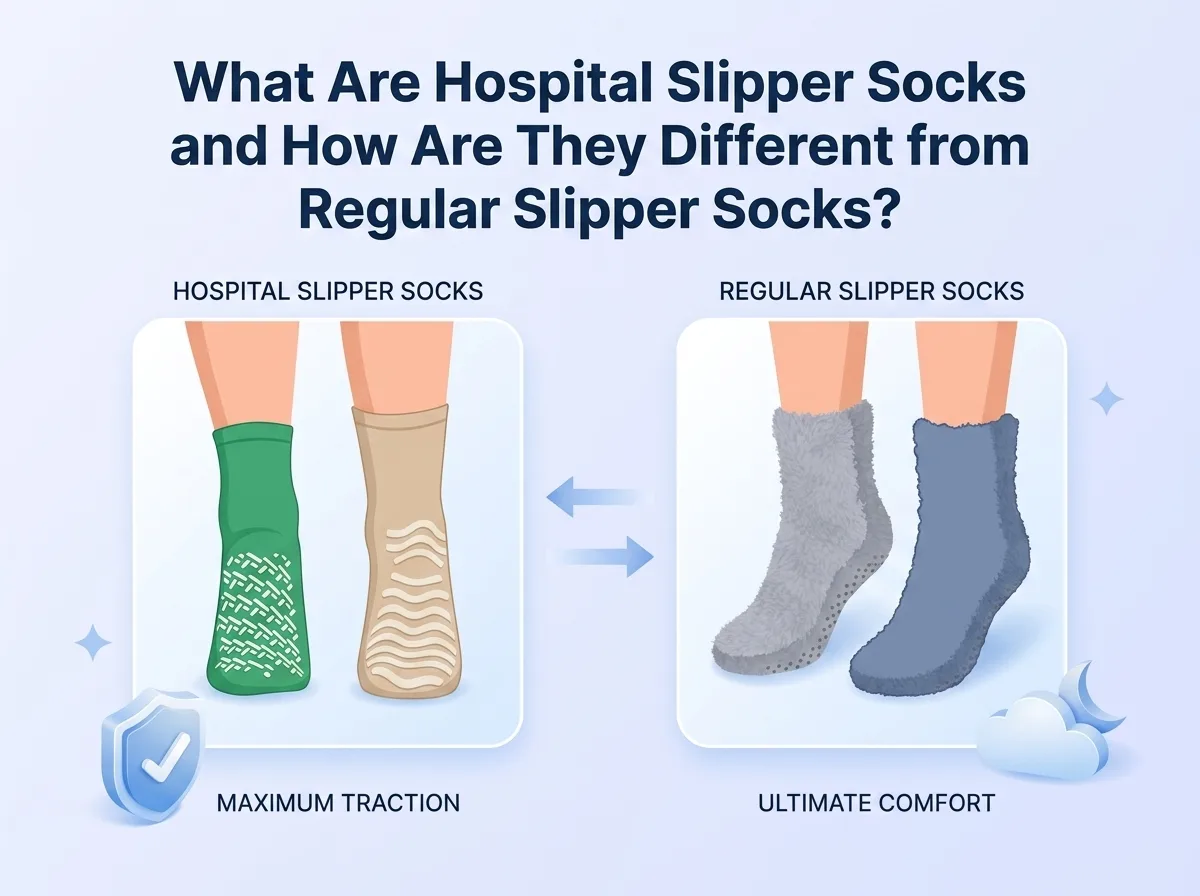
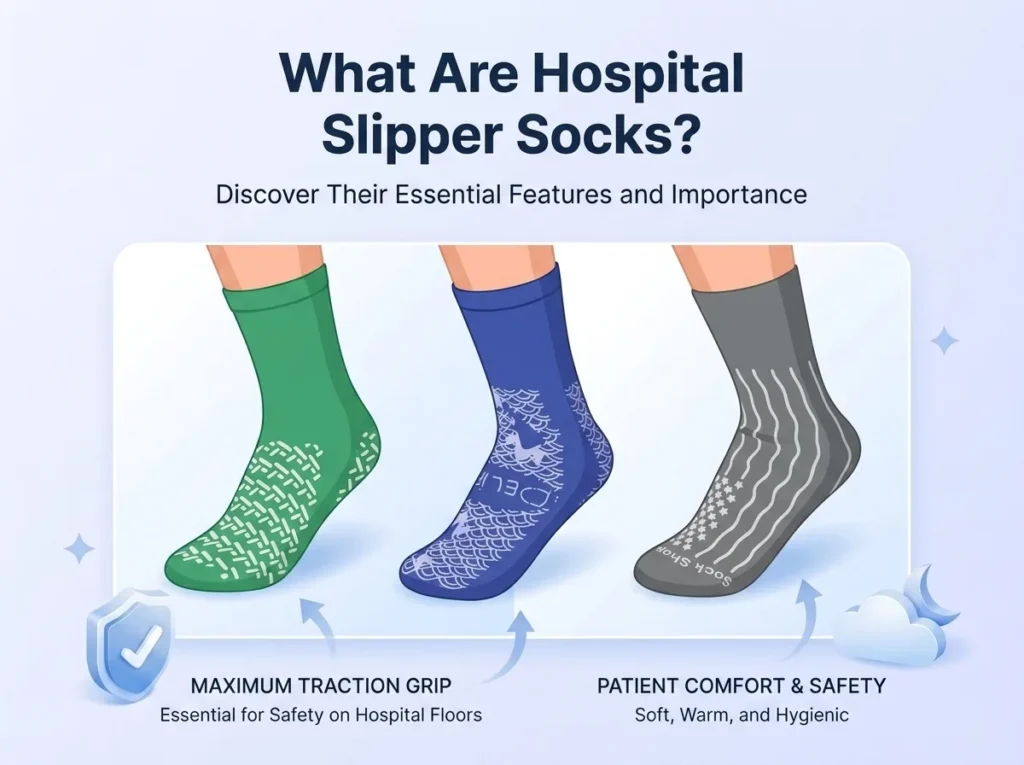
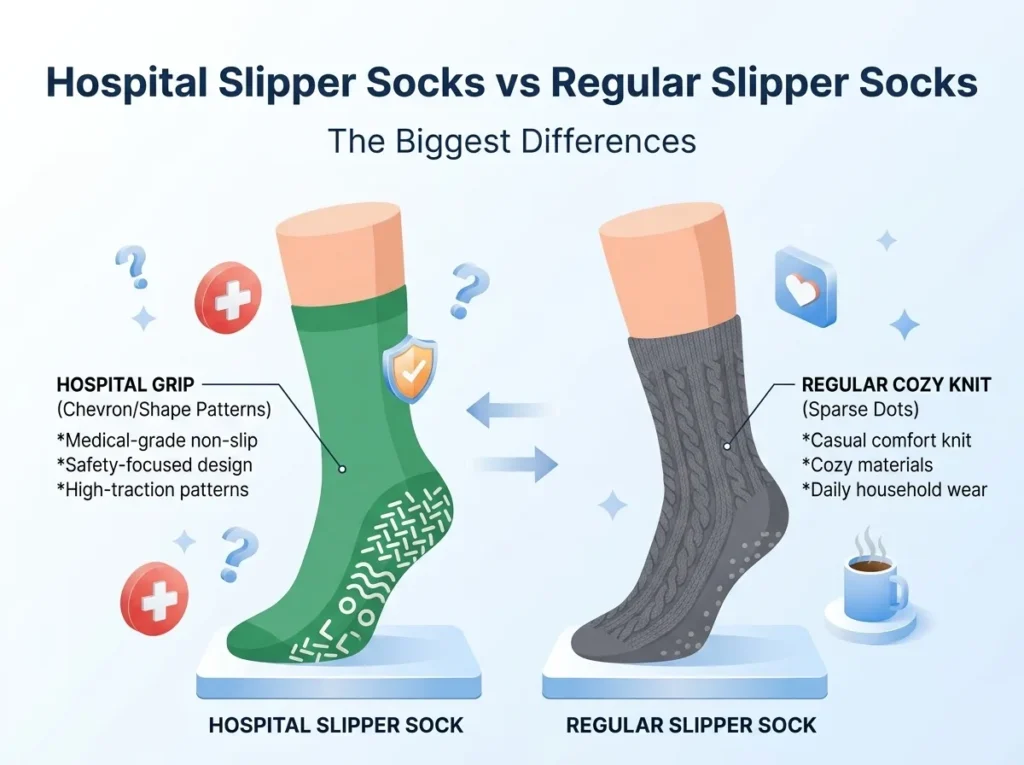
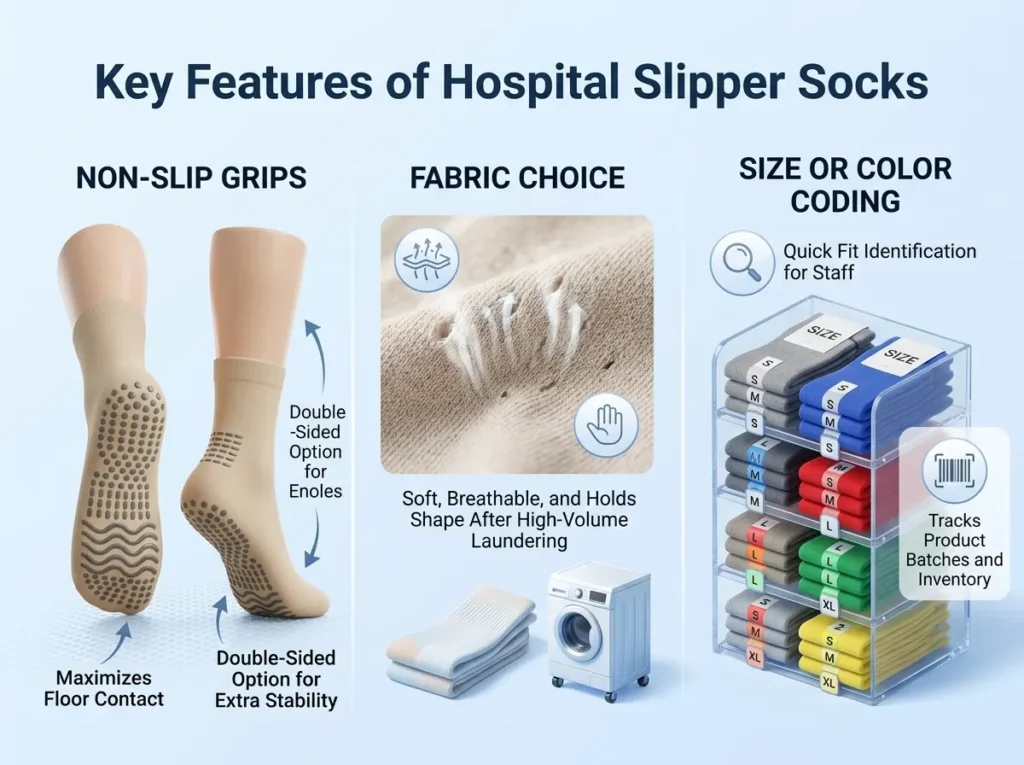
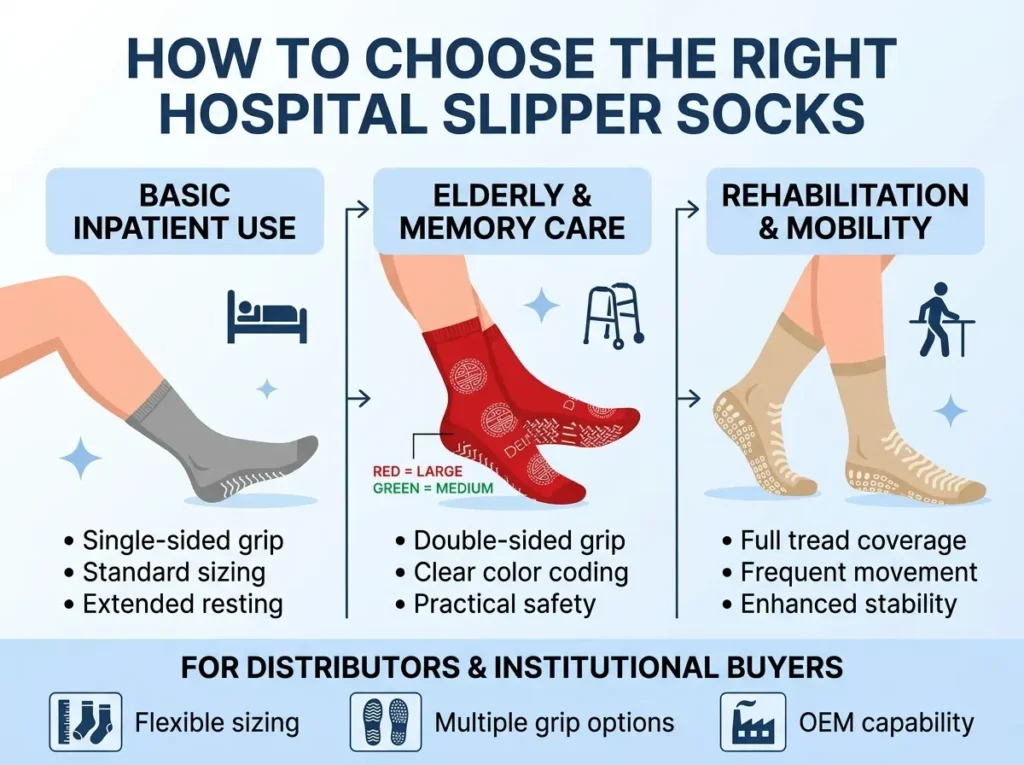
Single-tread hospital slipper socks have grip tread on the sole only. Double-tread styles place grip tread on both the sole and the upper side of the sock. For healthcare buyers, the better option doesn’t come down to which one sounds safer — it comes down to your facility’s intended use, distribution process, sizing system, fabric construction, and procurement specification.
This guide breaks down the real differences between the two designs, when each one tends to make sense for hospitals, care homes, and rehabilitation centers, and — just as importantly — what buyers and distributors should be specifying beyond “single” or “double” tread when placing a bulk or OEM order.
A quick note before we go further: hospital slipper socks are a product feature, not a safety guarantee. They shouldn’t replace proper footwear, facility mobility protocols, or a care team’s own risk assessment. Current research on non-slip socks in hospital settings hasn’t found strong evidence that grip socks alone reduce falls, so this guide focuses on product design and procurement — not clinical outcomes.
Quick Answer: What’s the Difference Between Single-Tread and Double-Tread Hospital Slipper Socks?
Single-tread hospital slipper socks have anti-slip tread applied to the bottom of the sock only.
Double-tread hospital slipper socks have anti-slip tread applied to both the bottom and the top surface of the sock.
Double-tread construction keeps a treaded surface facing the floor even if the sock rotates or turns during wear — but that doesn’t automatically make it the right choice for every facility or budget.
Feature
Single-Tread Slipper Socks
Double-Tread Slipper Socks
Grip placement
Bottom of the sock only
Bottom and top of the sock
Product structure
One-sided PVC or silicone tread
Two-sided PVC or silicone tread
Buyer consideration
Grip coverage, cost efficiency
Grip coverage regardless of orientation
Production consideration
Single tread-printing pass
Two-sided print alignment and consistency
Specification focus
Sole coverage, print adhesion, sizing
Two-sided coverage, alignment, uniformity
Typical order type
Standard bulk institutional supply
Facilities or distributors requiring two-sided grip
Key limitation
Not a substitute for facility safety protocols
Not a substitute for facility safety protocols
What Is a Single-Tread Hospital Slipper Sock?
A single-tread hospital slipper sock has its grip material — usually PVC dots, a silicone print, or a similar non-slip coating — applied only to the sole. The rest of the sock is a standard knit surface.
This is the more common configuration across bulk institutional supply programs, and it’s usually paired with:
Cotton, polyester, or cotton-polyester blend fabric
Terry-in or terry-out construction (more on that below)
Standard or color-coded sizing
Elastic or non-binding cuffs, depending on the intended patient group
Single-tread socks tend to fit facilities that want a straightforward, cost-controlled slipper sock specification with predictable sizing, color coding, and packaging — without needing tread coverage on both sides of the sock.
What Is a Double-Tread Hospital Slipper Sock?
A double-tread hospital slipper sock has grip material on both the sole and the upper surface. The idea is simple: if the sock rotates, bunches, or ends up facing the “wrong” way during wear, there’s still a treaded surface in contact with the floor.
From a manufacturing standpoint, double-tread styles require more than just adding a second print. Buyers should expect (and ask about):
Print alignment between the top and bottom surfaces
Consistent tread density and pattern on both sides
Slightly higher material and production input than single-tread styles
Double-tread is often requested by facilities or distributors that specifically want grip coverage regardless of how the sock is worn. It’s a legitimate specification — but it should be a deliberate choice based on your facility’s use case, not just the “upgraded” option by default.
Single-Tread vs Double-Tread: Which Specification Fits Your Facility?
Rather than thinking in terms of “basic vs. better,” it’s more useful to match the tread design to what your facility or distribution program actually needs.
Procurement Priority
What to Discuss With Your Supplier
Standard bulk slipper sock supply
Single tread, fabric composition, size range, color coding, carton quantity
Agreed wash-test method, tread appearance after laundering
Single-patient-use program
Individual packaging, labeling, disposal guidance
Buyer note: “Single tread” or “double tread” shouldn’t be the entire specification you send to a supplier. A complete spec should also define fabric, terry orientation, tread material, sizing, packaging, and quality-inspection criteria — which we’ll cover next.
Terry-In vs Terry-Out: A Specification Buyers Often Overlook
Most hospital slipper sock suppliers offer both terry-in and terry-out construction, but it’s rarely explained why it matters for a buyer’s specification sheet — and it’s just as relevant whether you’re ordering single-tread or double-tread socks.
Construction
What It Means
Questions to Ask
Terry-in
The terry loop surface faces the inside of the sock
Is inner softness or moisture absorption a priority for your patient population?
Terry-out
The terry loop surface faces the outside
Does your facility have a handling or laundering preference tied to the outer texture?
Plain knit (no terry)
A lighter, simpler knit construction
Does the project prioritize lower bulk or a specific cost target over terry cushioning?
This is a fabric and comfort detail, not a clinical claim — terry-in construction doesn’t prevent pressure injuries or improve circulation, and it shouldn’t be marketed that way. What it does affect is feel, warmth, and moisture handling, which matter for patient comfort and facility-specific preferences.
How to Write a Hospital Slipper Socks Procurement Specification
This is where most buyers lose time — going back and forth with a supplier because the original spec only mentioned “single or double tread” and a size range. Here’s a checklist you can send directly to a manufacturer or use to evaluate a quote:
Hospital Slipper Socks Specification Checklist
Product type: single-tread or double-tread
Fabric composition (e.g., cotton/polyester blend)
Construction: terry-in, terry-out, or plain knit
Tread material: PVC, silicone, or agreed alternative
Tread coverage: sole only / both sides / custom pattern
Sizes: full requested size range
Color coding: by size, department, or custom program
Cuff type: standard elastic, wider cuff, or bariatric fit
Latex requirement: latex-free if needed
Packaging: individual pair, bulk pack, or retail pack
Carton quantity and carton marking
Labeling: SKU, barcode, country of origin, lot number
Sending this level of detail upfront usually shortens the sampling process significantly, because the supplier isn’t guessing at unstated requirements.
Quality Control: What Should Buyers Check Before Bulk Production?
Once a spec is agreed, the next question is how to verify it before committing to a full production run.
Tread-print consistency Check that the grip pattern isn’t misaligned or unevenly applied. For double-tread styles, confirm both surfaces have clear, uniform coverage — and that this consistency holds across different sizes in the same batch.
Adhesion and handling performance After the agreed washing or handling conditions, inspect the tread for cracking, peeling, or visible wear. Avoid claims like “never wears off” — instead, confirm performance against a specific, agreed test method and cycle count.
Sizing and color-coding accuracy Verify sock length, foot length, cuff width, and stretch recovery against your approved sample. If your order includes bariatric sizing, confirm cuff width and wearing space match what was approved — not just the standard size chart.
Packaging and traceability Confirm pair packaging, carton quantity, product codes, batch numbers, and label language match the approved sample exactly. If you’re distributing under your own brand, this is also the point to verify any required documentation, such as material declarations or test reports.
Can Hospitals Use All-Around Tread Slipper Socks?
Some suppliers also offer all-around tread slipper socks, where grip material extends more broadly around the sock rather than being limited to top and bottom surfaces. This is worth knowing about, but it’s a distinct specification — material use, stretch, feel, and cost structure can all differ from standard single- or double-tread designs. If an all-around tread option comes up in your sourcing process, treat it as a separate quote and sample request rather than assuming it’s simply a version of “double tread.”
FAQ
Is double-tread better than single-tread hospital slipper socks? Not automatically. Double-tread provides grip coverage on both sides of the sock, which some facilities specifically want. But the right choice depends on your use case, budget, and how the socks will be distributed and managed — not on which option sounds more advanced.
What’s the difference between terry-in and terry-out slipper socks? Terry-in means the terry loop fabric faces the inside of the sock, against the skin. Terry-out means it faces outward. Either can be combined with single or double tread; the choice affects comfort and feel, not grip performance.
Can hospital slipper socks be customized for distributors? Yes. Buyers can typically discuss custom colors, tread patterns, logos, packaging artwork, barcodes, and carton marking for private-label programs. MOQ and lead time will depend on the specific materials and customization requested.
Can non-slip hospital socks replace proper footwear? No. Grip socks are a product feature, not a substitute for appropriate footwear, facility safety protocols, patient mobility assessments, or care team guidance. Facility footwear recommendations typically weigh fit, sole support, and heel support alongside — not instead of — sock tread design.
Need a Hospital Slipper Socks Specification Review?
Haody Medical supports bulk and OEM hospital slipper sock orders, including single-tread and double-tread designs, custom fabrics, terry constructions, color-coded sizing, packaging, and private-label options. Share your target market, size range, tread configuration, and packaging requirements with our team to discuss samples and production timelines.
Written by the Haody Medical Product Team. This article is for general product and procurement information and does not constitute medical or clinical advice. Facilities should follow their own safety protocols, product instructions, and applicable regulations when selecting patient footwear.
Haody Medical is currently taking part in Medical Fair China 2026, running from August 20 to 22 at the Suzhou International Expo Center. As a manufacturer of medical textiles and healthcare consumables, we are using this year’s show to meet face-to-face with international distributors, importers, healthcare product suppliers and OEM partners, and to talk through the kind of practical, everyday sourcing questions that shape long-term supply relationships.
For a company like ours, exhibitions are less about a big stage and more about direct conversation. Buyers walk up with real questions — about specifications, packaging, lead times, certifications — and those conversations tend to tell us more about the market than any report could. This year’s Medical Fair China is no exception, and our team has been on the floor engaging with visitors throughout the show.
If you’re sourcing medical bandages, compression stockings, hospital socks or stockinette, or exploring an OEM partnership with a Chinese manufacturer, this article covers what we’re showing at MFC 2026 and how to start a conversation with our team.
Why Medical Fair China Matters for Buyers
Medical Fair China is organized by Messe Düsseldorf (Shanghai) and positioned as the only satellite exhibition of MEDICA in China, which gives it a fairly specific role in the exhibition calendar: it’s where international buyers come to look closely at China’s medical consumables and raw materials supply chain, alongside device manufacturing, IVD and smart medical technology.
For sourcing teams and distributors, that focus matters. Rather than browsing a broad general trade show, buyers at MFC are typically there with a purpose — comparing suppliers on consumables and materials, checking documentation, and assessing whether a factory can support both current orders and future product development. For Haody Medical, that’s exactly the kind of audience we want to be talking to.
What We’re Showing on the Floor
Our booth this year is built around the product lines we manufacture day to day, not a curated “showcase-only” selection. Here’s what visitors have been asking about most.
Medical bandages and wound care textiles. We’re showing our range of elastic and tubular bandages, the kind used across basic wound care, fixation and general medical supply channels. Most conversations here have centered on specification consistency — buyers want to know that a bandage ordered in month one matches the one ordered in month six, and that packaging and labeling can be adapted for their own market.
Compression stockings and diabetic socks. This is one of our core categories, and it’s drawn steady interest from pharmacy-channel distributors and healthcare product brands. Questions have ranged from compression classes and sizing ranges to knit construction and private-label packaging options. We’re careful not to oversell these products as treatments — they’re presented as what they are: compression and comfort products for everyday health management, with the technical documentation buyers need to evaluate them properly.
Hospital slipper socks and patient care products. These come up often with buyers connected to hospitals, care homes and rehabilitation centers, where non-slip design, comfort and consistent sizing across large orders matter more than novelty features.
Stockinette and medical textile components. For OEM and component buyers, this category tends to generate the most technical back-and-forth — material choice, width and weight tolerances, and how well we can match an existing supplier’s spec sheet.
Each of these lines connects back to a simple point we keep making at the booth: we’re a manufacturer first, which means the conversation can move from sample to spec sheet to production plan without a middleman in between.
What Buyers Are Asking About
A few themes have come up repeatedly in conversations so far. Buyers want to understand minimum order quantities and how they scale with customization. They’re asking about lead times realistically — not the best-case number, but what typically happens with a first order versus a repeat order. Packaging and labeling flexibility comes up almost every time private label is mentioned. And quality documentation — test reports, certifications, production records — is often the deciding factor in whether a conversation turns into a quote request.
None of this is unusual for a B2B medical consumables show, but it’s a useful reminder that buyers are evaluating suppliers on reliability and communication just as much as on price or product range.
From Booth Conversation to Supply Partnership
For any buyer we’ve spoken with at MFC 2026, the next steps generally follow the same pattern:
Product matching — sharing your target market, application and price range so we can point you to the right specification, rather than a generic catalog listing.
Sample and packaging review — confirming size, material, color and labeling before committing to a production run.
Production and delivery planning — agreeing on MOQ, lead time, quality checks and export packaging for the first and subsequent orders.
If you weren’t able to visit our booth in person, this process works just as well by email or a video call — we’re happy to walk through specifications and samples remotely.
A Manufacturer You Can Talk To Directly
Haody Medical has been producing medical textiles and consumables since our founding, and exhibitions like this one are a chance to put faces and conversations behind what is otherwise a fairly technical product category. We manufacture under an ISO 13485 quality management system, and our team can walk any buyer through certification documents, production capacity and quality-control processes on request.
We’d rather be judged on the specifics — actual specification sheets, actual lead times, actual sample quality — than on general claims, and that’s how we’re approaching every conversation on the floor this week.
Get in Touch
Looking for a reliable medical textile or medical consumables supplier in China? Whether you visited us at Medical Fair China 2026 or are reading this after the show, our team is happy to discuss specifications, OEM requirements, sample requests and order planning.
But used the wrong way, it can do more harm than good.
In this guide, you’ll learn exactly what a transfer board is, when it’s the right tool, how it’s typically used, and — if you’re sourcing for a hospital, care facility, or distribution business — what to check before you order.
Let’s dive in.
Key takeaways
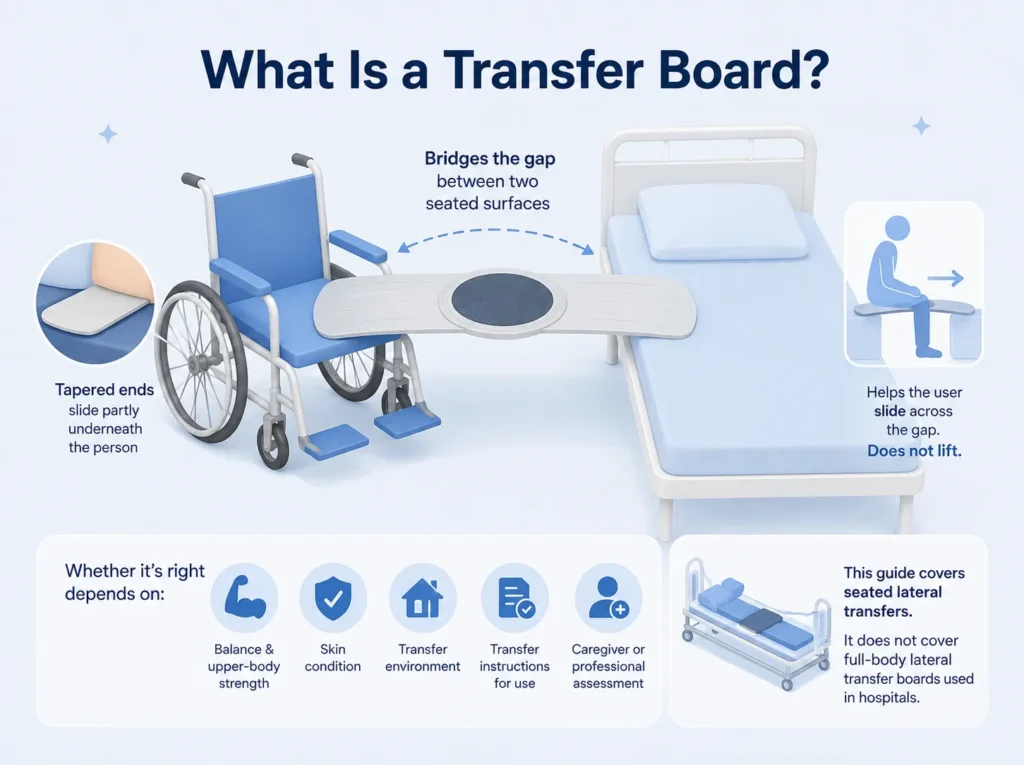
A transfer board bridges a short gap between two seated surfaces, like a wheelchair and a bed.
It supports sliding, not lifting. That distinction matters more than most product pages let on.
If you’re buying for a care facility or as a distributor, rated load, material, and documentation matter more than price per unit.
What Is a Transfer Board?
A transfer board (also called a slide board or sliding board) is a rigid device that bridges the gap between two seated surfaces.
Think wheelchair to bed. Or wheelchair to car seat.
The board is usually flat or gently curved. It’s made from a smooth, rigid material. And it’s tapered at one or both ends, so it can slide partly underneath the person using it.
Here’s the important part: a transfer board helps someone slide across a gap. It doesn’t lift them.
That’s a meaningful distinction — and one that gets glossed over a lot.
Whether a transfer board is the right tool depends on:
The user’s balance and upper-body strength
Their skin condition
The transfer environment
The specific product’s instructions for use
A trained caregiver’s (or healthcare professional’s) assessment
One more thing before we go further.
This guide covers boards used for seated lateral transfers — wheelchair-to-bed, wheelchair-to-chair, wheelchair-to-car, and similar. It doesn’t cover full-body lateral transfer boards used in hospitals to move a patient between a bed and a stretcher or imaging table. That’s a related but different product category, with different design requirements.
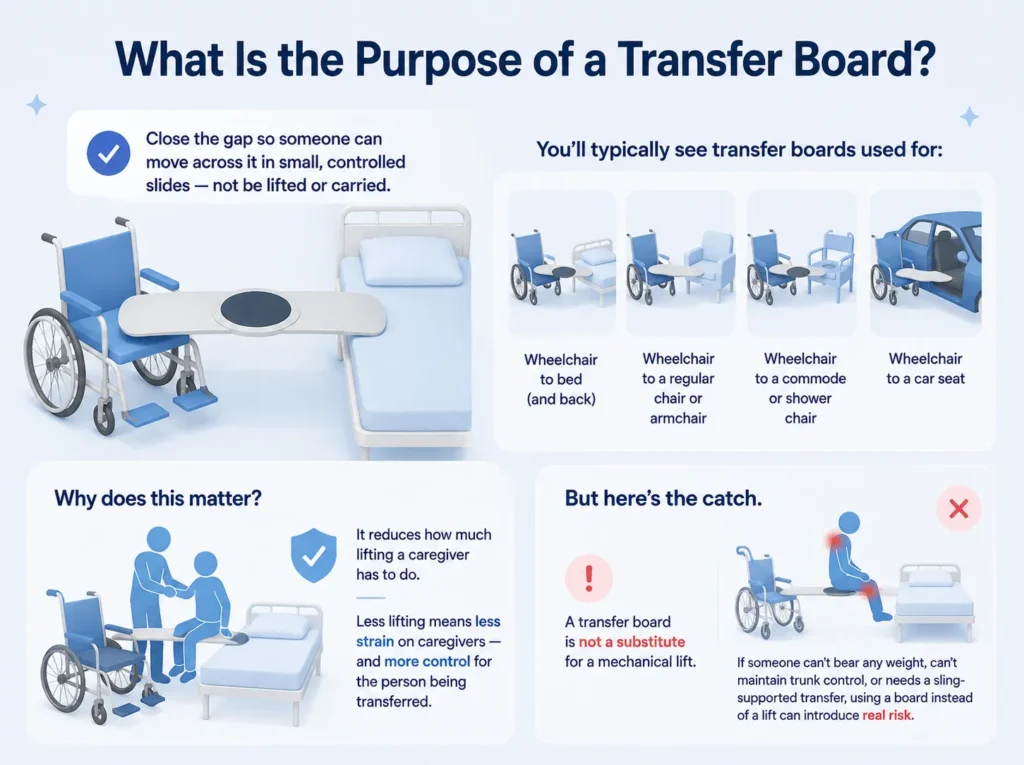
What Is the Purpose of a Transfer Board?
Simple: to close the gap between two seated positions so someone can move across it in small, controlled slides — instead of being lifted or carried.
You’ll typically see transfer boards used for:
Wheelchair to bed (and back)
Wheelchair to a regular chair or armchair
Wheelchair to a commode or shower chair
Wheelchair to a car seat
Here’s how it works in practice. One end of the board rests under the person. The other end rests on the destination surface. That creates a bridge across the gap.
Why does this matter?
Because it reduces how much lifting a caregiver has to do. Less lifting means less physical strain on staff or family caregivers — and more control for the person being transferred.
But here’s the catch.
A transfer board is not a substitute for a mechanical lift. If someone can’t bear any weight, can’t maintain trunk control, or needs a sling-supported transfer, using a board instead of a lift can introduce real risk.
Is a Transfer Board Right for Every Patient?
No. Not even close.
In fact, using a transfer board when it’s not appropriate is one of the more common causes of transfer-related injury.
So how do you know if it’s the right call? Use this as a starting framework — not a clinical assessment.
Consider a transfer board when…
Reassess (or pick another method) when…
The user has some sitting balance and trunk control, or a trained caregiver is helping
The user can’t safely maintain a seated position or can’t cooperate with the transfer
Both surfaces are stable and can be positioned close together
The gap, height difference, or space can’t be safely controlled
The board is in good condition, and its rated load matches the person and situation
The board is cracked, warped, damaged, or its rated load is unknown
The plan follows the product’s instructions for use and the facility’s protocol
Skin condition, medical lines, or clinical status call for professional evaluation first
One more caveat worth repeating: in a care setting, this decision — and how the transfer is carried out — should be made or confirmed by a qualified healthcare professional. A physical therapist, occupational therapist, or trained nurse, for example.
This table is a framework for thinking it through. It’s not a replacement for that judgment.
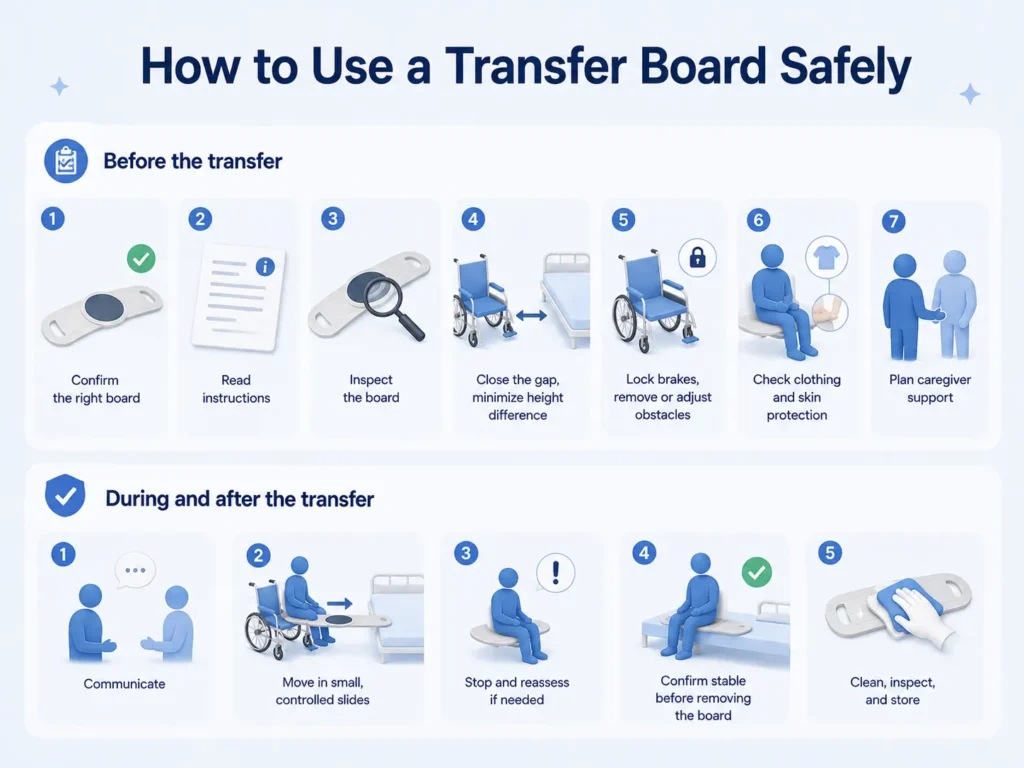
How to Use a Transfer Board Safely
Below is a general preparation checklist. Not a substitute for hands-on training. Not a replacement for your facility’s SOP. And definitely not a replacement for the product’s own instructions for use.
With that said, here’s what typically happens.
Before the transfer:
Confirm the board is designed for this type of seated transfer.
Read the instructions for use. Check the labeled safe working load.
Inspect the board. No cracks, no warping, no sharp edges, no contamination.
Position both surfaces as close together as possible. Minimize the height difference.
Lock the wheelchair brakes. Remove or adjust armrests, footrests, or obstacles if the product allows it.
Check clothing and skin protection at the contact points.
Decide how many caregivers are needed — one, two, or additional equipment.
During and after the transfer:
Communicate each step before moving.
Move in small, controlled slides. Not one big motion.
Stop and reassess if the board shifts, resistance spikes, or the user becomes unsteady.
Confirm the person is stable on the destination surface before removing the board.
Clean, inspect, and store the board per the manufacturer’s instructions.
That’s it. Simple in theory. It just takes practice — and proper training — to do consistently well.
Transfer Board vs. Slide Sheet vs. Gait Belt vs. Patient Lift
Here’s a mistake we see a lot: reaching for whichever patient-handling tool is closest, instead of the one that fits the task.
This table should help.
Equipment
Primary role
Typical scenario
Key purchasing question
Transfer board
Bridges a short gap for seated lateral transfer
Wheelchair-to-bed, wheelchair-to-car
Does it fit the seated transfer, and does the rated load match?
Slide sheet
Reduces friction when repositioning someone on one surface
In-bed repositioning
Is it reusable, washable, and reliable under load?
Gait belt
Gives a caregiver a secure hold during walking or standing
Users who can partially bear weight
Is staff trained, and is it rated for the load?
Mechanical lift
Fully or partially supports body weight via a sling
Users who can’t bear weight or assist
Is the sling compatible? Is there enough space? Is staff trained?
Bottom line: if someone can’t bear weight, can’t maintain trunk control, or the transfer distance exceeds what a board can bridge safely — reach for the lift, not the board.
Types of Transfer Boards (And Where Each One Fits)
Not all transfer boards are built the same. Here’s a breakdown.
Type
Best-fit application
What to check
Straight transfer board
Direct, unobstructed transfers
Length, width, thickness, rated load
Curved transfer board
Routing around a wheelchair armrest or wheel
Curve geometry, contact area, overlap
Board with handholds
When caregivers need a secure grip
Handhold placement, edge finish, strength
Low-friction sliding board
Prioritizing smoother lateral movement
Surface friction, skin safety, wear resistance
Portable/folding board
Home care, travel, vehicle transfers
Weight, folded size, hinge durability
Higher-capacity board
Users needing a higher rated load
Documented rated load, structural verification
Notice the pattern. Straight and curved designs mostly differ in how they navigate obstacles. Handholds, texture, and folding mechanisms are about handling and storage — not the transfer mechanics itself.
The takeaway? Start with the use case. Not the spec sheet.
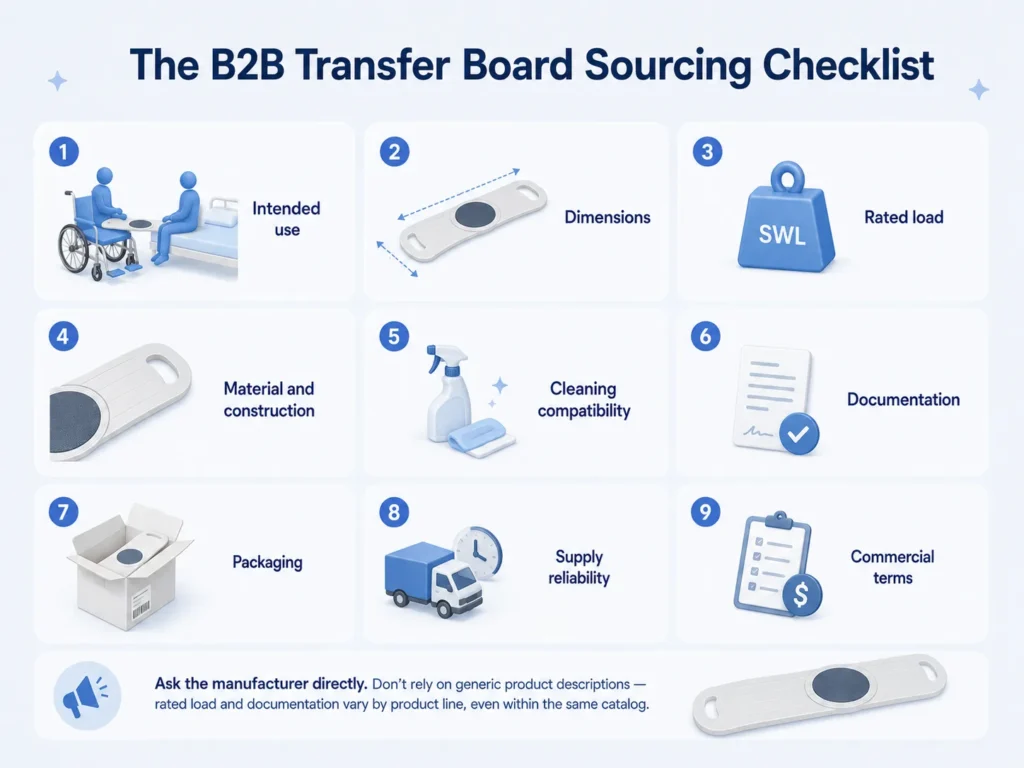
The B2B Transfer Board Sourcing Checklist
If you’re a distributor, a care facility, or a hospital procurement team, price-per-unit is the least useful comparison you can make.
Here’s what actually matters when sourcing:
Intended use. Is it built for seated transfer, or for bed-to-stretcher lateral transfer? These aren’t interchangeable — confirm before you order.
Dimensions. Length, width, thickness, effective transfer span, and storage size if it folds.
Rated load. Ask for the documented safe working load, and the conditions under which it was tested.
Material and construction. Base material, edge finishing, surface texture, handholds or reinforcements.
Cleaning compatibility. Which cleaning agents and disinfection methods the surface tolerates without degrading.
Documentation. Instructions for use, label artwork, batch traceability, and quality-system paperwork relevant to your market.
Packaging. Unit packaging, carton dimensions, barcoding, manual language, OEM or private-label options.
Supply reliability. MOQ, sample lead time, production lead time, and how the supplier handles restocking or quality issues.
Commercial terms. Sample policy, warranty scope, and how quality deviations get handled on repeat orders.
Ask the manufacturer directly. Don’t rely on generic product descriptions — rated load and documentation vary by product line, even within the same catalog.
A Quick Decision Matrix for Healthcare Buyers
Different buyers care about different things. Here’s a shortcut.
Buyer profile
Top priority
Focus your evaluation on
Next step
Home-care distributor
Portability, ease of use
Size, weight, packaging
Confirm packaging and included instructions
Rehabilitation provider
Range of user abilities
Straight vs. curved design, training materials
Test samples against real scenarios
Nursing-home supplier
Frequent use, frequent cleaning
Durability, cleaning compatibility, consistency
Request cleaning/maintenance docs
Hospital procurement
Standardization, risk control
IFU, rated load, traceability
Route through internal transfer-aid review
Medical-device distributor
Sellability, stable supply
OEM options, MOQ, lead time
Submit sourcing requirements for a quote
Sourcing a Transfer Board for Vietnam and Southeast Asia
Disclosure: Delifecare is a Vietnam-focused medical-care product platform within our business network. This section is general sourcing information — not a personalized recommendation.
If you’re sourcing transfer boards for Vietnam or Southeast Asia, three things usually decide the outcome:
Does the product spec actually match your use case?
Is documentation available in the language you need?
Can the supplier keep supply and communication consistent over repeat orders?
Before requesting a quote, have this ready: the intended application, your target user group, expected order volume, and any documentation requirements. It speeds up the entire conversation.
Explore Delifecare’s Transfer Board product page for specifications, or reach out to start a sourcing conversation for the Vietnamese market.
FAQs About Transfer Boards
What is the purpose of a transfer board?
To bridge a short gap between two seated surfaces — like a wheelchair and a bed — so someone can slide across instead of being lifted.
Can you use a transfer board by yourself?
Sometimes. If someone has enough sitting balance and upper-body strength, they may be able to use a board independently after being assessed and trained by a healthcare professional. Others need a caregiver’s help. This should be assessed case by case — never assumed.
How do you use a transfer board safely?
Generally: position both surfaces close together, place the board to bridge the gap, and move across in small, controlled slides while a caregiver assists as needed. Always follow the product’s instructions for use and any facility-specific protocol.
What’s the difference between a transfer board and a slide sheet?
A transfer board is rigid and bridges a gap between two surfaces. A slide sheet is a low-friction fabric used to reposition someone on a single surface — like in bed. It’s not designed to bridge a gap.
Can a transfer board be used for wheelchair-to-car transfers?
Some boards are designed or commonly used for this. But it depends on the height difference between the wheelchair and car seat, available space, and the user’s ability. Check the product-specific guidance first.
How do healthcare buyers choose a transfer board supplier?
They typically compare rated load, material and cleaning compatibility, available documentation, packaging options, and how consistently the supplier delivers quality across repeat orders.
What documents should distributors request from a manufacturer?
At minimum: instructions for use, rated-load documentation, label artwork, and any quality-system or compliance paperwork relevant to your target market.
Medical and safety notice
This guide provides general information about transfer boards and related sourcing considerations. It is not medical advice and does not replace individual assessment, hands-on transfer training, or instructions from a qualified healthcare professional. Always follow the product’s instructions for use and your organization’s transfer protocols.
About Haody Medical
Haody Medical is the international medical-products business of Suzhou Haody Medical Products Co., Ltd., established in 2008. We work with healthcare distributors, care providers and international buyers on medical textile and patient-care product solutions. Our content team creates practical product and sourcing resources to help buyers evaluate intended use, product specifications, documentation and supply requirements before making purchasing decisions.
Learn more about Haody Medical, our manufacturing capabilities and our medical-product portfolio.
Tubular bandage and tubular net bandage are related products, but they are not interchangeable. A tubular bandage is usually a denser or elasticated tube-shaped textile used for coverage, retention, or light support, while a tubular net bandage is an open-mesh elastic retainer mainly used to hold dressings in place.
That’s the short version.
If you are comparing these two products, you are probably trying to solve one of two problems: how to keep a dressing in place, or how to choose the right structure for a specific body area. This guide breaks down the differences, the best use cases, and the buyer considerations that matter before you place an order.
What Is a Tubular Bandage?
A tubular bandage is a seamless, tube-shaped medical textile that can be selected for coverage, protective layering, dressing retention, or light support, depending on its material and construction.
However, “tubular bandage” is a broad category, not one fixed product type. Some options use a denser knit for more complete coverage, while elasticated versions may provide a closer fit. For a detailed guide to tubular bandage uses, sizing, and application, see our [What Is a Tubular Bandage? Uses, Sizing, and Application Guide].
In this article, the key question is simpler: when is a standard tubular bandage the better choice, and when does a tubular net bandage make more sense?
What Is a Tubular Net Bandage?
A tubular net bandage is a tube-shaped bandage with an open mesh structure.
Its main job is to help hold dressings in place. The net construction makes it more breathable and flexible, which is useful when the body area is hard to wrap or when adhesive tape is not the best option.
This is where it differs most from a standard tubular bandage.
A tubular net bandage usually focuses on retention and ventilation, not compression or support. In many cases, that makes it a better fit for dressing fixation on sensitive skin, irregular body areas, or spots that move a lot.
The structure matters here. The open mesh can make the product feel lighter and easier to apply, while still keeping the dressing where it needs to be.
Tubular Bandage vs. Tubular Net Bandage
Here’s the simplest way to think about it:
Comparison Point
Tubular Bandage
Tubular Net Bandage
Structure
Denser or elastic tube-shaped knit
Open mesh or net structure
Main function
Coverage, protection, retention, or light support depending on design
Dressing retention and flexible fixation
Coverage level
More complete coverage
More open coverage
Breathability
Depends on material and knit density
Usually higher because of the mesh design
Support potential
Some designs may offer light support
Usually not positioned as a support product
Best for
Limbs, joints, fingers, toes, areas needing coverage
The key point is simple: one is not better than the other. They solve different problems.
If you need fuller coverage or a more traditional textile feel, tubular bandage is usually the better starting point. If you need breathable dressing retention and easy fixation, tubular net bandage is often the better fit.
When to Choose a Tubular Bandage
Choose a tubular bandage when the job is more than just holding a dressing in place.
It is a good option when you want:
More complete coverage.
A softer or denser textile layer.
Light support from an elasticated design.
A product that can fit a broader range of body areas.
A more traditional bandage feel for a medical textile application.
This is also why tubular bandages are often used on limbs, joints, and smaller body parts where a close, stable fit matters.
For buyers, the real question is not just “Does it fit?” It is “Does the construction match the way the product will be used?”
When to Choose a Tubular Net Bandage
Choose a tubular net bandage when fixation is the main priority.
It makes sense when you need:
Dressing retention without adhesive tape.
Better ventilation around the dressing.
A flexible fit on irregular body areas.
Less friction and easier reapplication.
A product that works well in sensitive or high-movement areas.
This type is especially useful when the dressing needs to stay in place, but you do not want the extra bulk of a denser bandage.
That’s the main advantage.
The net structure gives the product a different feel, different fit, and different use pattern from a standard tubular bandage.
Dressing Type Changes the Choice
This is one of the most overlooked parts of the decision.
Many people choose a bandage first and think about the dressing later. That usually leads to a weaker match.
A better approach is to look at the dressing and the bandage together.
If the dressing needs more complete external coverage, a tubular bandage may make more sense. If the dressing needs a lightweight retainer and you want more airflow, a tubular net bandage may be a better fit.
That matters even more if the dressing will be changed often. In that case, a net structure can reduce the need for repeated tape use and may make the process simpler.
In other words, the right choice often depends as much on the dressing as on the body area.
What Buyers Should Confirm Before Ordering
For bulk sourcing, the product name alone is not enough.
A clear specification should define the function, material, size range, packaging, and sample approval requirements before production begins.
For Tubular Bandages
Buyers should confirm:
Fiber composition.
Flat width and size range.
Stretch and recovery.
Knit density.
Roll length or pre-cut length.
Color and size coding.
Packaging format.
For Tubular Net Bandages
Buyers should confirm:
Mesh opening and density.
Elasticity and recovery.
Retention performance.
Size range by body area.
Applicator compatibility.
Latex-free or other market-specific requirements.
Packaging and labeling.
If you are sourcing for hospitals, pharmacies, retail channels, or private-label programs, the details matter. A product that works in one channel may not be right for another.
Sample Approval and Batch Consistency
This step is easy to skip, and that is usually a mistake.
Before bulk production, a sample should be checked for material feel, sizing, stretch, construction, packaging, and labeling. For a tubular net bandage, the mesh uniformity and the way the product behaves under stretch matter as well.
That sample approval step helps reduce surprises later.
It also helps you lock in the exact version you want before the order scales up. For B2B buyers, that can save time, reduce complaints, and avoid rework.
A simple written spec sheet is often enough to make the approval process much cleaner.
Common Fit Problems
When a tubular bandage or tubular net bandage does not work well, the problem is usually fit, construction, or application method.
Common issue
Likely cause
What to check
Edge rolling
Size, cut length, or stretch is unsuitable
Recheck circumference, length, and application method
Wrinkles or bunching
The material was not smoothed during application
Reapply with the fabric lying flat
Slipping
The construction does not match the retention need
Review elasticity, texture, and product type
Excessive tightness
The size is too small or overstretched
Stop use and follow the product instructions
The product should feel secure, not restrictive.
If it does not sit smoothly, the issue is often not the user — it is the product choice.
Related Products
Tubular bandages and tubular net bandages usually sit inside a broader medical textile range.
For B2B buyers, these products are often part of the same sourcing conversation.
Frequently Asked Questions
Is tubular net bandage the same as tubular bandage?
No. They are related, but not interchangeable. A tubular bandage is generally denser or more versatile in function, while a tubular net bandage is mainly used for flexible dressing retention and ventilation.
Which one is better for dressing retention?
It depends on the body area, dressing type, and coverage need. Tubular net bandage is often preferred where an open mesh structure and flexible fixation are more useful.
What should buyers confirm before ordering?
Buyers should confirm the intended function, size range, material structure, packaging, labeling, and sample approval requirements.
Final Thoughts
Tubular bandage and tubular net bandage both have a place in medical textile sourcing. The right choice depends on the required function, body area, dressing type, material construction, and packaging format. For B2B buyers, the most reliable approach is to define the intended use first, confirm the technical specification, and approve a sample before bulk production.
Suzhou Haody Medical Products Co., Ltd. is an ISO 13485-certified medical textile manufacturer established in 2008. We supply tubular bandages, tubular net bandages, finger bandages, stockinette, and other medical textile products for distributors, healthcare suppliers, and private-label programs. Looking for custom materials, size ranges, roll lengths, or private-label packaging?
Contact Haody Medical to discuss your specifications, sample requirements, and bulk-order needs.
Written by: SEO Specialist at Suzhou Haody Medical Products Co., Ltd. Product accuracy reviewed by: Haody Medical Product Team
Disclaimer: This article provides general product and educational information only. It is not medical advice and does not replace guidance from a qualified healthcare professional. Product selection and use should follow the manufacturer’s instructions, applicable regulations, and professional guidance where needed.
Search “tubular bandage,” and you’ll get a wall of products that all look the same.
Same shape. Same name. Completely different jobs.
Here’s the problem: the name only tells you the shape. It doesn’t tell you what the bandage is actually built to do.
A tubular bandage is a seamless, tube-shaped medical textile used for dressing retention, protective coverage, or light support — and which one it does depends entirely on the material and construction, not the label. In fact, elastic tubular bandages are classified by the FDA as Class I medical devices intended to “support and compress a part of the patient’s body,” which underscores why construction and intended use — not the generic name — determine the correct product.
In this guide, you’ll learn:
What a tubular bandage actually is (and why the name is misleading)
The 3 functions it’s used for — and why they’re not interchangeable
How to size it correctly (most guides skip the part that matters most)
The right way to apply it, step by step
What to specify before placing a bulk order
Let’s get into it.
What Is a Tubular Bandage, Exactly?
A tubular bandage is a seamless, knitted fabric tube. You pull it over a body part instead of wrapping it around like a roll bandage.
That single design difference is the whole appeal. No unwinding. No repositioning halfway through. No uneven tension. You measure, cut, pull it on like a sleeve, and you’re done.
But here’s where the confusion starts: construction varies wildly between products, even when they’re sold under the exact same name.
Four things determine what a tubular bandage actually does:
Fiber composition — cotton, viscose, polyester, or blends, each affecting softness, breathability, and durability
Knit structure — dense knit for coverage, or open mesh for airflow and flexible retention
Elasticity — some are built with elastic yarn for stretch and recovery, others aren’t
Supply format — continuous rolls cut to length, or pre-cut pieces
The takeaway: function follows construction, not the name on the box. Two products both labeled “tubular bandage” can solve completely different problems.
What Are Tubular Bandages Used For?
Most tubular bandages fall into one of three buckets:
1. Dressing retention
This is the most common use case. The bandage holds a primary dressing in place — especially on limbs and joints, where tape loosens fast with movement.
Retention products are lighter and less elastic than support bandages. Their job isn’t to compress anything. It’s to stay put.
2. Protective coverage
Some tubular bandages exist purely as a soft outer layer — over sensitive skin, over an existing dressing, or anywhere friction is a concern. Softness and comfort matter more than stretch here.
3. Light support (gentle compression)
Elasticated versions provide even, gentle support around a limb or joint. Compression products in this category are commonly graded by pressure level — typically low (around 5–10 mmHg), medium (10–20 mmHg), or high (20–30 mmHg) — with the appropriate level depending on the clinical need and the manufacturer’s guidance. Never assume the compression level based on the product category name alone; always confirm against the specific product’s rated pressure range.
Bottom line: figure out which of these three jobs you need done before you compare a single product. A retention bandage used as a support bandage will underperform every time — and vice versa.
Tubular Bandage Types: Don’t Choose by Name Alone
Here’s something most buying guides skip entirely: “tubular bandage” describes a shape, not a performance standard.
Two products can sit in the same catalog category and look nearly identical on a spec sheet — and behave completely differently once applied.
Dressing-retention tubular bandages Lightweight, soft, low-tension. Built for comfort and stability, not compression. Use one as a support bandage, and it’ll just slip.
Elasticated tubular support bandages Elastic yarn gives these stretch and recovery, for a more even fit. Whether a specific product works single-layer or double-layer — and how much support it actually delivers — comes from the manufacturer’s instructions, not a general rule.
Tubular net bandages Open mesh instead of dense knit. Prioritizes breathability and flexible fixation over coverage. Solves a different problem entirely — mainly securing dressings where dense fabric would be impractical. (Full comparison in our tubular bandage vs. tubular net bandage guide.)
Know which of these three you’re actually looking at before you compare prices or MOQs. Otherwise you’ll end up with a product that matches the search term but not the job.
How to Choose the Right Tubular Bandage Size
Sizing isn’t “small, medium, large.” It’s matching two measurements — width and length — to the body area and function.
Step 1: Measure circumference first
Measure the actual body area — finger, wrist, forearm, ankle, calf, knee, or upper arm. If it spans a joint or changes circumference along its length, check the product’s own guidance instead of assuming one measurement covers it all.
Step 2: Don’t stop at width — check finished length too
This is where most sizing guides fall short. The flat width matters, but so does the finished length once it’s cut and applied. Right width, wrong length, and you’ll end up too tight, too loose, or bunched at the ends.
Step 3: Match fit to function
Retention: secure, no added pressure
Support: enough stretch for even tension, without cutting off circulation
Protective coverage: comfortable, no excessive tightness anywhere
Too small creates pressure points. Too large rolls, slips, or bunches (more on that below).
What to confirm before you buy:
Body area and measured circumference → determines sizing range
Bandage type (retention, protection, support) → same width fits differently by type
Flat width and finished length → both affect final fit
Stretch and recovery → affects consistency over time
Single- or double-layer method → changes required cut length
Product-specific size chart → not standardized across brands
That last point is worth repeating: size charts aren’t universal. Sizing ranges vary meaningfully between manufacturers — for example, one widely used sizing reference maps “Size C” to roughly 15–25 cm circumference, while another brand’s compression-based chart uses a different range entirely for a similarly labeled size. Always size against that specific product’s chart — never a generic reference or a competitor’s chart.
How to Apply a Tubular Bandage
Once you’ve got the right product and size, application is simple. A few small steps separate a clean fit from a bandage that rolls within the hour.
Confirm product type and size. Retention, protection, or support — double-check before you cut anything.
Cut to the required length. Rolled products need cutting to spec. Single-layer vs. double-layer use changes the required length, so check the manufacturer’s guidance rather than eyeballing it.
Apply without overstretching. Pull or roll it into place gently — think sleeve or sock. Overstretching during application is one of the most common reasons a bandage ends up too tight or prone to rolling later.
Check the fit. No folds, wrinkles, or visible tension lines. If it’s part of a clinical care plan, follow product instructions and any guidance from a qualified healthcare professional.
Tubular Finger Bandages: A Different Sizing Game
Small body areas — fingers and toes — play by different rules.
Less surface area plus constant joint movement means tighter fit tolerance. A size that’s slightly off is far more noticeable on a finger than on a forearm.
Some finger bandages use an applicator for faster, more consistent placement — useful in settings where the same product gets applied repeatedly throughout the day. Whether you need one depends on the product and the workflow, not a universal rule.
If you’re sourcing finger bandages: confirm the supported size range and applicator compatibility before finalizing the spec.
Why Tubular Bandages Roll, Bunch, or Slip
These complaints come up constantly — and the cause is almost always identifiable.
Issue
Likely cause
Quick fix
Edge rolling
Size, cut length, or stretch doesn’t match the application
Recheck circumference and product size
Wrinkles/bunching
Fabric wasn’t smoothed during application
Remove, reapply, smooth flat before securing
Slipping
Construction doesn’t match the retention need
Review elasticity — you may need a different product type
Excessive tightness
Size too small, or overstretched during application
Stop use, check against the size chart
Pro tip: if the issue persists after resizing and reapplying, the product category itself is probably wrong for the job — for example, using a retention bandage where you actually need a support product.
What Buyers Should Specify Before Ordering
For distributors and private-label buyers: “tubular bandage” isn’t a spec. It’s a starting point.
1. Define the function first
Dressing retention, protective coverage, light support, or some combination — decide this before you compare a single supplier. Everything else follows from it.
2. Lock in the technical specs
Fiber composition and blend ratio
Flat width and size range
Finished length / roll length
Stretch percentage and recovery behavior (and rated compression level in mmHg, if applicable)
Knit density or mesh structure
Color options and size-coding system
Market-specific requirements
“Similar to what we ordered last time” is not a spec. It produces inconsistent results across production runs.
3. Nail down packaging and distribution
Roll format vs. individually packed vs. retail-ready
Label language, barcoding, instruction inserts
Outer carton markings for warehousing
MOQ, sample lead time, approval sample requirements
4. Approve the sample against the full spec
Before bulk production, check the sample for:
Material feel vs. agreed fiber composition
Actual sizing vs. the stated size chart
Stretch and recovery performance
Knit or mesh construction
Packaging and labeling accuracy
Skip this step, and you’re the one dealing with sizing complaints after the product’s already shipped. For OEM orders especially, put approval criteria in writing — a signed spec sheet or reference sample — so every future run has a fixed standard.
Having produced tubular bandages for wound-care distributors across multiple international markets since 2008, we’ve found that the most consistent production runs are the ones where the buyer approves a signed spec sheet before the first bulk shipment — not after a resizing complaint.
Related Medical Textile Products
A tubular bandage rarely gets sourced alone. It usually shows up alongside:
Net tubular bandage — breathable dressing fixation where dense coverage isn’t the priority
Finger bandage — sized for small, high-movement areas
Cotton stockinette — padding and general medical textile applications
Cellulose acetate medical fabric — non-adherent, permeable wound-contact material
FAQ
What is a tubular bandage used for? Dressing retention, protective coverage, light support, or layering — depending on the product’s material and construction. Not every tubular bandage is built for the same job.
What size tubular bandage do I need? Measure the body area’s circumference and match it against the manufacturer’s own size chart. Sizing systems vary by supplier, so don’t rely on another brand’s chart.
Can a tubular bandage be worn overnight? Depends on the specific product and application. Follow the manufacturer’s instructions, and consult a qualified healthcare professional when medical guidance is needed.
Final Thoughts
A tubular bandage isn’t one standard product. It’s a shape applied to at least three different jobs: holding a dressing in place, protecting skin, or providing light support.
Match the construction to the job, get the sizing right, and application takes care of itself.
For bulk buyers: a clear spec and an approved sample upfront save you from the sizing and consistency headaches that only surface after the order’s already shipped.
Looking for tubular bandages in custom sizes, materials, or private-label packaging? Contact Haody Medical to discuss your product specifications, sample requirements, and bulk-order needs.
Written by the Haody Medical Product Team | Medically reviewed for accuracy. Haody Medical is an ISO 13485-certified medical textile manufacturer producing medical products since 2008, supplying medical textile products to distributors across multiple international markets.
This article provides general product and educational information only. It is not medical advice. Product selection and use should follow the manufacturer’s instructions and applicable professional guidance.
If you’ve ever compared a pair of hospital slipper socks with the fuzzy slippers you wear at home, you’ve probably noticed they don’t feel the same — and they’re not supposed to. Hospital slipper socks are non-slip socks designed for patient use in healthcare settings, while regular slipper socks are mainly made for warmth and casual comfort at home.
This article breaks down what hospital slipper socks actually are, how they differ from regular slipper socks, and what buyers should look for when sourcing them for hospitals, care facilities, or distribution. Whether you’re comparing products for a facility or evaluating suppliers for bulk purchasing, understanding these differences matters more than it might seem at first glance.
What Are Hospital Slipper Socks?
Hospital slipper socks are a type of non-slip footwear given to patients in hospitals, nursing homes, and rehabilitation centers. Unlike regular socks, they’re built with grip elements on the sole — usually rubberized dots or strips — to help reduce slipping on smooth indoor flooring like tile, vinyl, or polished concrete.
They’re typically issued to patients moving between a bed, bathroom, or hallway, especially during short-term stays where wearing personal footwear isn’t practical. That’s a very different use case from a pair of slippers you’d wear around the house on a Sunday morning.
The design priorities also reflect this. Hospital slipper socks focus on functional grip, easy sizing, and consistent quality across large quantities, rather than on style or seasonal comfort trends.
Hospital Slipper Socks vs Regular Slipper Socks: The Biggest Differences
At a glance, both products might look similar — soft socks with some kind of grip on the bottom. But once you look closer, the differences show up in almost every part of the design.
Intended use. Regular slipper socks are made for personal, everyday comfort at home. Hospital slipper socks are made for institutional use, where consistency, hygiene, and safety take priority over style.
Grip design. Home slipper socks often have decorative or partial grip patterns. Hospital slipper socks are engineered with more consistent tread coverage, since they need to perform reliably on hospital flooring, not just carpet.
Material focus. Regular slipper socks are often built around softness and warmth first. Hospital slipper socks balance comfort with durability, since they may be worn for extended periods and need to hold up under frequent laundering in institutional settings.
Fit and sizing. Home products usually follow standard retail sizing. Hospital slipper socks are typically designed with a simpler, broader sizing system so staff can quickly match sizes across large patient populations.
Distribution context. Regular slipper socks are sold individually through retail channels. Hospital slipper socks are usually sourced in bulk by hospitals, care facilities, or distributors, which changes how they’re packaged, labeled, and supplied.
Key Features of Hospital Slipper Socks
A few features consistently show up across hospital slipper sock products, and they’re worth understanding if you’re evaluating options.
Non-slip grips are the most obvious one — usually placed on the sole in a pattern designed to maximize contact with the floor. Some designs use single-sided grips (bottom only), while others use double-sided grips for extra stability during transfers or short walks.
Fabric choice also matters. Most hospital slipper socks use a soft, breathable knit that’s comfortable for extended wear but still holds its shape after repeated washing — a practical requirement in any facility doing high-volume laundering.
Many products also use visible sizing or color coding, which helps staff quickly identify the right fit or track specific product batches, especially in facilities that manage large inventories.
Where Hospital Slipper Socks Are Commonly Used
Hospital slipper socks show up most often in general hospital wards, where patients need basic mobility support between their bed and nearby areas. They’re also widely used in nursing homes and elderly care facilities, where fall prevention and ease of movement are ongoing concerns.
Rehabilitation centers and post-surgery recovery units use them too, often for patients who are regaining mobility and need reliable footwear during physical therapy sessions or short walks. Each of these settings has slightly different priorities — a rehab center may care more about grip during active movement, while a long-term care facility may focus more on comfort for extended daily wear.
Are Hospital Slipper Socks the Same as Grip Socks or Non-Slip Socks?
Not exactly, and this is where a lot of confusion comes from. The terms overlap in general use, but they’re not always describing the exact same product.
“Grip socks” is often a broader consumer term used for anything from yoga socks to home safety socks. “Non-slip socks” is a similarly generic label that can apply to both retail and medical products. “Hospital slipper socks” specifically refers to the version designed and supplied for healthcare environments — meaning it’s built for institutional use, bulk supply, and consistent quality across large orders, not just individual retail sales.
For buyers, this distinction matters because product naming affects sourcing. A supplier that only sells consumer-grade “grip socks” may not have the manufacturing consistency or bulk capacity that a hospital or distributor actually needs.
What Double-Sided Grip and Tread Coverage Really Mean
This is one detail that often gets mentioned but rarely explained clearly. Single-sided grip means the non-slip pattern only covers the bottom of the foot — the most basic and common design. Double-sided grip adds tread to both the sole and sometimes the sides, offering more stability during transfers, turns, or short unsteady movements.
Tread coverage also varies. Some products use a partial pattern focused on the heel and forefoot, while others use full coverage across the entire sole. Full coverage generally provides more consistent contact with the floor, which can matter more in higher-mobility settings like rehab units compared to a general ward where patients are mostly resting in bed.
For buyers, this isn’t just a technical detail — it’s a practical decision point. Facilities with more patient movement may prioritize full tread coverage, while general wards may find single-sided grip sufficient for basic safety needs.
Why Size Coding, Color Coding, and Packaging Matter in Healthcare Use
In a retail setting, packaging is mostly about branding. In a healthcare setting, it’s about logistics. Hospitals and care facilities often manage hundreds of pairs at once, which makes size coding and color coding genuinely useful — not just a nice-to-have feature.
Color-coded sizing allows staff to quickly identify the right pair without checking a label every time, which matters in fast-paced ward environments. Bulk packaging formats — such as pre-counted case packs or individually sealed pairs — also affect how easily a facility can restock, track inventory, and maintain hygiene standards between uses.
For distributors and institutional buyers, these details often influence purchasing decisions as much as the product itself, since they directly affect day-to-day handling and supply consistency.
What B2B Buyers Should Check Before Sourcing Hospital Slipper Socks
If you’re sourcing hospital slipper socks for a facility, distribution channel, or private label program, a few factors are worth checking beyond basic comfort and price.
Material composition affects both comfort and durability, especially under frequent washing. Grip pattern options — single-sided versus double-sided, partial versus full tread — should match your intended use case. Size range matters too, particularly if you’re supplying a facility with a wide patient population.
For buyers considering private label or OEM production, it’s also worth confirming a supplier’s capacity for custom colors, branding, or packaging formats, along with their ability to maintain consistent quality across large production runs. These are the kinds of details that don’t always show up in a basic product listing but make a real difference in long-term sourcing relationships.
How to Choose the Right Hospital Slipper Socks for Different Applications
For basic inpatient use, single-sided grip with standard sizing is usually sufficient, since most patients are resting for extended periods. For elderly care or memory care settings, double-sided grip and clear color coding can add an extra layer of practical safety and ease of use for staff.
Rehabilitation or higher-mobility settings often benefit from full tread coverage, given the more frequent movement involved. For distributors or institutional buyers managing multiple facility types, working with a supplier that offers flexible sizing, grip options, and OEM capability makes it easier to serve different customer needs without switching vendors for every product variation.
Final Thoughts
Hospital slipper socks and regular slipper socks might look similar at first, but they’re built for very different purposes. One is designed around home comfort, while the other is engineered for safety, consistency, and institutional use.
If you’re evaluating hospital slipper socks for a facility, distribution program, or private label line, understanding these design and sourcing details can help you make a more informed decision — and avoid the kinds of ambiguities that often surface only after a bulk order is already placed. For buyers exploring specifications, samples, or OEM options, working directly with a manufacturer familiar with these details is usually the most efficient starting point.
About the Author
This article was written by the content team at Haody Medical, a manufacturer specializing in medical textiles and healthcare support products. Founded in 2008 in Suzhou, China, Haody Medical operates under an ISO 13485 quality management system and produces over 2,000 tons of cotton and polyester medical products annually, including hospital slipper socks, diabetic socks, compression stockings, and related healthcare textiles for global distributors and institutional buyers.
Disclaimer
This article is intended for general product and sourcing information only. It does not constitute medical advice. Facilities and buyers should evaluate product suitability based on their own safety protocols, patient needs, and applicable healthcare regulations.